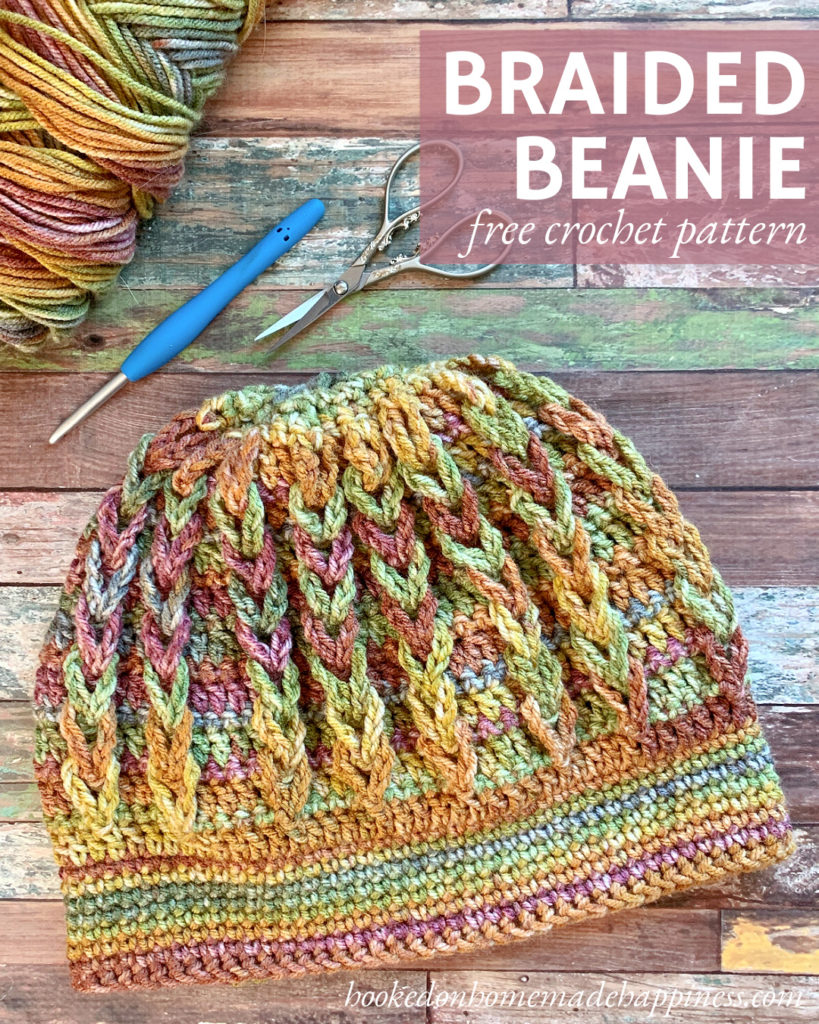
Braided Beanie Crochet Pattern
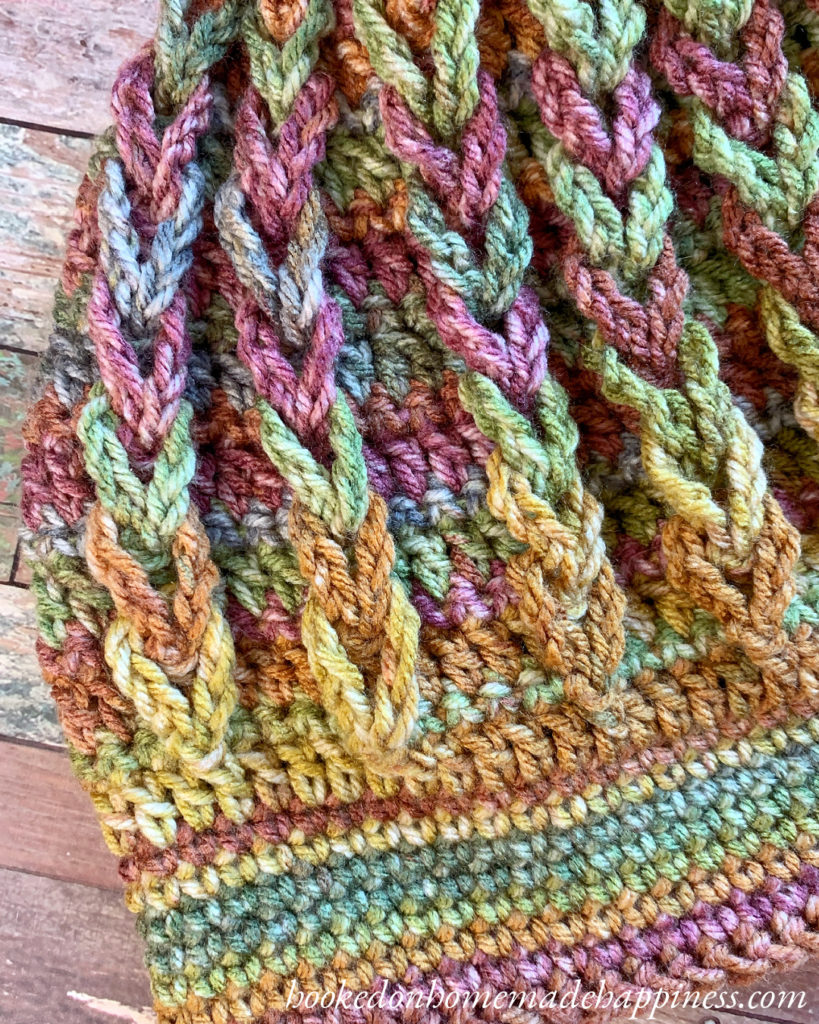
The Braided Beanie Crochet Pattern uses a fun stitch called the Jacob’s Ladder Stitch. It has a faux cable look that is so easy to create!
This hat is the 2nd pattern in the Crochet Along for a Cause. We are making 1 hat per week to donate to a cancer center, school, or homeless shelter for 12 weeks. There’s always time to join! You can find all the details and hat patterns HERE.
More Homemade Happiness:


Double Brim Cable Beanie // Burst Beanie // Wayward Beanie
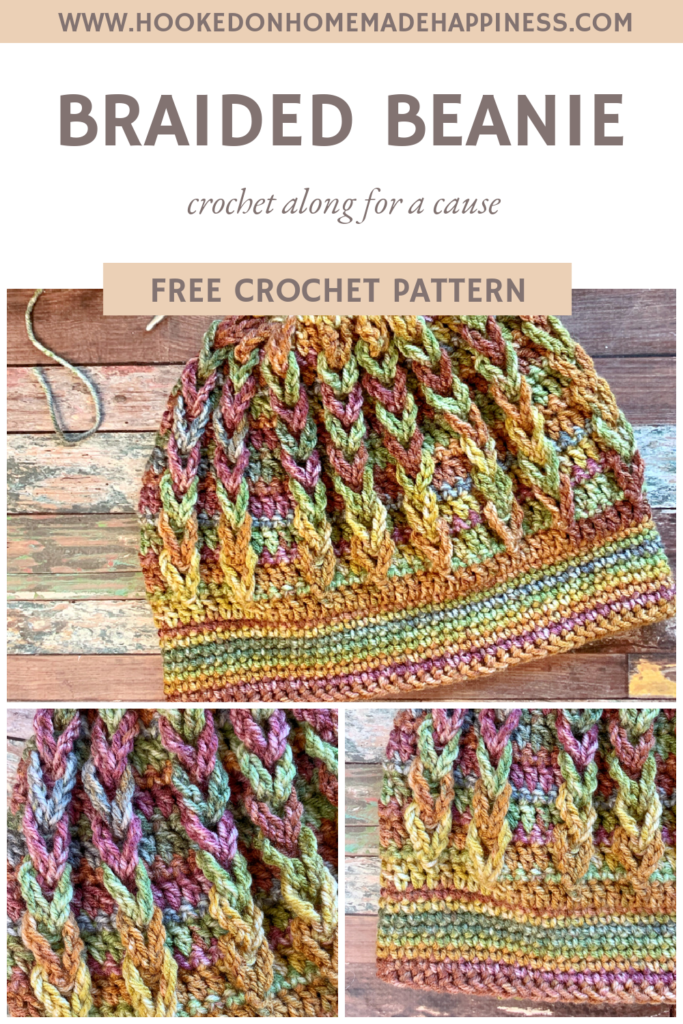
click here to pin for later >>>
Braided Beanie Crochet Pattern
Get the full pattern below or purchase the ad-free, printable PDF in my Etsy Shop or Ravelry Shop
PIN for later HERE
Add to your Ravelry Queue HERE
Materials
140g/252yds worsted weight yarn (I used I Love this Yarn in Cinnamon Cedar)
H/5.0 mm hook
yarn needle
scissors
Level
intermediate
Pattern notes & Stitches to Know
fsc – foundation single crochet (video tutorial linked in pattern)
sl st – slip stitch
ch – chain
sc – single crochet
dc – double crochet
dc2tog – double crochet 2 together
sc2tog – single crochet 2 together
· Written in US terms
· ch 1 does not count as sc
· ch 2 does not count as dc
· This beanie is made from the bottom up beginning with joined rounds, then in turned joined rounds.
· To change the pattern size, go up or down a hook size. You can also add or take out fsc in row 1 (must be a mult of 5)
Approx Finished size (large adult) – 22” x 9”
BRAIDED BEANIE CROCHET PATTERN
ch 2
Row 1: starting in 2nd ch from the hook, fsc 80, join to first sc with sl st (80 sc)
If not doing fsc, ch 81, sc in 2nd ch from the hook and across
To change the size, reduce the number of stitches in row 1 by 5’s. Row 1 must be a mult of 5.
>FOUNDATION SINGLE CROCHET VIDEO TUTORIAL<
Continue working in joined rounds
Round 2 – 8: ch 1, sc in each stitch around, join to first sc with sl st (80 sc)
The Jacob’s Ladder stitch is used to create the “braided” look
>JACOB’S LADDER STITCH VIDEO TUTORIAL<
Round 9: ch 2, dc in 3, *ch 10, sl st to last dc made, dc in next 5* repeat from * to * around to last 2 stitches, dc in last 2, join to first dc with sl st (80 dc)
The remainder of the beanie is made with joined turned rounds
Round 10: ch 1, turn, sc in each stitch around, making sure the ch 10 loops are facing the outside of the beanie, join to first sc with sl st (80 sc)
Round 11 – 14: repeat rounds 9 & 10, turning each round
Decreases will begin in the next round
Round 15: ch 2, turn, dc in 3 stitches, ch 10, sl st to last dc made, dc in next, dc2tog, dc in next 2 stitches, ch 10, sl st to last dc made, *dc in next 5 stitches, ch 10, sl st to last dc made, dc in next, dc2tog, dc in next 2, ch 10, sl st to last dc made* repeat from * to * around to last 2 stitches, dc in last 2, join to first dc with sl st (72 dc)
Round 16: ch 1, turn, sc in each stitch around, making sure the ch-10 loops are facing the outside of the beanie, join to first sc with sl st (72 sc)
Round 17: ch 2, turn, dc2tog, dc in next, ch 10, sl st to last dc made, dc in next 4 stitches, ch 10, sl st to last dc made, *dc in next, dc2tog, dc in next 2, ch 10, sl st to last dc made, dc in next 4, ch 10, sl st to last dc made* repeat from * to * around to last 2 stitches, dc in last 2, join to first dc with sl st (64 dc)
Round 18: ch 1, turn, sc in each stitch around, making sure the ch-10 loops are facing the outside of the beanie, join to first sc with sl st (64 sc)
Round 19: ch 2, turn, dc in 2 stitches, ch 10, sl st to last dc made, dc in next, dc2tog, dc in next, ch 10, sl st to last dc made, *dc in next 4 stitches, ch 10, sl st to last dc made, dc in next, dc2tog, dc in next, ch 10, sl st to last dc made* repeat from * to * around to last 2 stitches, dc in last 2, join to first dc with sl st (56 dc)
Round 20: ch 1, turn, sc in each stitch around, making sure the ch-10 loops are facing the outside of the beanie, join to first sc with sl st (56 sc)
Round 21: ch 2, turn, dc in 2 stitches, ch 10, sl st to last dc made, dc in next 3, ch 10, sl st to last dc made, *dc in next, dc2tog, dc in next, ch 10, sl st to last dc made, dc in next 3 stitches, ch 10, sl st to last dc made* repeat from * to * around to last 2 stitches, dc2tog, join to first dc with sl st (48 dc)
Round 22: ch 1, turn, sc in each stitch around, making sure the ch-10 loops are facing the outside of the beanie, join to first sc with sl st (48 sc)
Round 23: ch 2, turn, dc in 2 stitches, ch 10, sl st to last dc made, *dc in next 3, ch 10, sl st to last dc made* repeat from * to * around to last stitch, dc in last, join to first dc with sl st (48 dc)
Round 24: ch 1, turn, sc in each stitch around, making sure the ch-10 loops are facing the outside of the beanie, join to first sc with sl st (48 sc)
Round 25: ch 2, turn, dc in each stitch around, join to first dc with sl st (48 dc)
Using your hook, chain the ch-10 loops together starting at the bottom. This process in included in the video tutorial.
Round 26: ch 1, turn, sc in first stitch, *grabbing the topmost ch-10 loop, sc in next stitch (closing in the ch-10 loop), sc in 2 stitches* repeat from * to * around, join to first sc with sl st (48 sc)
Round 27: ch 1, turn, *sc in 2 stitches, sc2tog* repeat from * to * around, join to first sc with sl st (36 sc)
Round 28: ch 1, turn, *sc in 1 stitch, sc2tog* repeat from * to * around, join to first sc with sl st (24 sc)
Round 29: ch 1, turn, sc2tog around (12 sc)
Fasten off. Leave a long end for sewing.
With your yarn needle, weave the long end in and out of the top loops of the last round. Pull end to cinch top closed. Weave in the ends.
>HOW TO FINISH A BOTTOM UP BEANIE PHOTO TUTORIAL<
And that’s it! See you next week for the third CAL for a Cause pattern!
Looking for more patterns? Follow me on Facebook, Instagram, and Pinterest! Please share a pic of your finished product with me. I’d love to see it!


Is there a tutorial video for this pattern?
Hi! There is a video for the stitch but not the entire beanie
Hi haven’t tried this pattern yet. I was wondering if you have a ponytail hat with this pattern or if it’s possible .? Thanks 😊
Hi! Yes, I think you could stop before the last round. 🙂
Hi! In Round 9 you say ” ch 2, dc in 3,” Does this mean to double crochet in the 3rd chain from hook or does it mean to double crochet in the next 3 stitches or something else? Thanks!
dc in the next 3 stitches 🙂