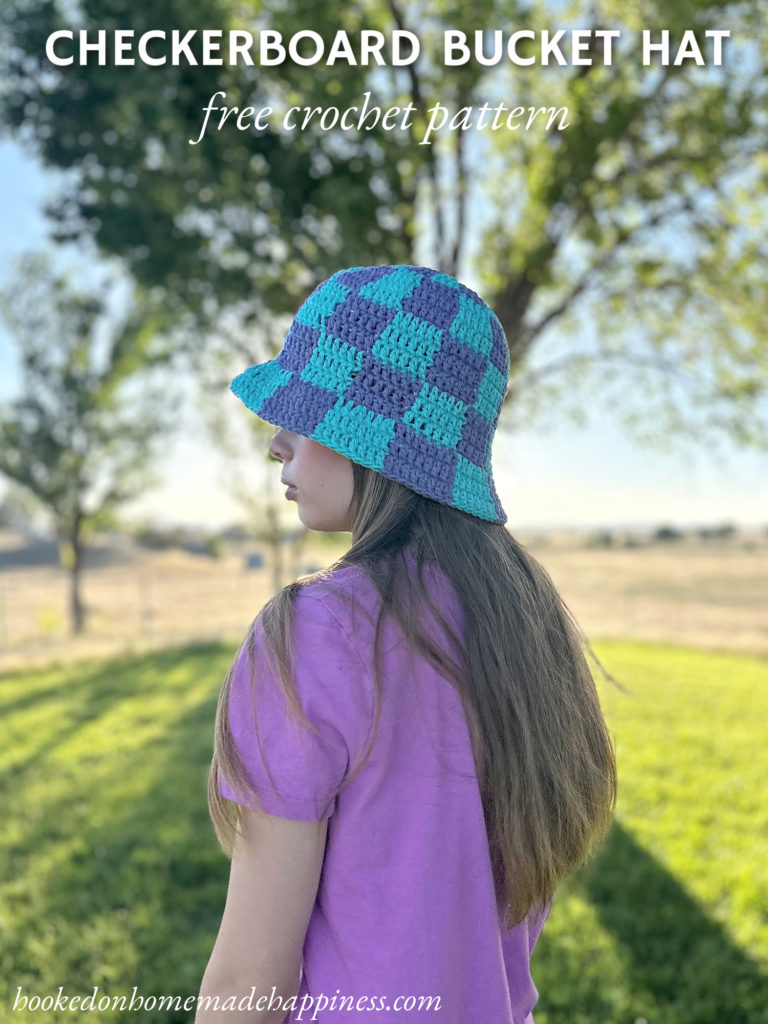
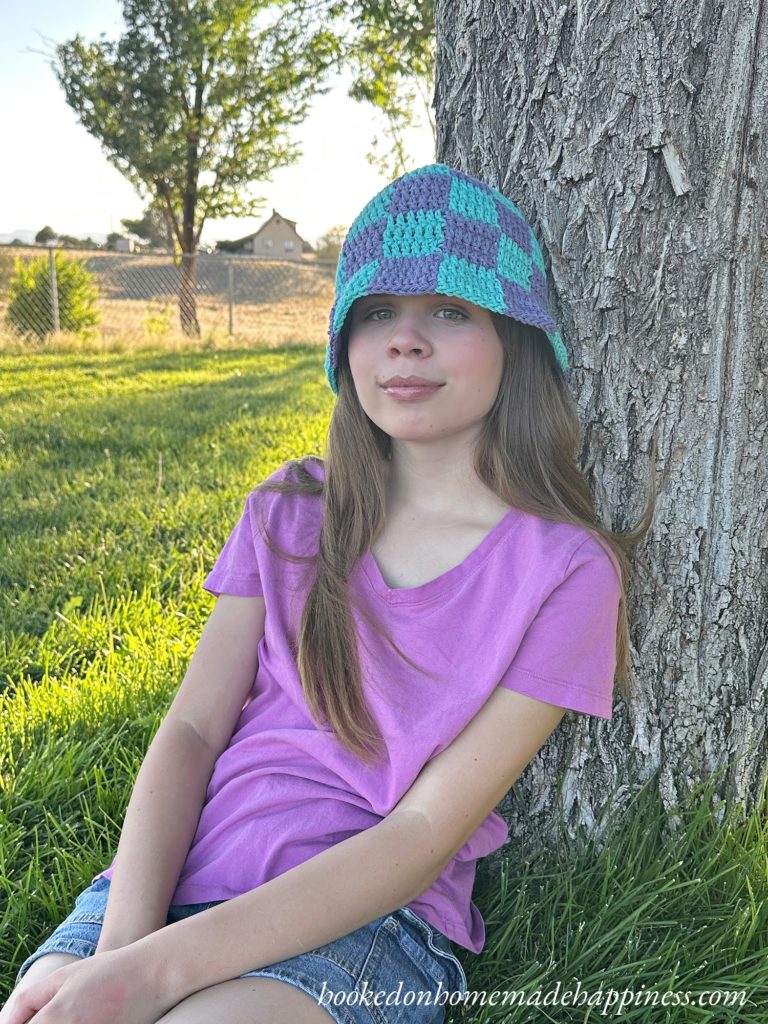
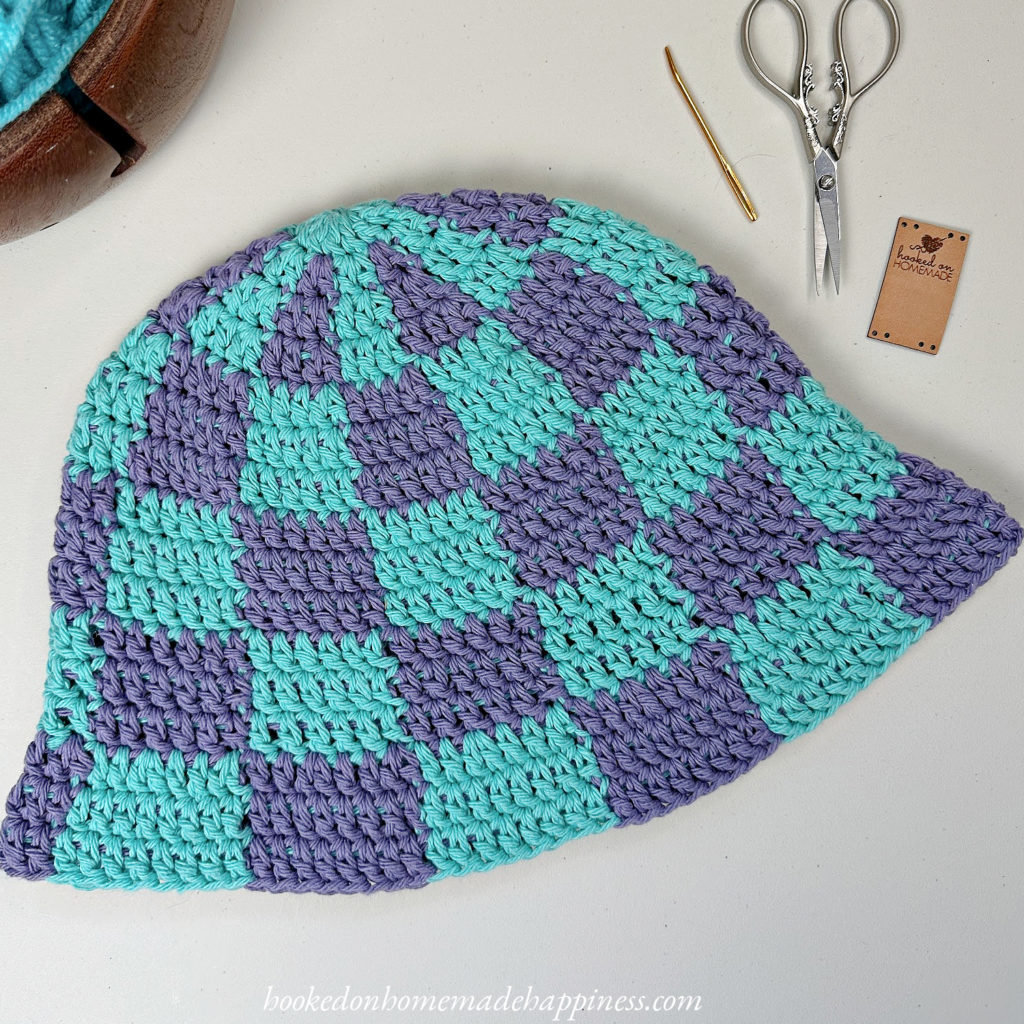
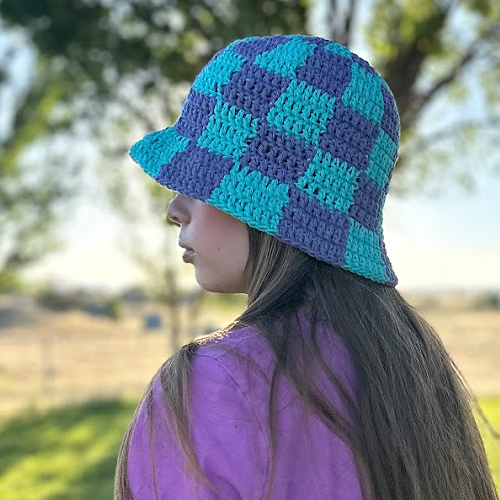
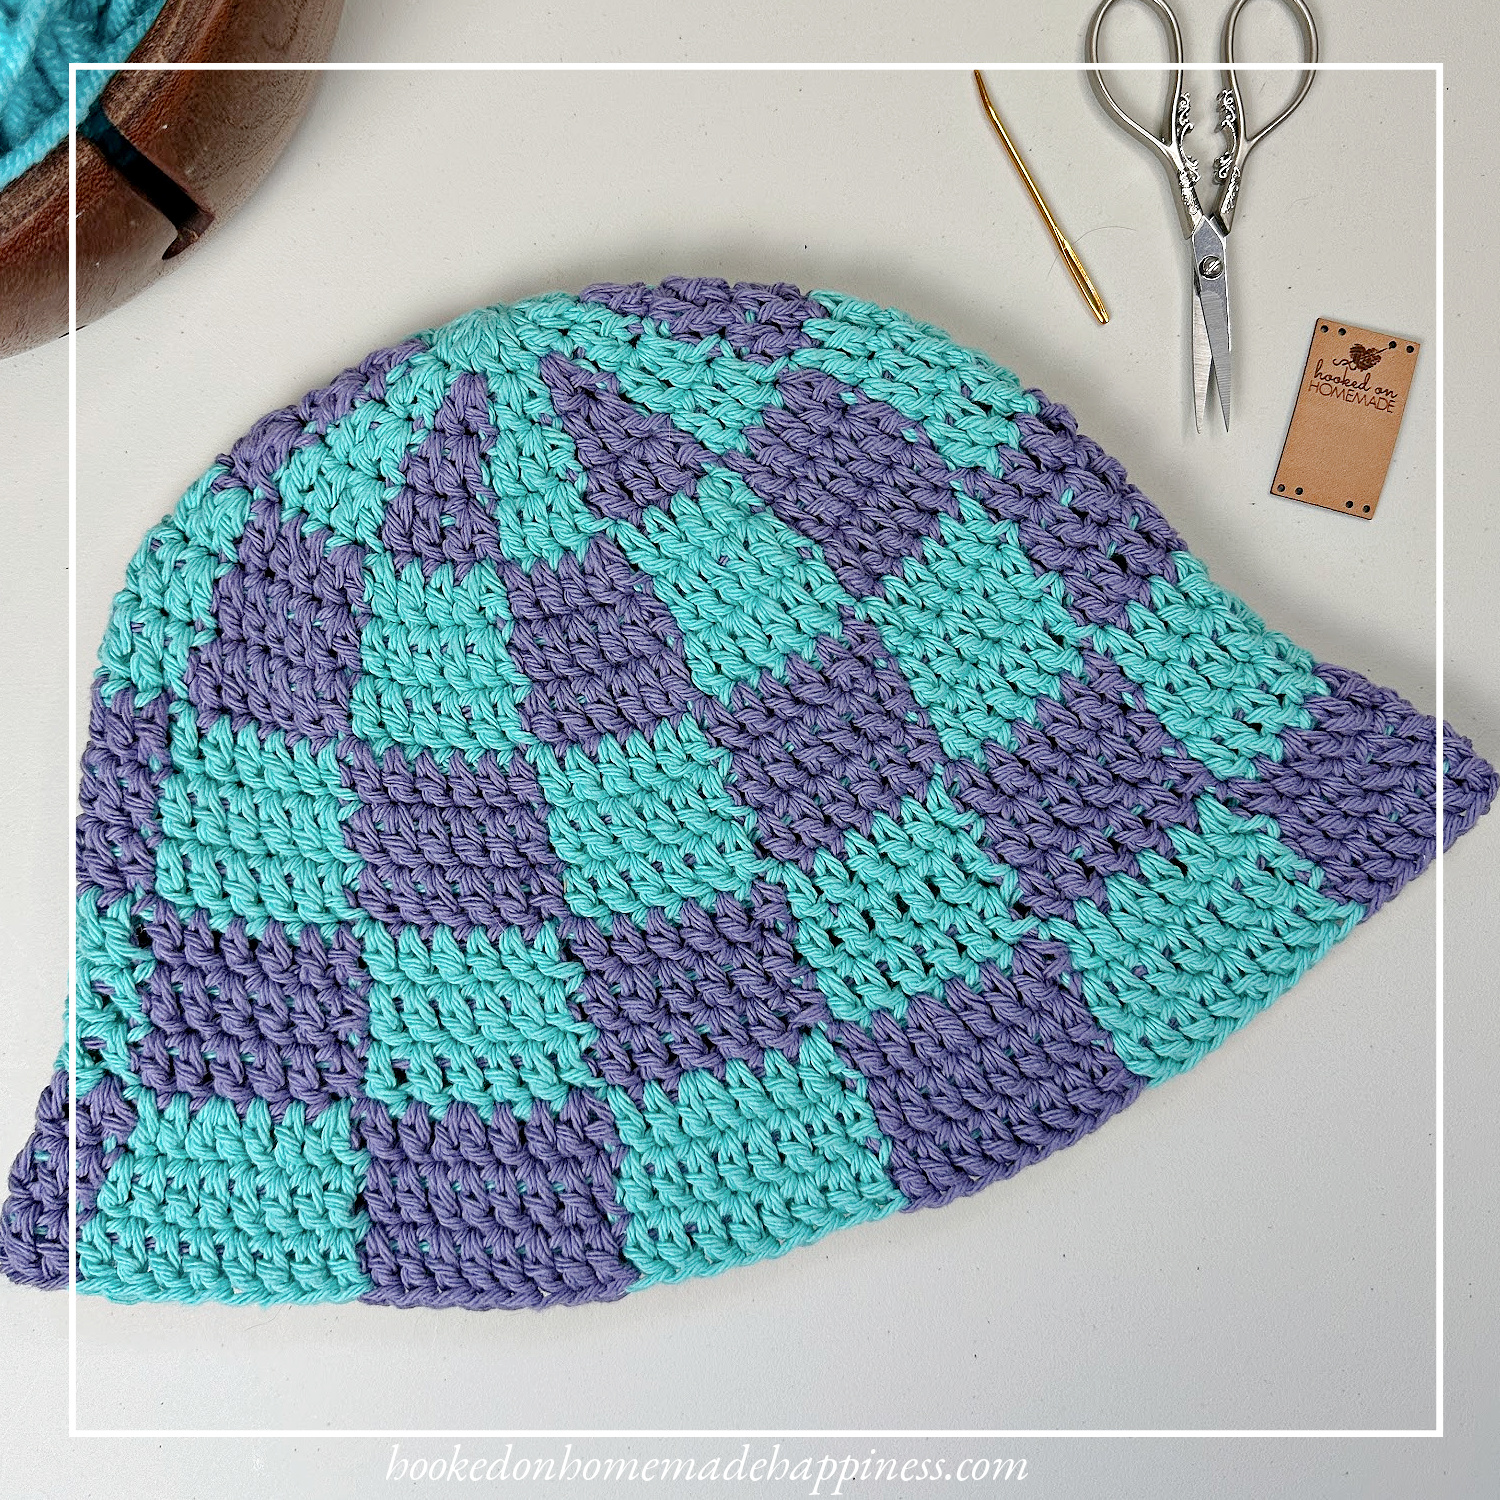
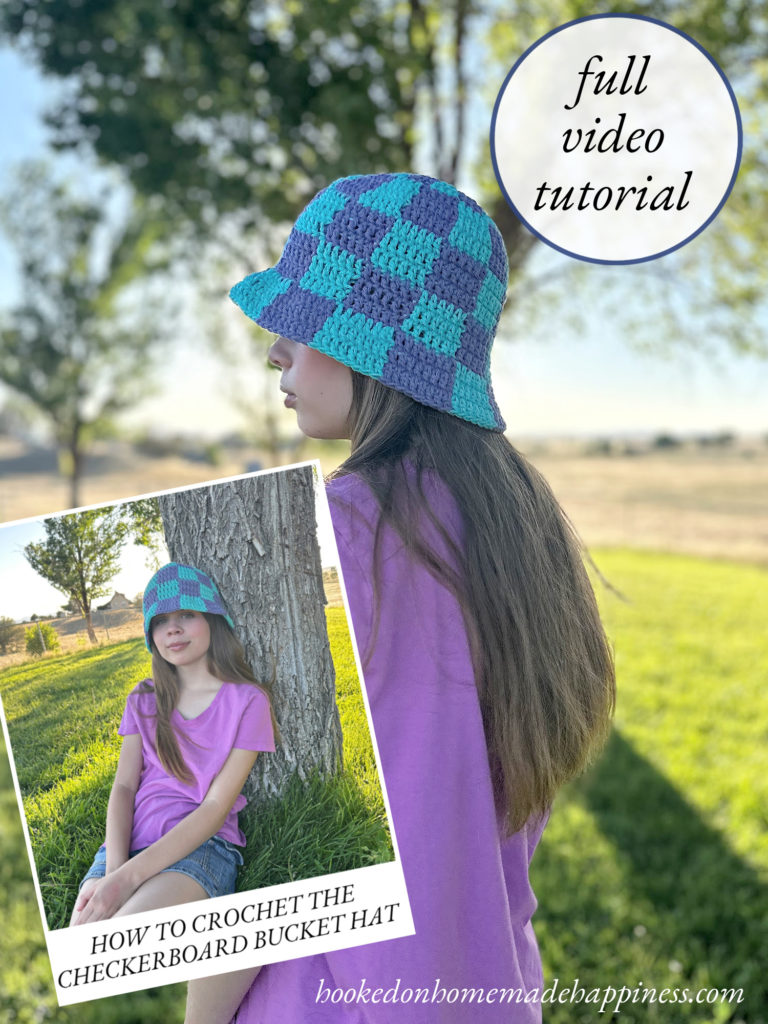
Checkerboard Bucket Hat Crochet Pattern
If you’re looking for a fun and trendy accessory to crochet, the Checkerboard Bucket Hat Crochet Pattern is just the thing! With its bold, graphic design and classic bucket hat shape, this pattern is perfect for making a statement while keeping the sun out of your eyes. The checkerboard effect is created using simple color changes, making it a great project for confident beginners or anyone ready to play with colorwork. Whether you’re heading to the beach, a music festival, or just want to add some flair to your outfit, this hat is a must-make!
Purchase the ad-free, printable PDF for easy printing.
Materials You’ll Need:
- Stitch markers (optional but helpful)
- Worsted weight cotton yarn in two contrasting colors
- (Try: Lily Sugar’n Cream, Paintbox Cotton Aran, or Premier Home Cotton)
- Size H/8 (5.0 mm) crochet hook
- Scissors
- Yarn needle for weaving in ends
Why You’ll Love This Pattern:
- Step-by-step video tutorial – crochet with confidence
- Beginner-friendly colorwork – simple stitches with high-impact results
- Breathable cotton yarn – perfect for warm-weather wear
- Customizable color combos – go neutral or bold
- Trendy & functional – blocks the sun and boosts your outfit

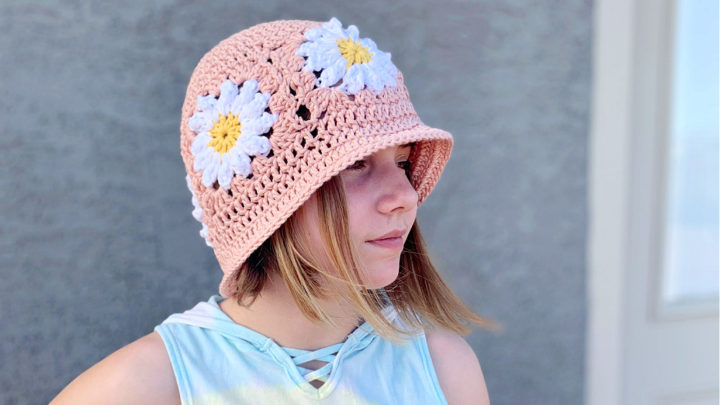
This hat was part of the Crochet Along for a Cause. Where we make 1 hat per week to donate to a cancer center, school, or homeless shelter. You can find all the details and hat patterns HERE.
Making the Checkerboard Bucket Hat Crochet Pattern
Get the full free pattern below or purchase the ad-free, printable PDF
Materials
100g/190 yds total worsted weight cotton yarn in 2 colors (I used Dishie in Swan and Linen)
H/5.0 mm hook
yarn needle
scissors
Level
intermediate
Pattern notes & Stitches to Know
Magic circle
ch – chain
sl st – slip stitch
dc – double crochet
· Written in US terms
· This beanie is made from the top down joined rounds. Do not fasten off the colors. Carry them throughout.
· Linen is Color A. Swan is Color B.
· When changing colors, always change color on the last step of the stitch just before the color change
· To change the pattern size, go up or down a hook size.
Approx Finished size (small adult) –
Length: 8”
Circumference (around base of head): 22”
Watch the Tutorial
See how it’s done! This easy-to-follow video tutorial will walk you through each step of the pattern.
CROCHET PATTERN WRITTEN INSTRUCTIONS
With Color A, make a magic circle
Round 1: ch 2, 12 dc in circle, pull circle closed tight, join to first dc with sl st (12 dc)
Round 2: ch 2, starting in the first stitch, *2 dc in next stitch, change to Color B, 2 dc in next stitch, change to Color A* repeat from * to * around, join to first dc with sl st (24 dc)
Round 3: continuing with Color A, ch 2 *dc in 1 stitch, 2 dc in next, change to Color B, dc in 1 stitch, 2 dc in next, change to Color A* repeat from * to * around, join to first dc with sl st (36 dc)
Round 4: continuing with Color A, ch 2 *dc in 2 stitches, 2 dc in next, change to Color B, dc in 2 stitches, 2 dc in next, change to Color A* repeat from * to * around to last stitch, do not change to color A, join to first dc with sl st (48 dc)
Round 5: continuing with Color B, ch 2, *dc in 3 stitches, 2 dc in next, change to Color A, dc in 3 stitches, 2 dc in next, change to Color B* repeat from * to * around, join to first dc with sl st (60 dc)
Round 6: continuing with Color B, ch 2 *dc in 4 stitches, 2 dc in next, change to Color A, dc in 4 stitches, 2 dc in next, change to Color B* repeat from * to * around, join to first dc with sl st (72 dc)
Crown diameter is approx. 6.5”.
Round 7: continuing with Color B, ch 2 *dc in 6 stitches, change to Color A, dc in 6 stitches, change to Color B* repeat from * to * around to last stitch, do not change to Color B, join to first dc with sl st (72 dc)
Round 8 – 10: continuing with color A, ch 2, *dc in 6 stitches, change to Color B, dc in 6 stitches, change to Color A* repeat from * to * around, join to first dc with sl st (72 dc)
do not change colors on last stitch of round 10
Round 11 – 13: continuing with Color B, ch 2, *dc in 6 stitches, change to Color A, dc in 6 stitches, change to Color B* repeat from * to * around, join to first dc with sl st (72 dc)
do not change colors on last stitch of round 13
Round 14: continuing with Color A, *dc in 2 stitches, 2 dc in next, dc in 2 stitches, 2 dc in next, change to Color B, dc in 2 stitches, 2 dc in next, dc in 2 stitches, 2 dc in next, change to Color A* repeat from * to * around, join to first dc with sl st (96 dc)
Round 15 – 16: continuing with Color A, *dc in 8 stitches, change to Color B, dc in 8 stitches, change to Color A* repeat from * to * around, join to first dc with sl st (96 dc)
Fasten off.
Weave in the ends.
And that’s it! See you next week for the twelfth and final CAL for a Cause pattern!
Looking for more patterns? Follow me on Facebook, Instagram, and Pinterest! Please share a pic of your finished product with me. I’d love to see it!


This hat is sooo cute! I can’t wait to crochet it.
Thank you!
Hi! I’m crocheting this using a DK weight yarn and a 5.5mm hook, and when I got to round 6, my diameter was less than yours (6″), should I increase 1 more round? Thank you!
Hi! Yes, you can add another increase round 🙂
Lovely patter but for some reason mine didn’t flare out after row 14 and it’s super short. Is there any way I can fix this?
Hi! You can go back to round 13 and add a few more without the increases to add length. And when you continue you can go up a hook size to make it flare out more 🙂
Hi Breann!
I am new to crochet and when looking at the Dishie yarn you used, it is suggested to use a 5.5-6.5 hook. However you used (and I have) a 5mm hook. Does it ultimately matter if I try and use the Dishie yarn with a 5mm hook or should I buy a different size? I am excited to get started. Thanks!
Hi! I used a smaller hook to make tighter stitches 🙂
Hi do you have this pattern for a baby blanket. Thanks
Hi! No, sorry I don’t
Where can I find your poncho pattern
Hi! Here’s a poncho pattern 🙂 https://www.hookedonhomemadehappiness.com/easy-all-double-crochet-hooded-poncho/
I’m so excited to make this! Thank you
Thank you so much!