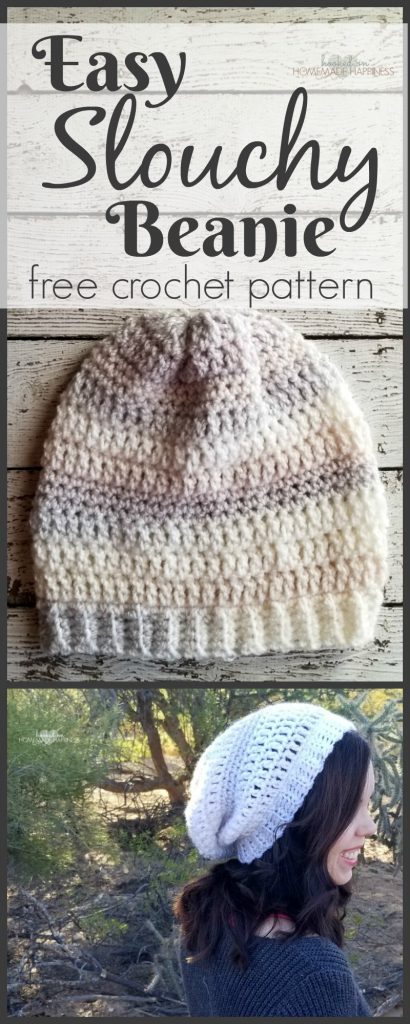
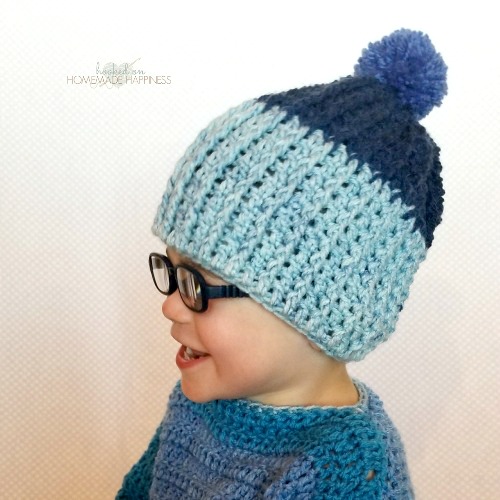
Easy Slouchy Crochet Beanie Pattern
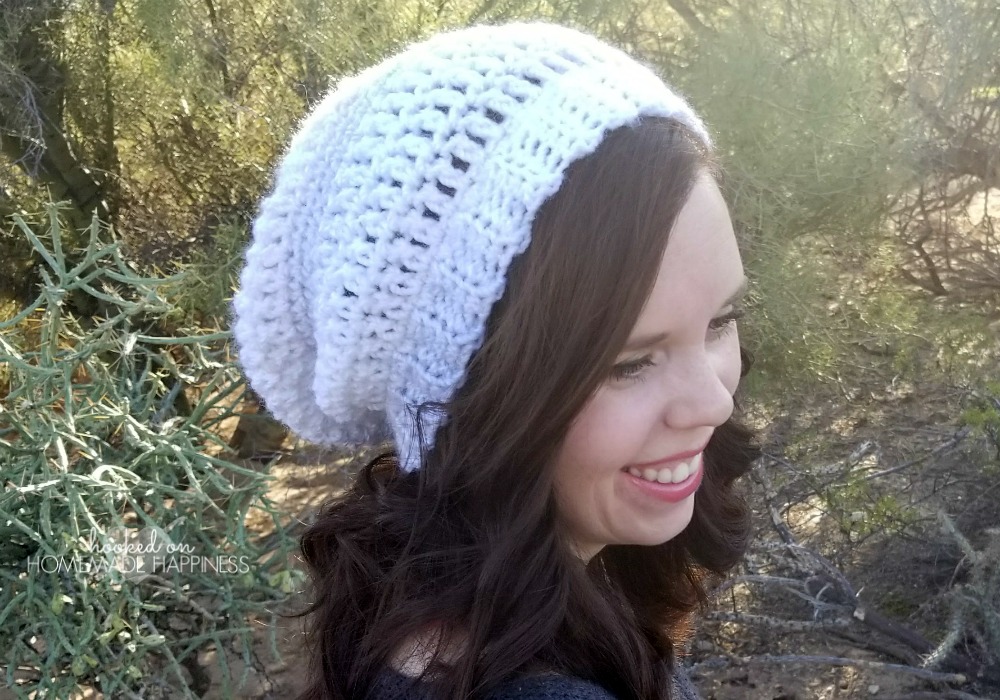
This Easy Slouchy Crochet Beanie Pattern is true to its name… it’s both super slouchy and super easy. It fits loose and comfortably. Plus, this colorway is everything.
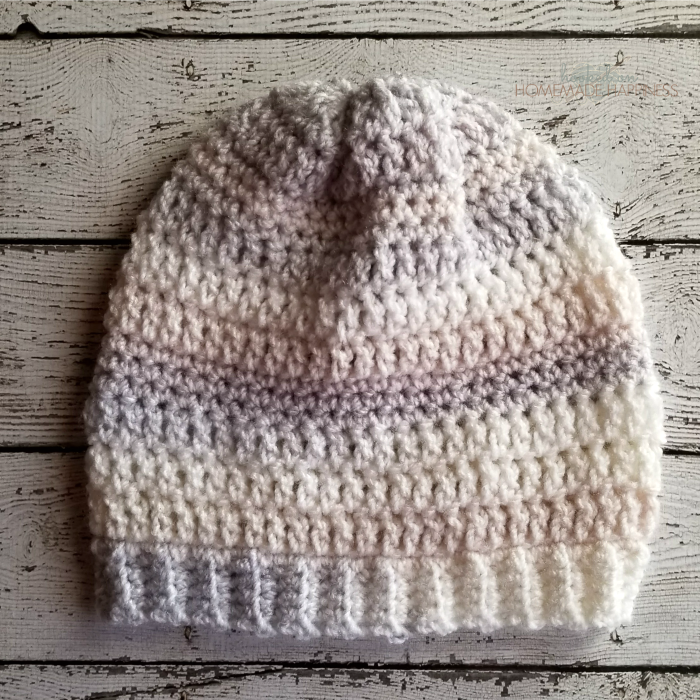
I had some of this gorgeous yarn leftover after making my COZIEST CROCHET CARDIGAN and I had to use it again. I love the slight texture and the subtle color changes in this yarn. This hat uses only basic crochet stitches. Because of the touch of texture, there isn’t a need for any special stitches. This yarn is beautiful all on it’s own!
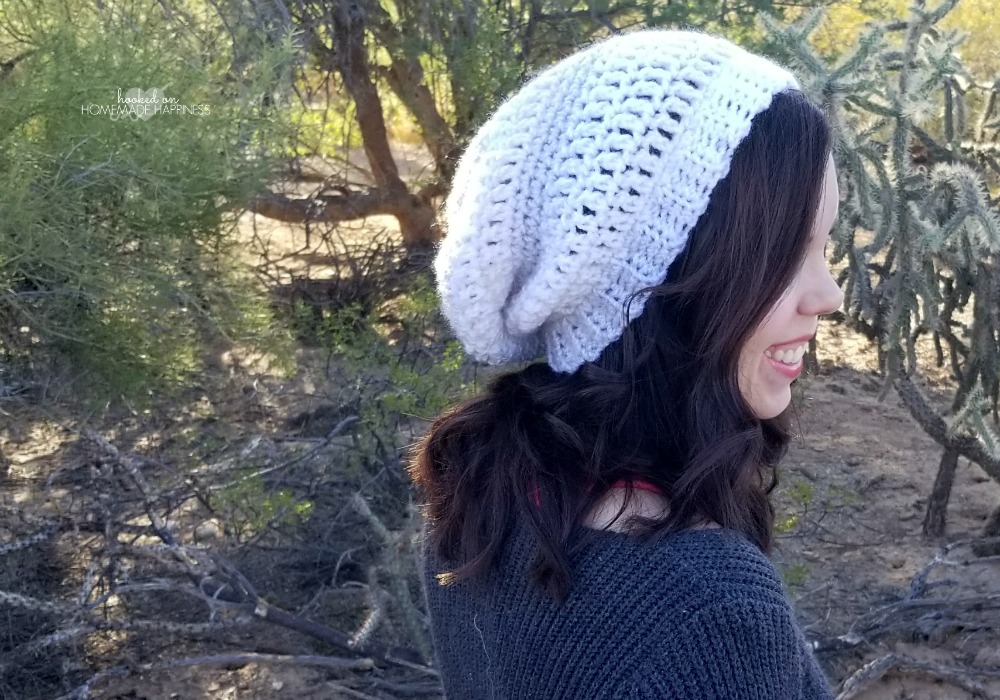
And can we just address how vicious that cactus looks behind me? Goodness! I actually did get some cactus in my shoe while we were photographing this hat. I was warned not to wear Crocs this far out in our back yard. Of course, I didn’t listen. Of course, I got cactus in my foot. #lifeinthedesert
This pattern is available as an inexpensive, clearly formatted, PDF instant download HERE in my Etsy shop.
PATTERN
Materials
Loops & Threads Barcelona in Arctic (category 5 yarn)
6.00 mm hook
8.00 mm hook
Yarn needlE
Scissors
Level
Easy+
Pattern notes & stitches to know (US terms)
Sl st – slip stitch
Sc – single crochet
Sc blo – single crochet back loop only (instead of inserting hook into both top loops, only insert hook into the back loop)
dc – double crochet
Hat Measurements:
Width: 10.5 inches across the brim
Length: 11 inches from top to bottom
Gauge:
9 dc = 4”
4 rows = 4”
SLOUCHY BEANIE
This hat is worked from the bottom up
Ch at the beginning of each round does not count as stitch
Start with the 6.00 mm hook
Ch 6
Row 1: sc in 2nd chain from the hook and across (5 sc)
Row 2 – 50: ch 1, turn, sc blo in each stitch across (5 sc blo)
NOTE: this band is the base of the hat, you can test it around your head to make sure it fits snug, add or take out rows as needed
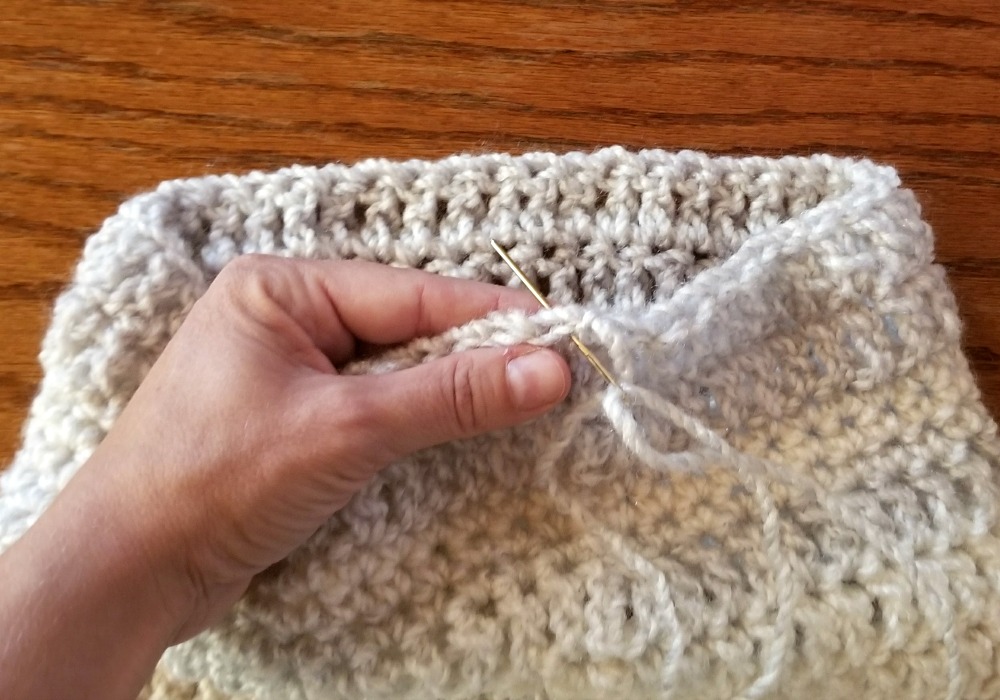
Do not fasten off
Bring both ends of the band together, sew both ends together with sc
Do not fasten off
Row 1: Ch 1, turn and sc across the top of the ribbed edge, one sc in each row, join to first sc with sl st (50 sc)
Switch to 8.00 mm hook
Row 2 – 4: ch 3, dc in each stitch around, join to first dc with sl st (50 dc)
Row 5 – 7: ch 1, sc in each stitch around, join to first sc with sl st (50 sc)
Row 8 – 10: ch 3, dc in each stitch around, join to first dc with sl st (50 dc)
Row 11 – 13: ch 1, sc in each stitch around, join to first sc with sl st (50 sc)
Row 14 – 15: ch 3, dc in each stitch around, join to first dc with sl st (50 dc)
Leave a long tail for sewing, fasten off, weave in first end
Weave the long end in and out of the top loops of the last row, all the way around

Pull the end to cinch up the top. Sew the top closed by sewing back a forth a couple times through the hole at the top.
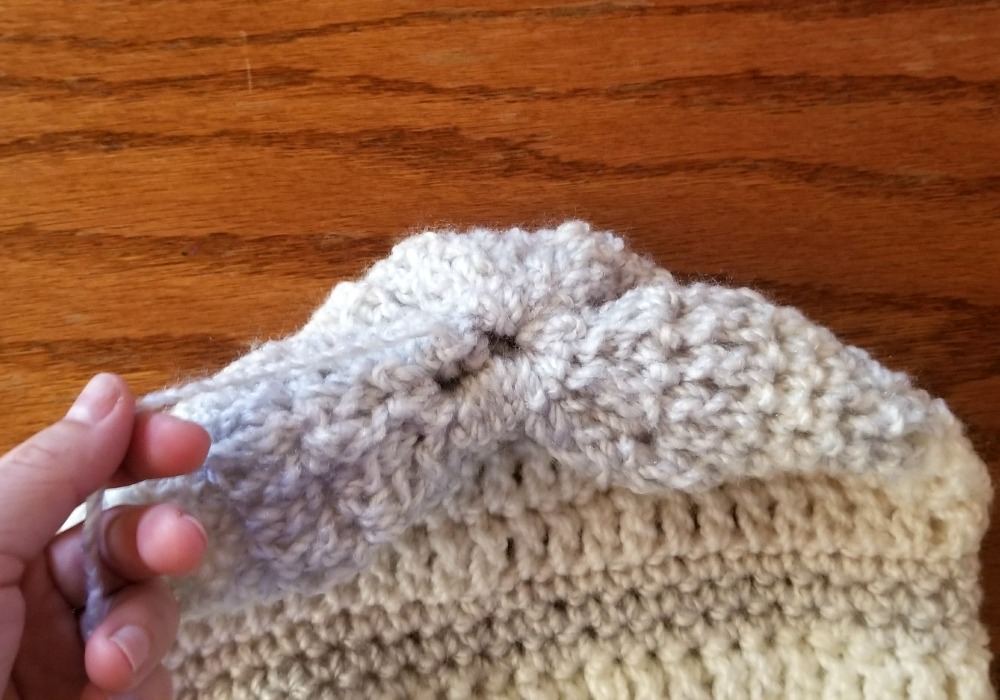
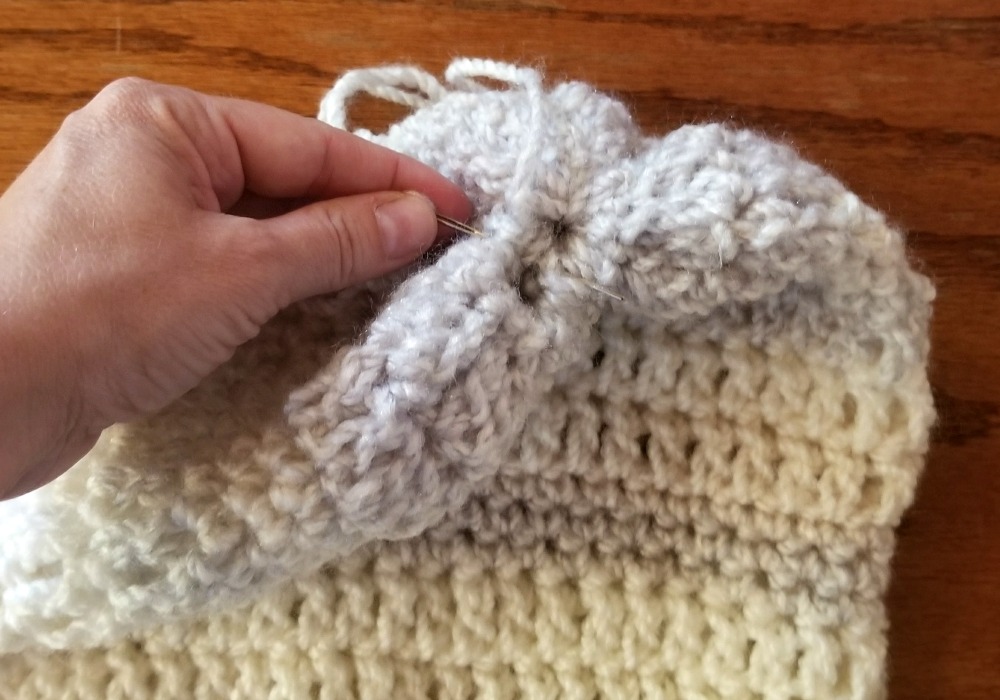
Fasten off, weave in all your ends.
Looking for more patterns? Follow me on Facebook, Instagram, and Pinterest! Please share a pic of your finished product with me. I’d love to see it!

NEVER MISS A PATTERN!
Sign up for my newsletter and receive a FREE ebook with 3 of my favorite patterns PLUS patterns straight to your inbox. You’ll also get a heads up about upcoming giveaways, events, and crochet alongs.
>>>HOOKED ON HOMEMADE NEWSLETTER<<<

An 8 hook?? Too huge!!
And a 6.00 hook to make the band.
What size hook do you use for the gauge swatch?
How do u connect the ends of the band to the beany? and start the new please help
Hi! Sew the ends together with a single crochet. Insert your hook into the top loops of the last row and the bottom of the first row. Then work a single crochet all the way across. I hope this helps!!
I don’t understand your instructions on finishing the ends of the beanie, would you please help me with this.
Hi! What specifically are you having trouble with? Sewing the top?
Truly enjoying this pattern. Haven’t crocheted in a spell so trying out this easy pattern. Thank you for sharing!!
Any idea how many balls of yarn needed (or yards)?
I would say around 200g 🙂
I am getting ready to crochet the easy beanie hat. I always love your instructions because they are easy to follow!
Thank you so much!!