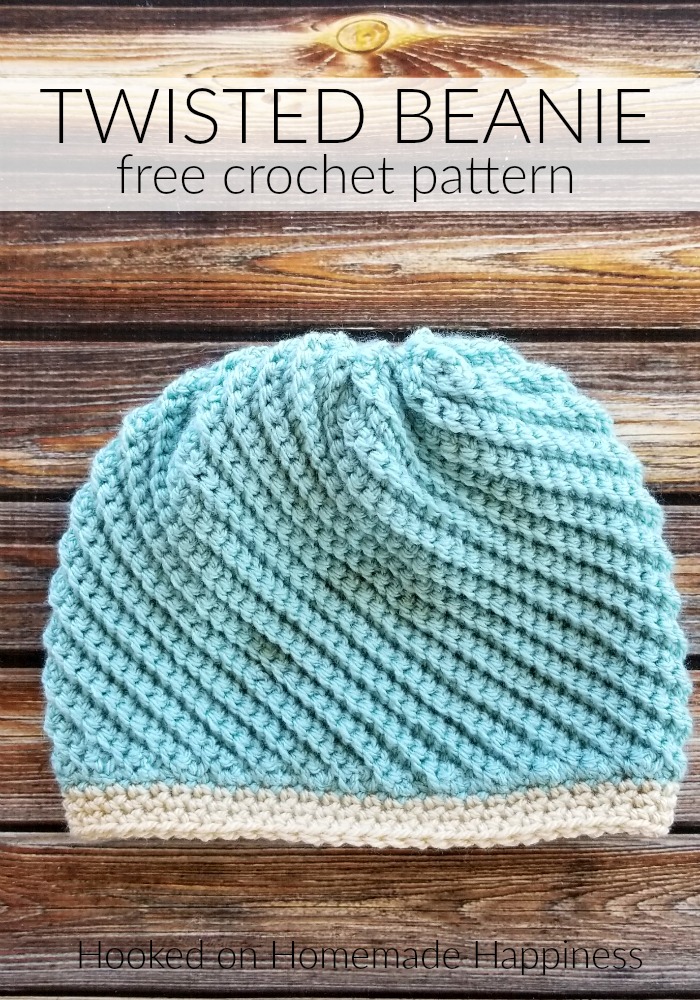
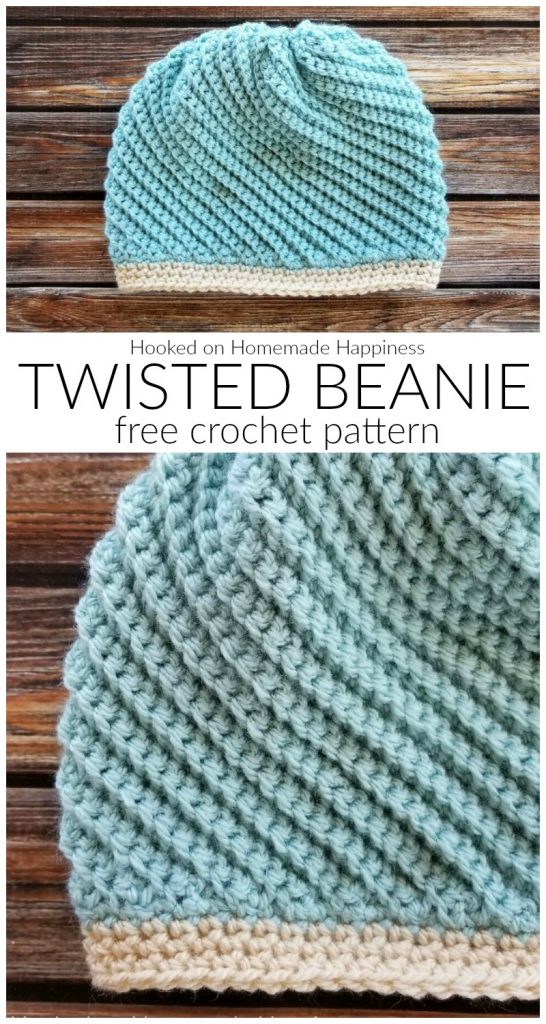
Twisted Beanie Crochet Pattern (CAL for a Cause)
I am so excited to share the Twisted Beanie Crochet Pattern with you! This beanie is completely different than any beanie I have ever made. I hope you love it, too!
This hat is the 9th pattern in the Crochet Along for a Cause. We are making 1 hat per week to donate to a cancer center, school, or homeless shelter all summer long. There’s always time to join! You can find all the details and hat patterns HERE.
Hooked on Homemade Happiness:
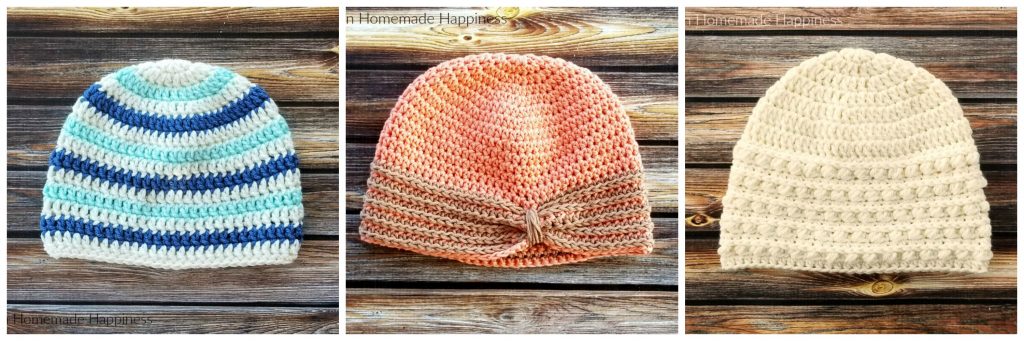
Basic Striped Beanie // Kid’s Turban Style Beanie // Snowdrop Beanie
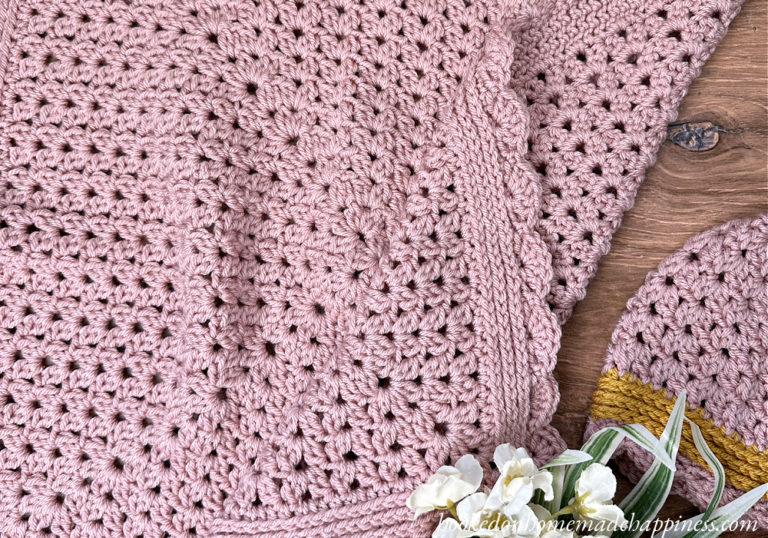
Twisted Beanie Crochet Pattern
– PIN for later HERE
– Add to your Ravelry Queue HERE
Materials
Worsted weight yarn in 2 colors (I used Paintbox Simply Aran)
H/5.0 mm hook
yarn needle
scissors
Level
advanced beginner
Pattern notes & stitches to know
sl st – slip stich
ch – chain
sc – single crochet
sc blo – single crochet back loop only
sc2tog – single crochet 2 together (single crochet decrease)
· written in US terms
· ch 1 does not count as sc
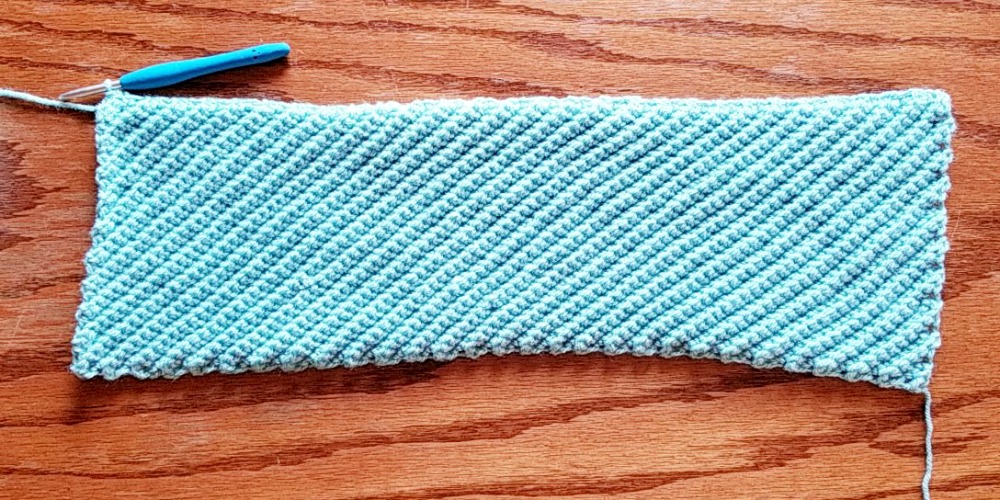
· This beanie is made from a rectangle folded together and sewn to make a tube. The top is cinched closed. Crochet around the bottom to make the brim
· The rectangle is made using a corner to corner method
Approx Finished Size (child):
Circumference: 18”
Length: 7.5”
TWISTED BEANIE CROCHET PATTERN
Start with main color, ch 2
Row 1: 2 sc in 2nd ch from the hook (2 sc)
Row 2: ch 1, turn, 2 sc blo in each stitch (4 sc)
Row 3: ch 1, turn, 2 sc blo in first stitch, sc blo in next 2, 2 sc blo in last stitch (6 sc)
Row 4: ch 1, turn, 2 sc blo in first stitch, sc blo in each stitch across to last, 2 sc blo in last (8 sc)
Repeat row 4 to Row 19 (38 sc)
Each side should be approx. 6.5” Add or take out rows as needed.
In the following rows a rectangle shape will form. One side will increase while the opposite decreases.
Row 20: ch 1, turn, 1 sc blo in each stitch to last, 2 sc blo in last stitch (39 sc)
Row 21: ch 1, turn, 2 sc blo in first stitch, sc blo in each stitch to the last 2, sc2tog blo (39 sc)
Row 22: ch 1, turn, sc2tog blo, sc blo in each stitch across to last stitch, 2 sc blo in last (39 sc)
Repeat rows 21 & 22 to Row 56
The long side should be approx. 20” long. Add or take out rows as needed.
In the following rows, both sides will decrease to close the rectangle
Row 57: ch 1, turn, sc2tog blo, sc blo in each stitch to last 2, sc2tog blo (37 sc)
Repeat row 57 to Row 75
Row 76: ch 1, turn, sc3tog
Fasten off.
Leave a (very) long end for sewing.
Bring both of the short ends together. Sew the ends together with a whip stitch.
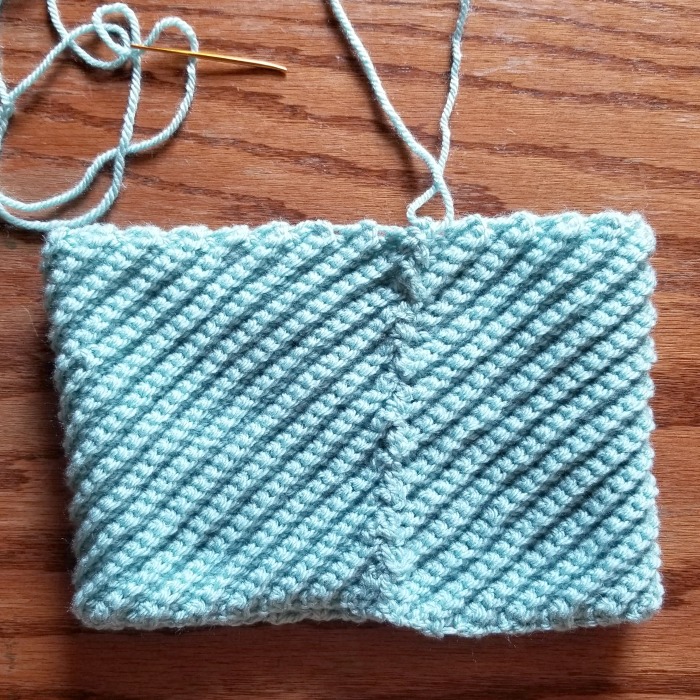
Use the long end to weave in and out of the stitches around the top. Pull to cinch the top closed. Sew the top closed.
Fasten off, weave in the ends.
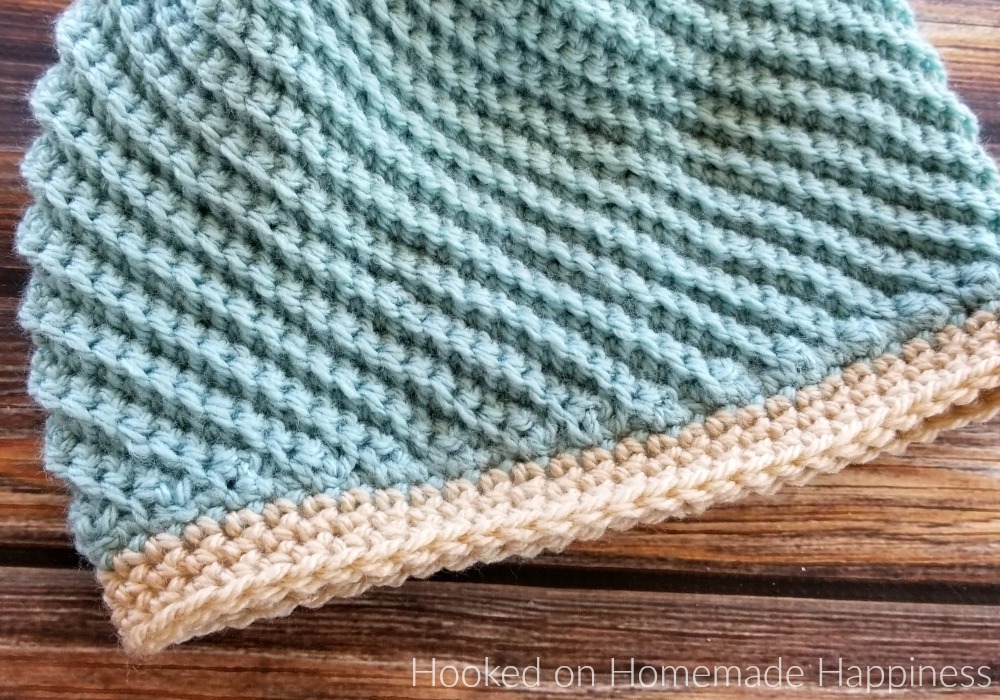
BRIM
To make the brim, join yarn to the bottom of the beanie at the seam and work in rounds.
Join main color at the seam
Round 1: ch 1, sc evenly around working 1 sc in the end of each row around, join to first sc with sl st (approx. 57 sc)
Change to the second color
Round 2 – 4: ch 1, sc in each stitch around, join to first sc with sl st
Fasten off. Weave in the ends.
And you’re done with this fun beanie!!
Looking for more patterns? Follow me on Facebook, Instagram, and Pinterest! Please share a pic of your finished product with me. I’d love to see it!


Love this hat! Can’t wait to start making it. Already tweeted about it 🙂
Would like to make as an adult beanie. Don’t understand if the rectangle is 20″ but the end product is 18″ is it the brim that pulls it in? So to make an adult version would need to increase the start rows to be approx 7.5″ and the rectangle to be roughly 24″? My husband wants me to try it, we both really like what it looks like just didn’t know if I could figure out the increases needed. Thanks. judy
Yes, the brim tightens it up quite a bit. And yes, you can make the rectangle larger to make a bigger beanie 🙂
Thanks. On list to try next.
Would like to make for adult do you have a pattern. Or any ideas how to increase to make for adult.
New to crocheting how can I make it larger do you have a pattern I can follow
Hi! You can add rows to make the rectangle larger 🙂
How many rows should I add to make adult size hat?
I would like to help but they don’t accept mine because I smoke and so does my husband. I don’t know what to do. How to help
Hello Breann,
Thank you for the pattern. After row 19 it states that each side should be about 6.5”. Mine is about 8” on the working side and about 5” on the other two. Adding or taking away more rows will still result in uneven sides. Should I just roll with it? Thanks!
Hi I actually made this for one of my neices and she loved it. My Aunt would like one too (we maybe fighting cancer again after her being in remission for almost 20 something years) but I’m a little confused on where or how to make it in an adult size. Please help me I want to give it to her for christmas.
Hi! You can repeat row 4 until it’s about 7.5″. Then repeat the pattern rows 21 & 22 until it’s about 21″ or 22″. Then do the decreasing rows. I hope that helps!
Yes it will! Thank you so very much!!!