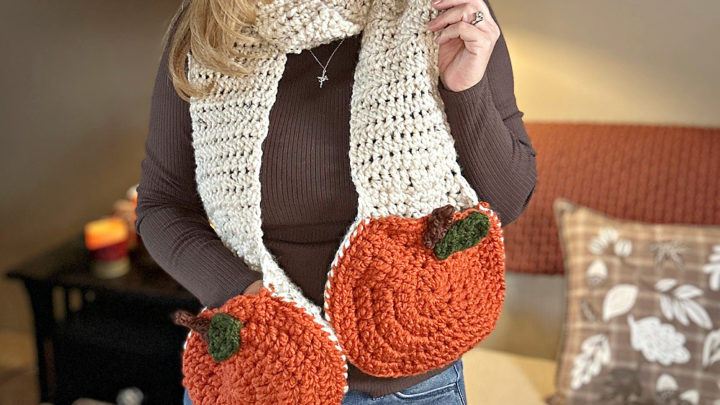
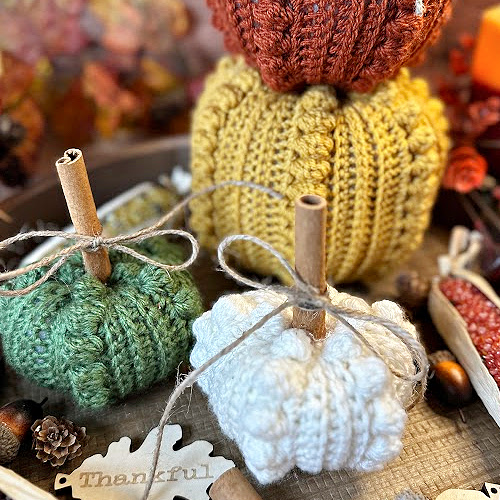
Bobble Pumpkin Crochet Pattern
Fall crochet is all about cozy textures and handmade décor—and nothing says autumn quite like crochet pumpkins! This Bobble Pumpkin Crochet Pattern combines fun texture with simple construction, making it the perfect seasonal project.

Purchase the ad-free, printable PDF for easy printing.
About the Pattern
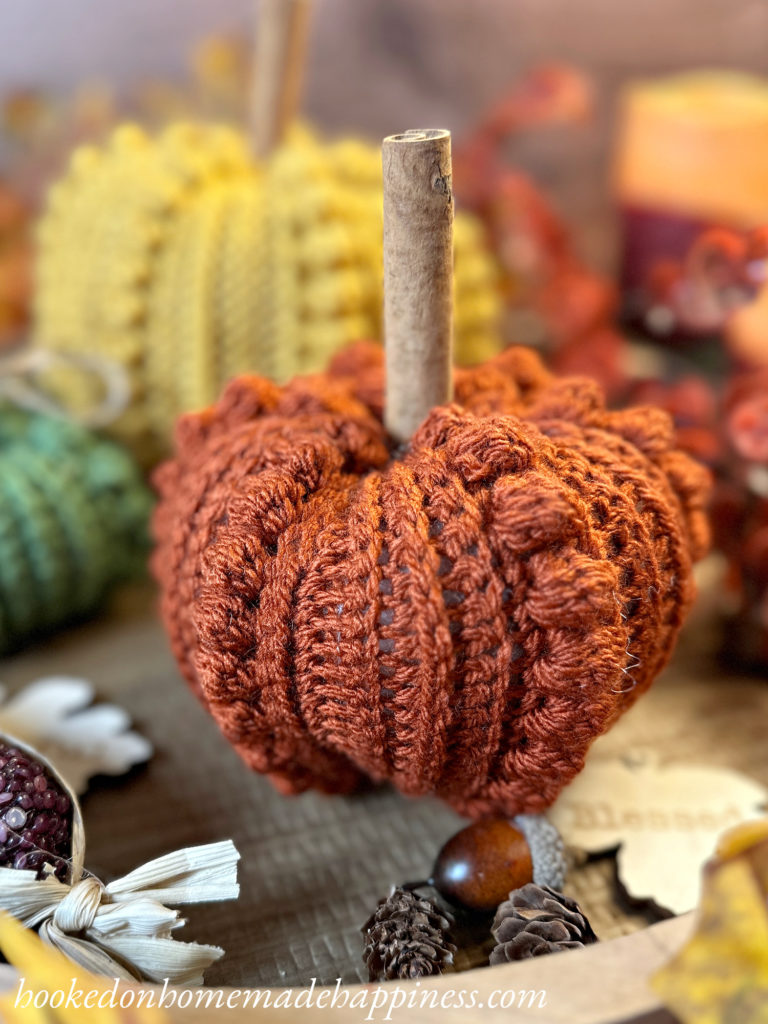
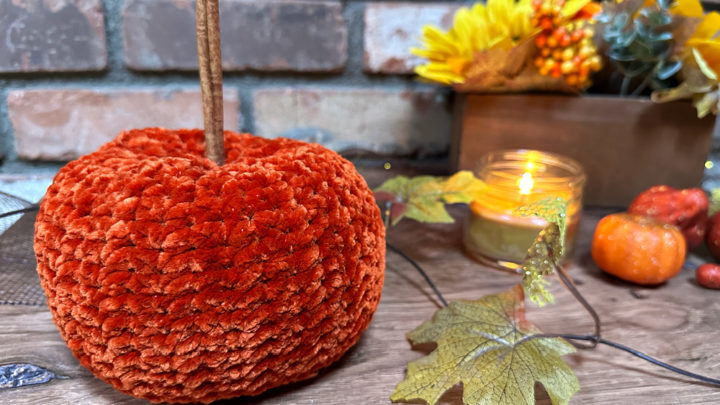
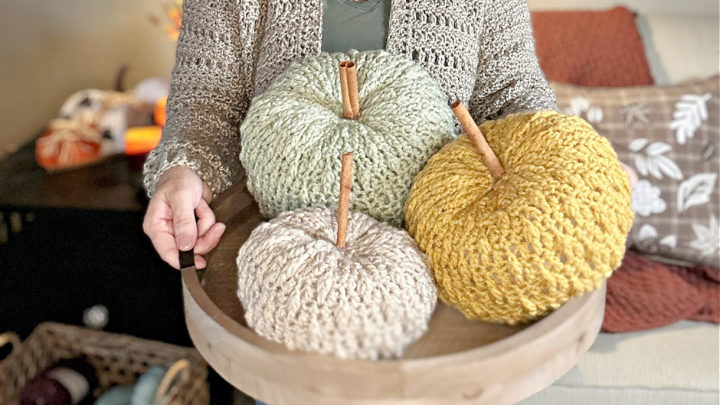
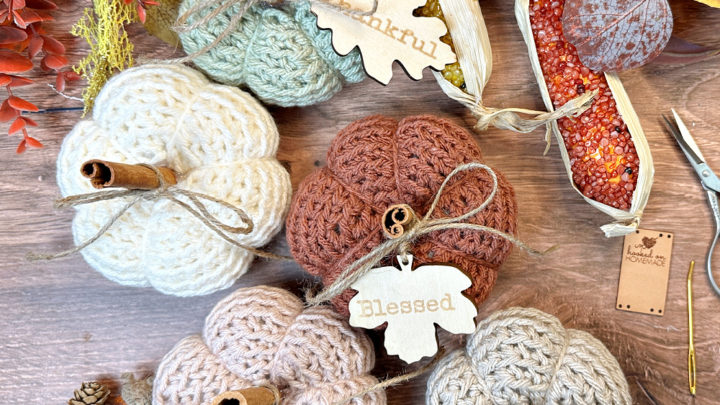
This pumpkin is worked as a flat rectangle, alternating rows of bobble stitches and half double crochet ribbing. Once the rectangle is complete, it’s seamed into a tube, gathered at the top and bottom, and stuffed to shape. Add a stick, cinnamon stick, or crocheted stem, and you’ll have the cutest handmade pumpkin for your fall display.
The alternating stitch rows give this pumpkin its unique ribbed and bumpy texture, which makes it stand out from traditional crochet pumpkins.

Yarn + Materials
- Worsted weight yarn (any color you’d like for your pumpkin!)
- Crochet hook size H/5.0mm
- Fiberfill stuffing
- Yarn needle
- Scissors
- Stem: stick, cinnamon stick, or crocheted stem
Crochet Stitches Used
- Bobble Stitch – adds the fun bumps that make this pumpkin extra special
- Half Double Crochet (hdc) – worked in the back loop only and third loop only for the ribbed rows
- Single Crochet (sc)
- Chain (ch)
Pattern Details
- Skill Level: Easy/Intermediate (a great project if you’ve never tried bobble stitches before!)
- Construction: Rectangle worked in rows, then seamed into a pumpkin shape
- Size: Easily adjustable—make your rectangle longer for a larger pumpkin, or shorter for a mini version
Making the Bobble Pumpkin Crochet Pattern
Get the full free pattern below or purchase the ad-free, printable PDF
Materials
Worsted weight (4) yarn
H/5.0 mm hook
yarn needle
scissors
fiberfill stuffing
hot glue
cinnamon stick
Level
intermediate
Pattern notes & stitches to know
ch – chain
sl st – slip stitch
sc – single crochet
fsc – foundation single crochet
hdc – half double crochet
blo – back loop only
TL – third loop (work stitch into third loop of hdc—bar across back)
bobble – *yarn over, insert hook into stitch, pull up a loop, yarn over, pull through 2 loops* repeat from * to * 4 more times, yarn over, pull through all 6 loops on hook
· written in US terms
· ch 1 does not count as sc
· ch 2 does not count as hdc
· This pumpkin is made as a flat rectangle, sewn into a tube, then closed at the top and bottom.
· Pattern written in small, medium, and large, notated in that order in parenthesis (S, M, L)

Watch the Tutorial
See how it’s done! This easy-to-follow video tutorial will walk you through each step of the pattern.
Pattern Support
Looking for pattern support or want to share your progress? Join our Crochet Community Facebook Group! It’s the perfect place to ask questions, get help, and connect with fellow makers.
CROCHET PATTERN WRITTEN INSTRUCTIONS
BOBBLE PUMPKIN CROCHET PATTERN
Ch 2 (leave a long end for sewing)
Row 1: starting in 2nd ch from the hook, fsc (15, 23, 31), join to first sc with sl st ((15, 23, 31) sc) – row 1 can be any odd number
Alternatively, make a starting ch and sc in 2nd ch from the hook and across.
Row 2: ch 1, turn, sc in first stitch, sc blo in each stitch across to last, sc in last ((15, 23, 31) sc)
Row 3: ch 2, turn, hdc in first stitch, hdc blo in each stitch across to last, hdc in last ((15, 23, 31) hdc)
Row 4: ch 1, turn, sc in first stitch, scTL in each stitch across to last, sc in last ((15, 23, 31) sc)
Row 5: ch 1, turn, sc in first stitch, sc blo in each stitch across to last, sc in last ((15, 23, 31) sc)
Row 6: ch 1, turn sc in first stitch, *bobble in next, sc in next* repeat from * to * across ((15, 23, 31))
Row 7 – Row (30, 36, 42): repeat rows 1 – 6 (for row 1 repeat– sc in each stitch across)
Do not fasten off.
Bring both short ends together. Sew ends together with sl st. Fasten off. Leave a long end for sewing.
Using one long end and yarn needle, weave the long end in and out around the opening. Pull to cinch closed. Sew bottom closed.
Fill with fiberfill. Repeat closing method for the top. Pull the end closed about halfway. Finish filling with fiberfill. Pull tight to cinch closed. Sew closed.
Insert the long end through the center top of the pumpkin, bringing it out through the center bottom. Pull the yarn snug to create a dip in the center, making a squatty shape.
Fasten off. Weave in the ends.
Hot glue the cinnamon stick.

Looking for more patterns? Follow me on Facebook, Instagram, and Pinterest! Please share a pic of your finished product with me. I’d love to see it!


Sooo adorable and I love the texture!
Thank you for the pattern. ❤️
quelque chose qui fait vraiment la différence ! et ce n’est pas très long à faire, donc… à mon crochet. merci pour cette attention !
Hi – I was wondering how much yarn or skeins does it take to make the Ribbed Bobble Pumpkin ? I was using lion’s brand cobblestone and ran out of yarn 3 pattern rows (18 rows) short.
-Thanks!
Robin
Hi! Just 1 skein 🙂
Absolutely LOVE this pattern. It is written well and is easy to understand. My first pumpkin I made according to your directions. My second pumpkin I started with 52 chains versus 42 because I wanted it a tad bigger. They both turned out better than I expected. Thank you for sharing this beautiful pattern. =]
Thank you so much!!
What would be the starting chain and rows for smaller pumpkins?
Chain any even number 🙂
When at stitches of 41 in each row the length is way over 9 inches and no where near 26 inches for 54 rows….so the numbers for rows and stitches do not match up….hmm m?
Hi! We probably crochet with different tension. The height will be shorter once the pumpkin is sewn. You can add more rows until it’s the size you are looking for.
I agree. My tube is 13″ in length and about 22″ when stuffed.
Hi, I am a bit confused. The pattern says “scTL” is this just the TL from the special stitches or do I single crochet before doing the TL stitch? Also is the bobble going around an hdc pole?
Hi! The TL indicates where you place the sc. The previous row is hdc. There is a bar on the back of the stitch (facing you after turning). Insert hook into this bar and work the sc 🙂 The bobble is worked into the top loops of the stitch
Oh, thank you! I came up with a different solution in the meantime but I am definitely going to try this.
Love this pattern. I’m working on my second. Doing a smaller one 20 chains. How many rows would you suggest making to finish off.
Rows 2 (sc) & 3 (hdc) both say to do the stitch in the back loop. But one side is front side and the other is back. Is that right do both rows in back loop?
Thanks
Hi! Yes, work in the back loop only for both rows 🙂