Mosaic Beanie Crochet Pattern – Easy Zig-Zag Mosaic Crochet Hat
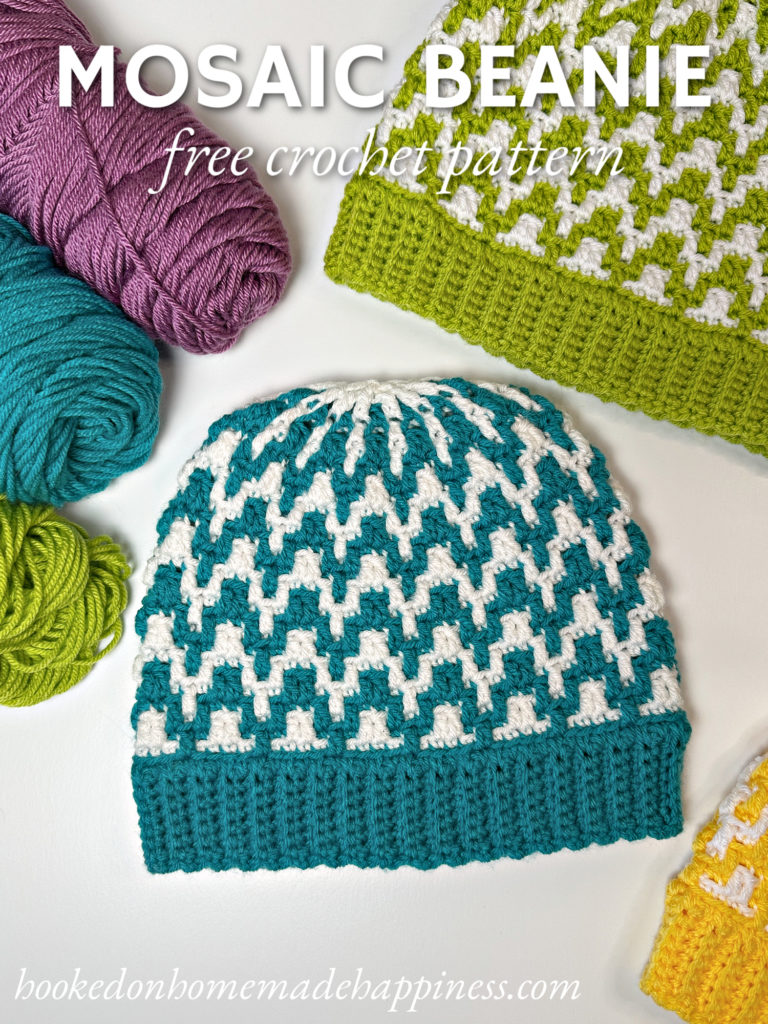
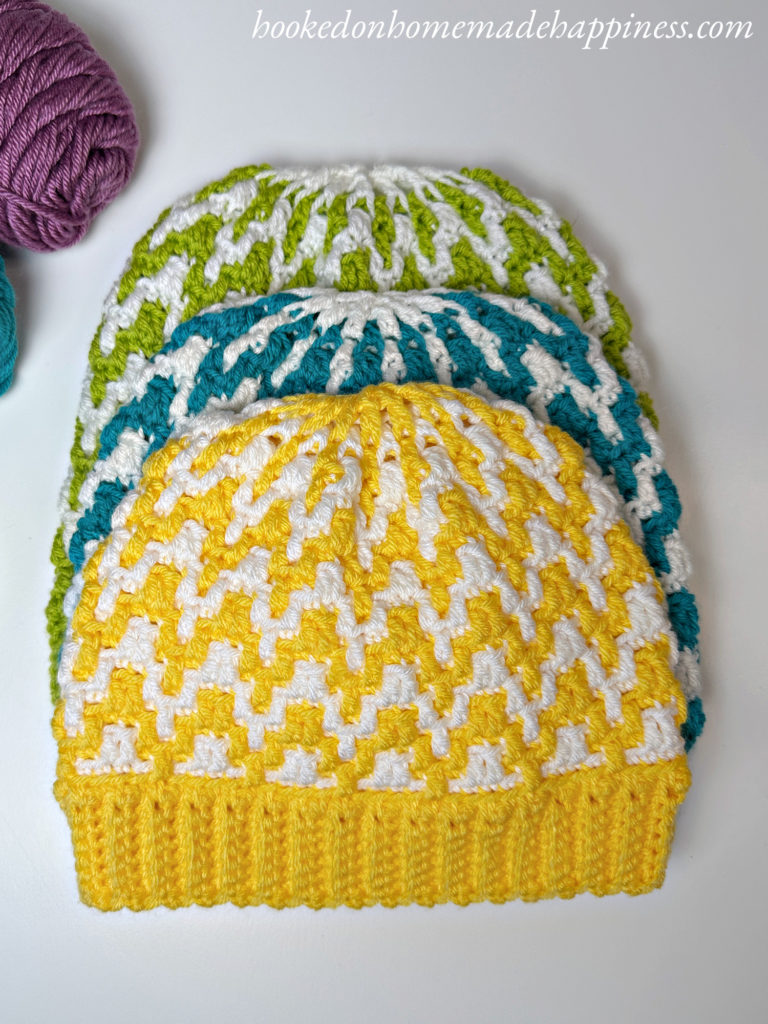
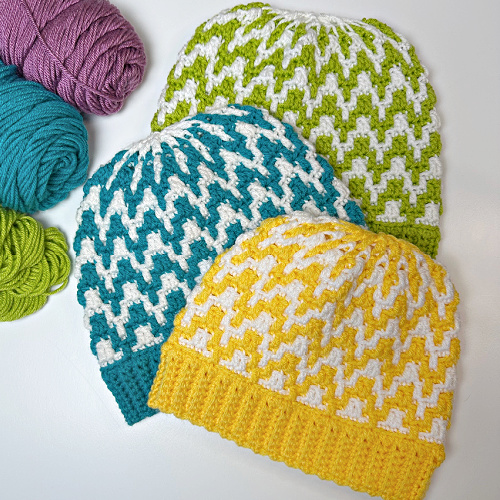
If you’ve been wanting to try mosaic crochet but felt intimidated, this Mosaic Beanie Crochet Pattern is the perfect place to start! It is designed to show just how approachable mosaic crochet can be. Using a simple 3-row repeat and working with only one color per round, you’ll create a beautiful zig-zag design that looks much more complicated than it really is.
Why You’ll Love This Pattern
- Easy introduction to mosaic crochet
- Simple 3-row repeat that’s easy to memorize
- No color changes within the row
- Creates a striking zig-zag mosaic design
- Great for confident beginners looking to learn a new technique
- Includes a full step-by-step video tutorial
- Perfect for donating through CAL for a Cause or making thoughtful handmade gifts
Materials
- Worsted weight yarn in two contrasting colors
- 5.0 mm (H) crochet hook
- Yarn needle
- Scissors
Crochet Along for a Cause
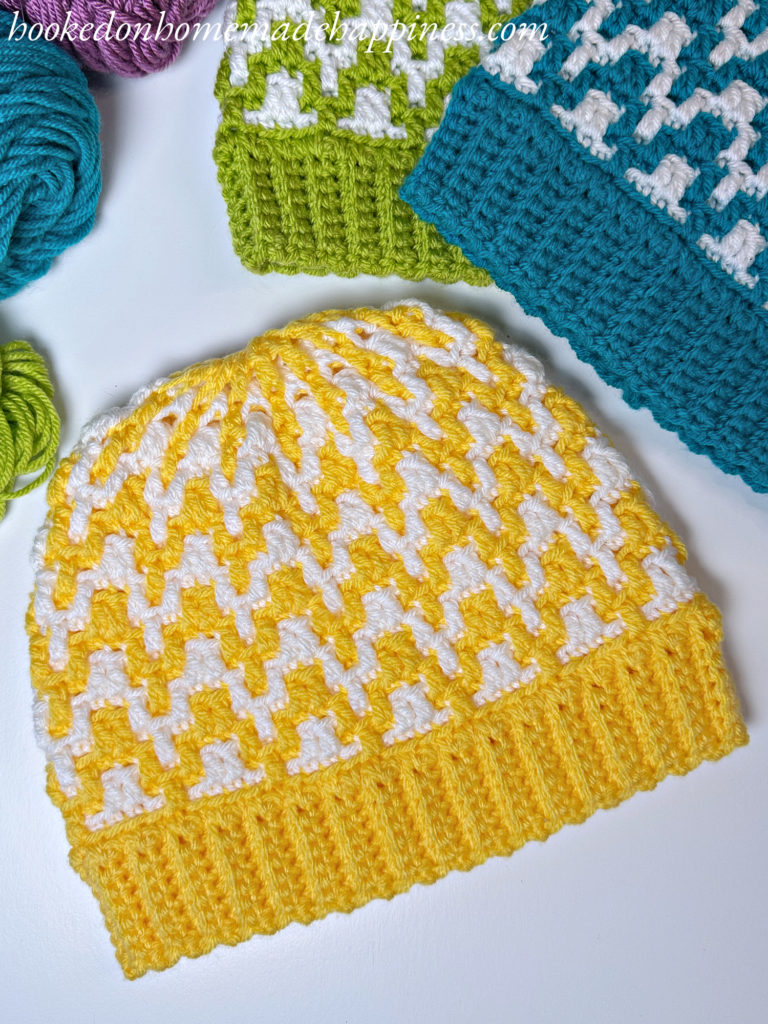
This pattern is part of the 2026 Crochet Along for a Cause — a special crochet along focused on creating handmade items for donating, gifting, and giving back to others. Throughout the crochet along, we’ll be revisiting favorite patterns with updated sizing, refreshed instructions, and new video tutorials.
Whether you’re making one beanie or several to donate, every stitch helps spread warmth and kindness.
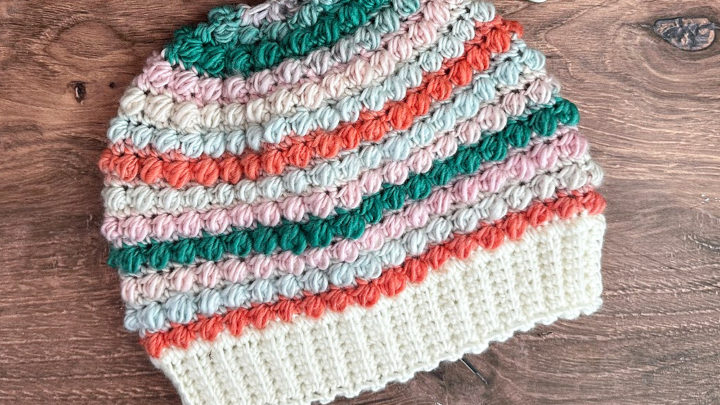
Making the Mosaic Beanie Crochet Pattern
Get the full pattern below or download the printable PDF for free HERE
PIN for later HERE
Add to your Ravelry Queue HERE
Materials
worsted weight acrylic yarn in 2 colors (I used Hobby Lobby I Love This Yarn)
H/5.0 mm hook
yarn needle
scissors
Level
intermediate
Pattern notes & Stitches to Know
ch – chain
dc – double crochet
rep – repeat
sc – single crochet
sl st – slip stich
st(s) – stitch(es)
t – turn
* * – work step in between asterisks
Special Stitches:
sc blo – single crochet back loop only
sc2tog blo – single crochet 2 together back loop only
ldc flo – long double crochet front loop only (work dc in row below previous row in flo)
ldc2tog flo – long double crochet 2 together front loop only
ldcflo scblo 2tog – long double crochet front loop only + sc blo 2 together
· written in US terms
· ch 1 does not count as sc or dc
· Pattern is written in 3 main parts: Ribbing, Body, and Crown
· Beanie is made from the bottom up starting with the ribbing.
· The body in made in joined rounds. Change color each round. Do not fasten off. Carry the yarn up each round.
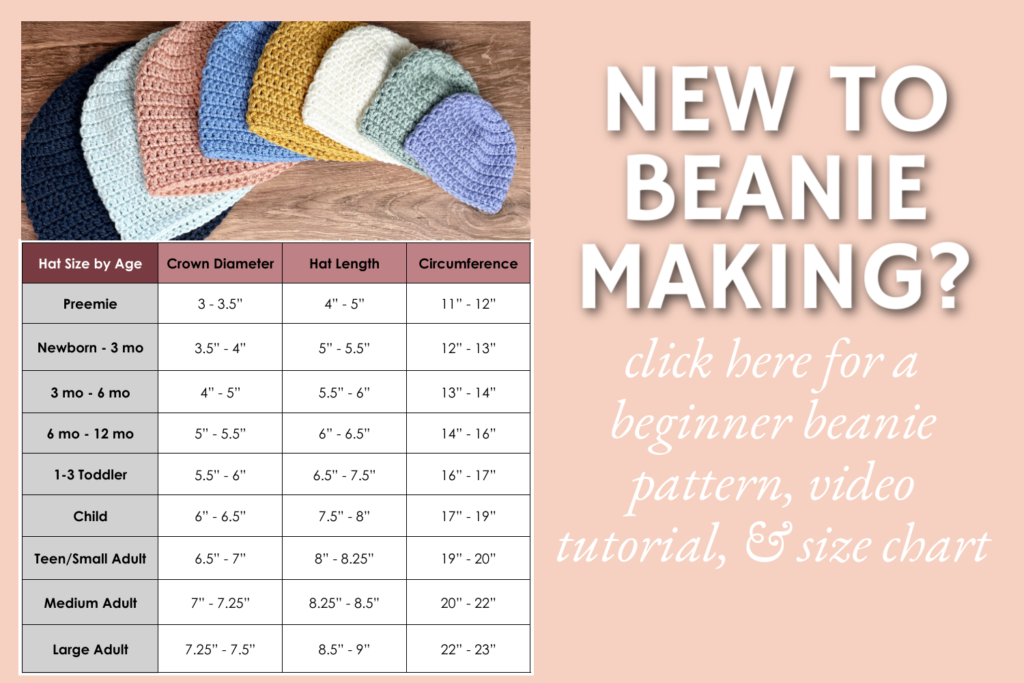
· Pattern is written in 6 sizes consecutively: (baby, toddler, child) (Teen, Med Adult, Lg Adult)
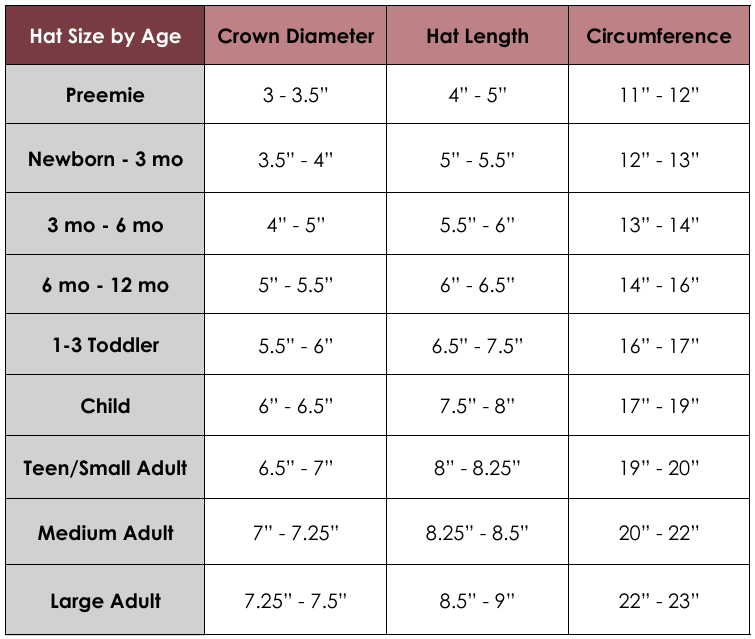
· Sizing is based on the chart below.
Watch the Tutorial
See how it’s done! This easy-to-follow video tutorial will walk you through each step of the pattern.
Pattern Support
Looking for pattern support or want to share your progress? Join our Crochet Community Facebook Group! It’s the perfect place to ask questions, get help, and connect with fellow makers.
CROCHET PATTERN WRITTEN INSTRUCTIONS
RIBBING
Starting with ribbing color
ch 9
Row 1: sc in 2nd ch and across (8 sc)
Row 2 – Row (55, 60, 65) (70, 75, 80): ch 1, t, sc in first st, sc blo in next 6, sc in last (8 sc)
Bring both short ends together. Sew the short ends together with a sl st. Do not fasten off. In the next round, work along the rough edge.
BODY
Round 1: ch 1, sc in the end of each row, join to first st with sl st ((55, 60, 65) (70, 75, 80) sc)
Change to contrasting color
Round 2: ch 1, sc blo in each st around, join to first st with sl st ((55, 60, 65) (70, 75, 80) sc)
Change back to first color – continue changing colors each round
Round 3: ch 1, sc blo in first 2 sts, ldc flo in next, *sc blo in 4 sts, ldc flo in next* rep from * to * around to last 2 sts, sc blo in last 2, join to first st with sl st ((55, 60, 65) (70, 75, 80))
Round 4: ch 1, ldc flo in first st, *sc blo in 3 sts, ldc flo in next 2 sts* rep from * to * around to last 4 sts, sc blo in next 3, ldc flo in last, join to first st with sl st ((55, 60, 65) (70, 75, 80))
Round 5: ch 1, sc blo in first st, *ldc flo in next, sc blo in next, ldc flo in next, sc blo in next 2* rep from * to * around to last 4, ldc flo in next, sc blo in next, ldc flo in next, sc blo in last, join to first st with sl st ((55, 60, 65) (70, 75, 80))
Repeat round 3 – 5 to Round (14, 17, 20) (23, 26, 26)
Round (15, 18, 21) (24, 27, 27): ch 1, sc blo in first 2 sts, ldc flo in next, *sc blo, sc2tog blo, sc blo, ldc flo in next* rep from * to * around to last 2, sc2tog blo, join to first st with sl st ((44, 48, 52) (56, 60, 64))
Round (16, 19, 22) (25, 28, 28): ch 1, ldc flo in first st, *skip sc, sc blo in dc, ldc2tog flo* rep from * to * around to last 2 stitches, sc2tog, join to first sc with sl st ((22, 24, 26) (28, 30, 32))
Round (17, 20, 23) (26, 29, 29): ch 1, sc blo in first st, ldc flo in dc, *sc blo in the 2tog, ldc flo in dc* rep from * to * around, join to first st with sl st ((22, 24, 26) (28, 30, 32))
Round (18, 21, 24) (27, 30, 30): ch 1, ldcflo scblo 2tog around, join to first st with sl st ((11, 12, 13) (14, 15, 16)
Round (19, 22, 25) (28, 31, 31): ch 1 ldc flo in each dc around, join to first st with sl st ((10, 11, 12) (13, 14, 15))
Fasten off. Leave a long end for sewing.
Weave the long end in and out of the top sts in the last round. Pull to cinch closed. Sew top closed. Weave in all the ends.
Looking for more patterns? Follow me on Facebook, Instagram, and Pinterest! Please share a pic of your finished product with me. I’d love to see it!





Thank you for sharing your patterns. Can’t wait to make #12.
Thank you!!
Thank you so much for the accompanying video for this hat. For the first time ever, I have learnt how to do foundation crochet instead of a chain start
Yay! Awesome!
Just discovered all the amazing beanie patterns and the Crochet for a Cause! What a terrific idea— will this be happening for summer 2023 too? Hope so and would love to join!
Hi! Thank you! Yes, it will 🙂
Pattern says can increase size in multiples of 5 so I was making my hat 85 instead of 80 but the pattern does not work out.
On round 3, I should have ended with the last 2sc in BLO but I only had 1 spot left so can only do 1sc.
I think needs to be even number stitches divisible of 5 so adding just 5 from 80 to 85 doesn’t work. I would need to be at 90.
Bummer now have to frog.
Unless I am doing something wrong but I checked multiple times.
I found an error in round 3. I had to watch your video to see why I couldn’t figure it out. You have 2 sc back loop only when it should be 4 sc back loop only, then the ldc flo.
Hi! The repeat starts and ends with 2 sc. So when it’s repeated there are 4 in a row.
I am really struggling with this pattern. i am fine all through row 4, when i go to row 5 i always have an issue. ROW 4 IS 3 singles followed by 2 long doulbes. But row 5 is one single and then one long doulbe. However, doing this my long double ended up on top of row 4 double and i do not have a front stich to do it in. What am i doing wrong
Hi! I have a video tutorial for this stitch 🙂 https://youtu.be/jWio75YwhG0?si=drAuGisU7rqeYpjW
Hi Breann,
When comparing your video with your written instructions above, I see that you have an error in the written text.
Existing text:
Round 5: ch 1, *sc blo, ldc flo in next, sc blo in next, ldc flo in next, sc blo in next* repeat from * to * around, join to first sc with sl st (80)
Should be changed to:
Round 5: ch 1, *sc blo, ldc flo in next, sc blo in next, ldc flo in next, sc blo in NEXT 2 STITCHES* repeat from * to * around, join to first sc with sl st (80)
This would explain Danira’s problem with row 5.
Hi! But that would make for 3 sc blo in a row, because you have 1 at the beginning of the repeat and 2 at the end 🙂
I believe Round 5 has an error.
It should read… ch 1, *sc blo, ldc flo in next, sc blo in next, ldc flo in next, sc blo in NEXT 2 STITCHES* repeat from * to * around, join to first sc with sl st (80)
No error 🙂
Any tips for reducing with extended sizing? I have 85 stitches around and the base pattern looks great but the decreasing seems a little rapid for it.
Also can you explain the “sc2tog” stitch? I’m not familiar with that one and didn’t see it in the video.
Thank you for this pattern it is gorgeous I’m super excited for how it’ll turn out.
Hi! To do a sc2tog – insert hook into next stitch, pull up a loop, insert hook into next stitch, pull up a loop, yarn over, pull through all loops on hook.
This will combine 2 stitches into and decrease the number of stitches around. If you would like it longer, go ahead and continue repeating the mosaic crochet stitch until it’s more the length you are looking for 🙂
Pretty sure there’s an error in row 5. I had to watch the video tutorial to figure out that it goes sc DC sc DC sc sc, not just alternating sc DC.
Oops, my mistake, I missed the two sc at the repeat. Thanks, Diana
Disregard my last submitted comment. I was reading pattern wrong. I was doing sc sc ldc repeating ..I wasnt putting the 4sc together.
Glad you figured it out! 🙂
thanks for the awesome looking hat pattern!!
am wondering how many stitches i would need around the bottom if i wanted it for a toddler, a 1 1/2 year old ? im assuming the 80 count is for an adult
Hi! To adjust the circumference of the beanie, you will need to take out rows of ribbing. The number of rows needs to be a multiple of 5. Make your ribbing about 16″ long (while also keeping it a multiple of 5. Then continue the repeat until it’s about 6″ before starting the decreases.
I have a chart in this post (https://www.hookedonhomemadehappiness.com/how-to-crochet-a-basic-beanie-for-beginners/) to help with sizing.