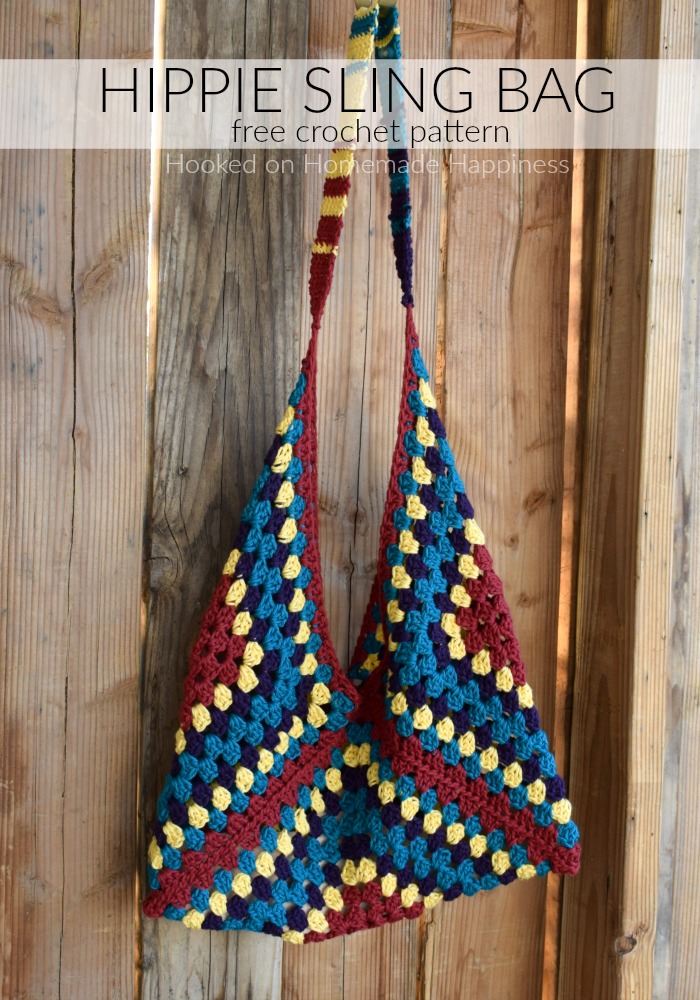
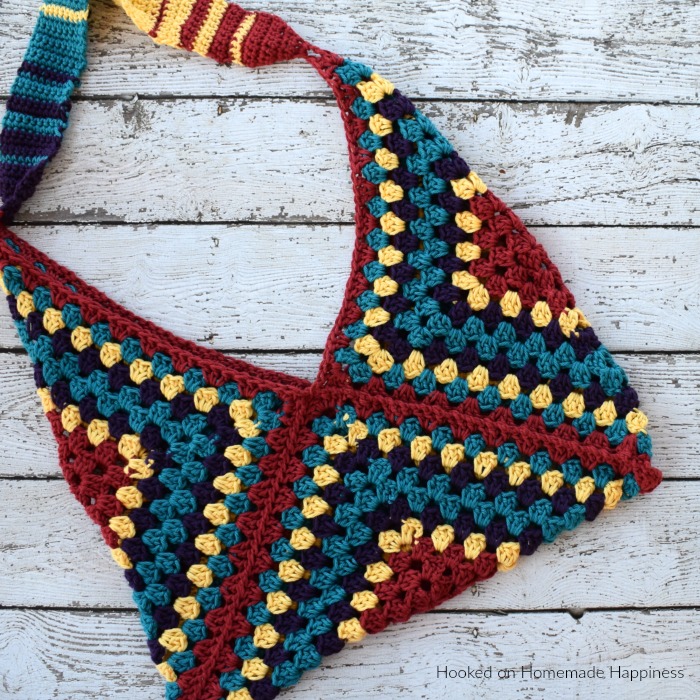
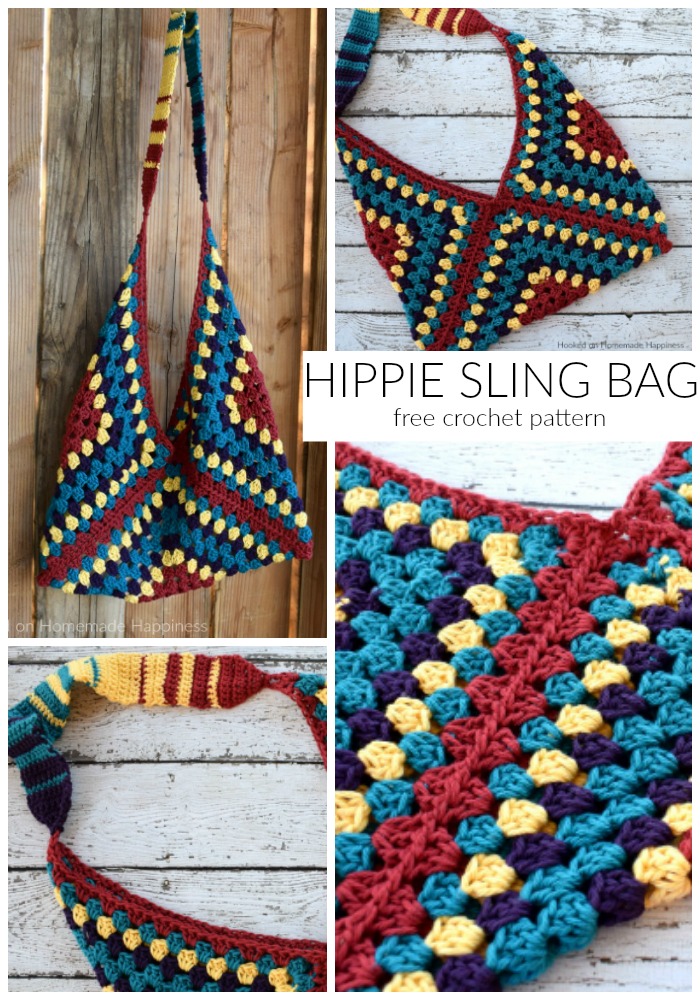
Hippie Sling Crochet Bag Pattern
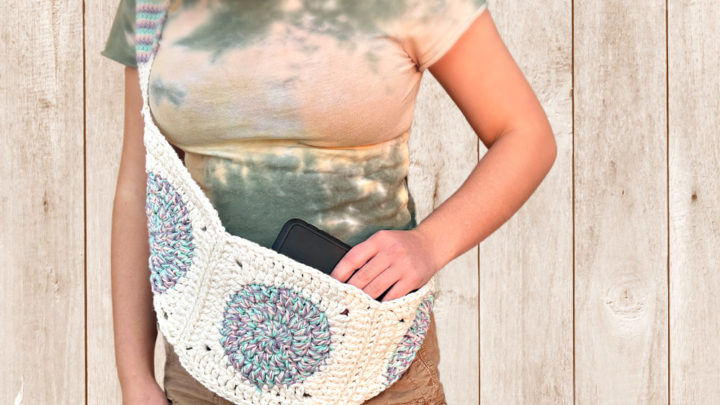
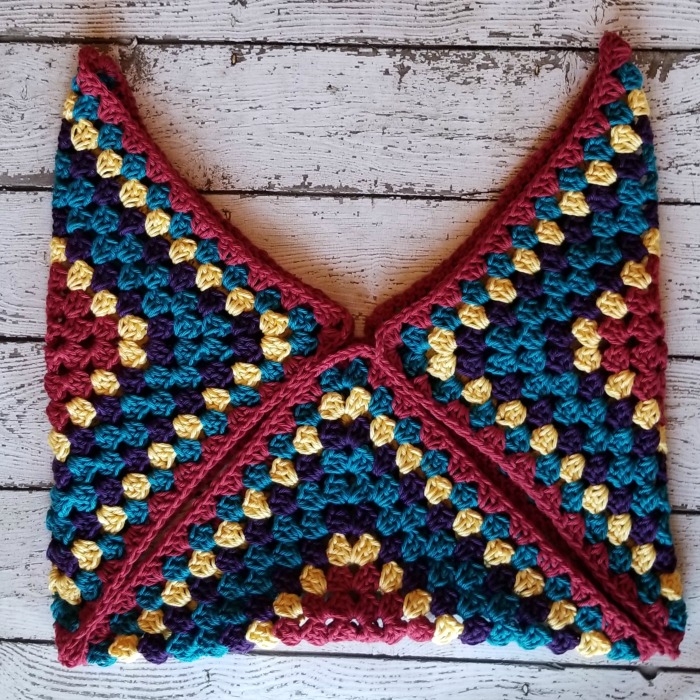
Looking for a fun, laid-back crochet project with tons of personality? This Hippie Sling Bag is the perfect mix of simple construction and creative freedom. Made with just three granny squares, this bag comes together quickly and lets you play with color in a way that’s totally your own.
Whether you go bold and bright or soft and neutral, no two bags will ever look the same—and that’s exactly the charm.
Purchase the ad-free, printable PDF for easy printing.
✨ Why You’ll Love This Pattern
- Beginner-friendly construction using classic granny squares
- Quick project—perfect for weekend crocheting
- Endless color combinations for a totally unique look
- Lightweight and functional for everyday use
- Minimal shaping and simple assembly
🧶 Pattern Details
- Skill Level: Easy
- Yarn: Worsted weight cotton (I used I Love This Cotton)
- Hook: H/5.0 mm
- Construction: 3 granny squares sewn together + strap added
- Style: Crossbody / sling bag
🌈 Customize Your Bag
This is where the fun really begins! You can:
- Use scrap yarn for a colorful, boho vibe
- Stick to neutrals for a modern look
- Try a gradient or ombré effect
- Make each square a different color—or keep them all the same
There’s truly no wrong way to make this bag. Let your creativity take over!
💡 Tips for Success
- Use cotton yarn for durability and structure
- Block your granny squares before seaming for a cleaner finish
- Adjust strap length to fit your preferred style (crossbody or shoulder bag)
- Add a lining if you want extra sturdiness or to keep small items secure
FAQ
🧡 Ready to Crochet?
Grab your favorite cotton yarn, pick out your colors, and start stitching your one-of-a-kind Hippie Sling Bag. This is one of those projects that’s just as fun to make as it is to wear!
Making the Hippie Sling Crochet Bag Pattern
Get the full free pattern below or purchase the ad-free, printable PDF
Materials
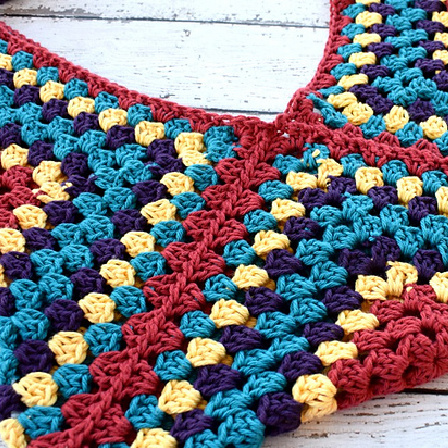
Worsted weight cotton or acrylic yarn (I used I Love This Cotton Yarn in Burnt Sienna, Curry, Purple, and Deep Teal)
H/5.0 mm hook
Yarn needle
scissors
Level
Easy+
Pattern notes & stitches to know
Sl st – slip stich
Ch – chain
Dc – double crochet
Sc – single crochet
sc2tog – single crochet 2 together
Approximate Finished Size:
17” x 27” (including strap)
Colors are noted as –
Color A: Burnt Sienna
Color B: Curry
Color C: Purple
Color D: Deep Teal
Pattern Support
Looking for pattern support or want to share your progress? Join our Crochet Community Facebook Group! It’s the perfect place to ask questions, get help, and connect with fellow makers.
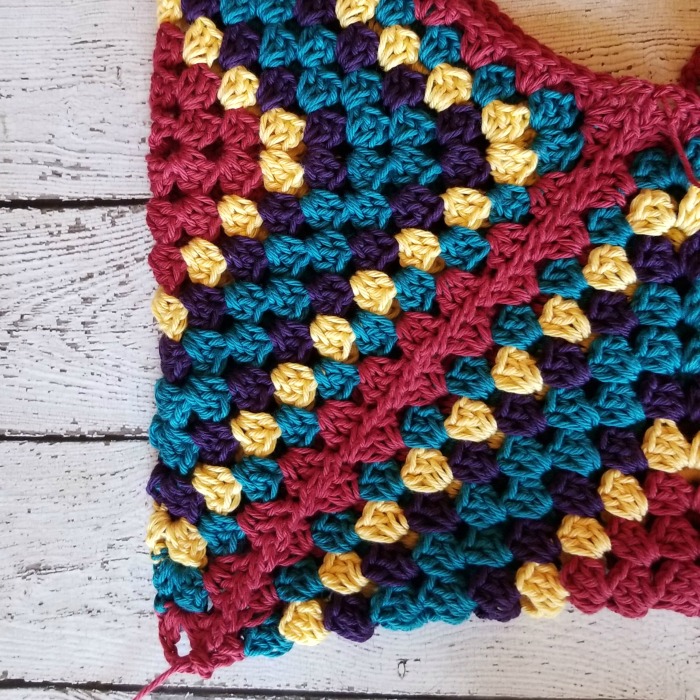
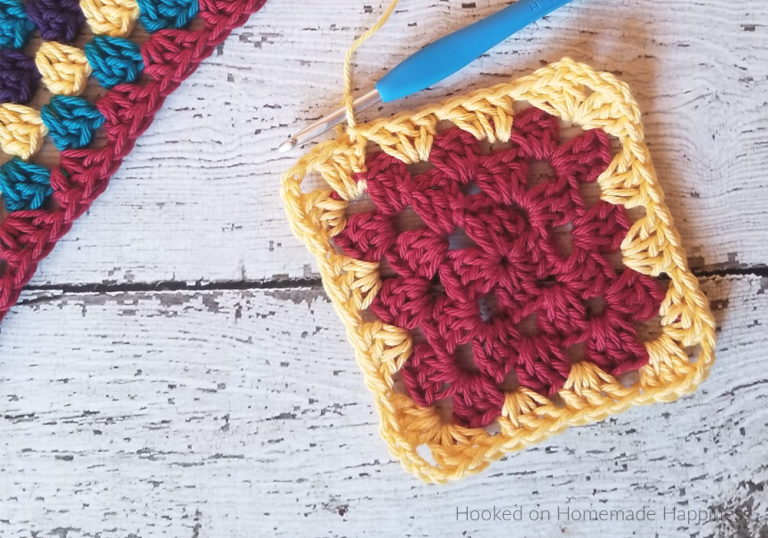
GRANNY SQUARE (make 3)
For a detailed photo tutorial of a basic granny square click HERE
Starting with color A, ch 4, join to first ch with sl st to make a loop
Round 1: ch 3 (counts as dc), working in the ring, 2 dc, ch 3, 3 dc, ch 3, 3 dc, ch 3, 3 dc, ch 3, join to first ch 3 with sl st (12 dc)
Round 2: sl st in next 2 stitches so you’re working in the ch 3 space, (ch 3, 2 dc, ch 3, 3 dc) all in ch 3 space, *(3 dc, ch 3, 3 dc) all in next ch 3 space*, repeat from * to * around, join to first ch 3 with sl st (24 dc)
Round 3: sl st in next 2 stitches so you’re working in the first ch 3 space, (ch 3, 2 dc, ch 3, 3 dc) all in ch 3 space, 3 dc in the space between the 3 dc groups from previous row, *(3 dc, ch 3, 3 dc) all in ch 3 space, 3 dc in between the 3 dc groups from the previous row* repeat from * to * around, join to first ch 3 with sl st (36 dc)
NOTE: In the next round there is a color change
Round 4: sl st over the next 2 stitches, insert hook in ch 3 space, pull up color B, working in the first ch 3 space, (ch 3, 2 dc, ch 3, 3 dc) all in ch 3 space, 3 dc in each space between the 3 dc groups from the previous row across to the next ch 3 space, *(3 dc, ch 3, 3 dc) in ch 3 space, dc in each space between the 3 dc groups from the previous row across to the next ch 3 space* repeat from * to * around, join to first ch 3 with sl st (48 dc)
Repeat row 4 to row 11
The color changes are
Round 5: color C
Round 6: color D
Round 7: color D
Round 8: color C
Round 9: color B
Round 10: color D
Round 11: color A
Fasten off, weave in all your ends
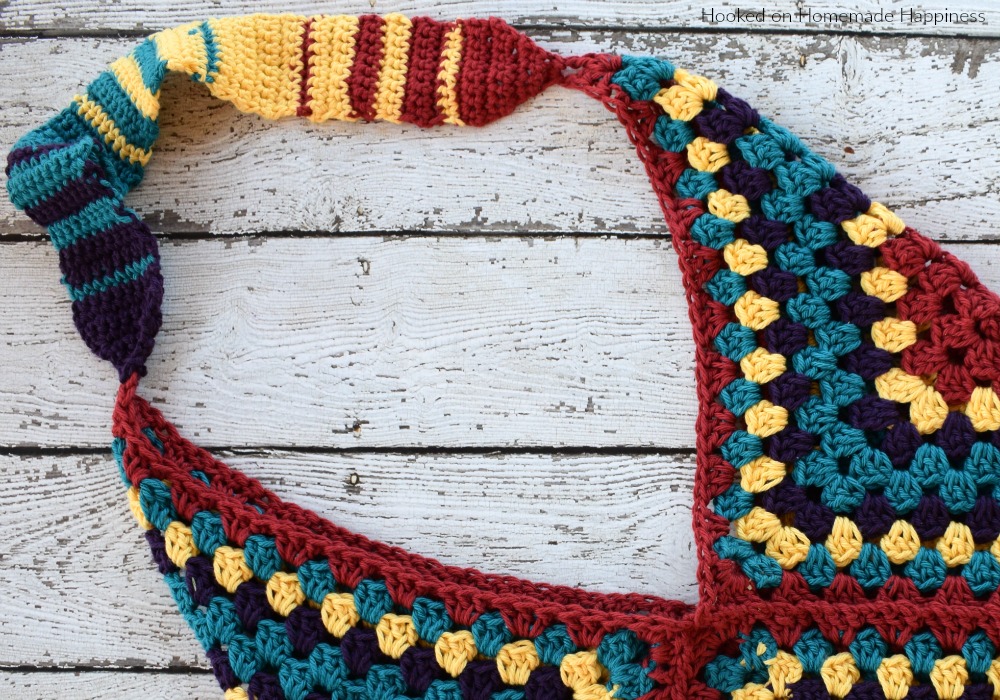
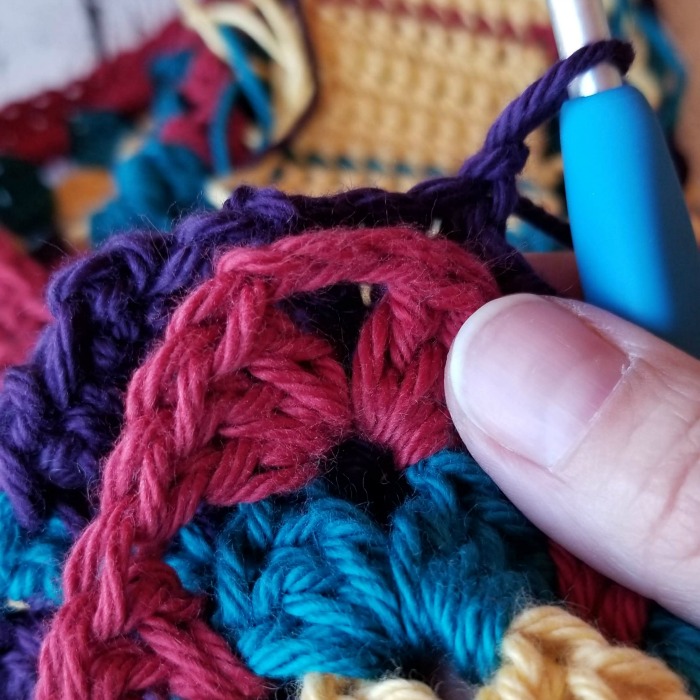
CONSTRUCTION
Fold your squares diagonal and lay them out like this
Sew the squares together using a piece of color A yarn 5 times the length of the diagonal edge, and your yarn needle.
Join color A in the corner ch. I sewed in the chs farthest from the edge I was sewing to have less of a gap on the top.
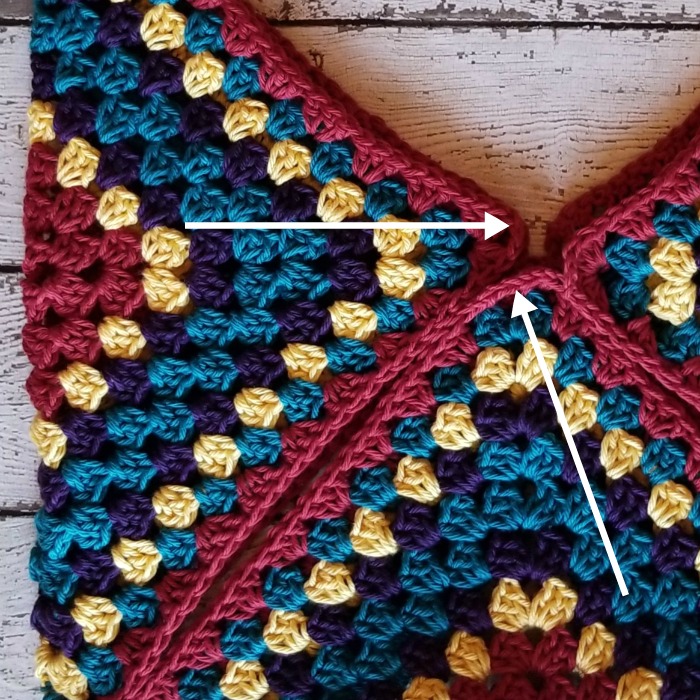
Whip stitch down the diagonal edge to the bottom corner. Do not fasten off.
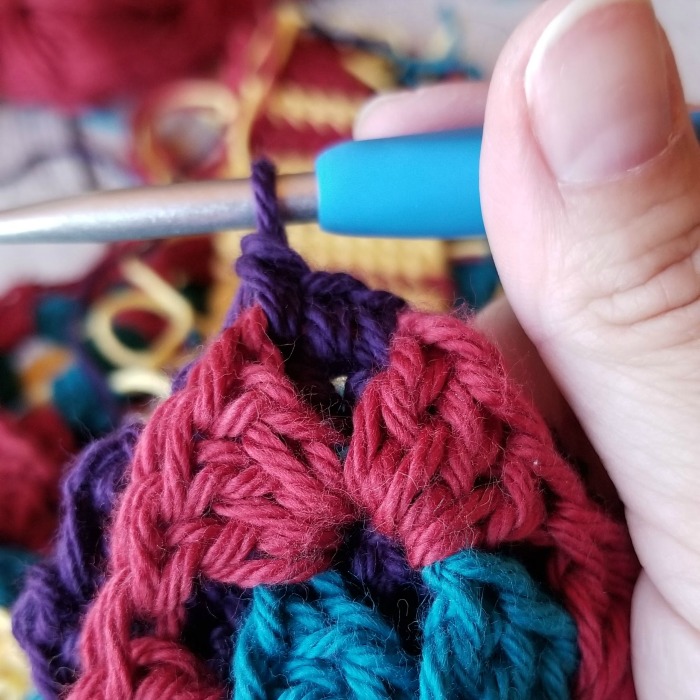
Repeat on the other diagonal edge on the same side.
Turn the bag over and continue sewing along the back to the top center.
Pick up the yarn from the other side and continue sewing on the back to the top center.
Fasten off, weave in the ends.
STRAP
The striping on the strap is a bit time consuming, but could be changed to whatever you prefer 🙂
Join yarn Color A to top ch 3 corner

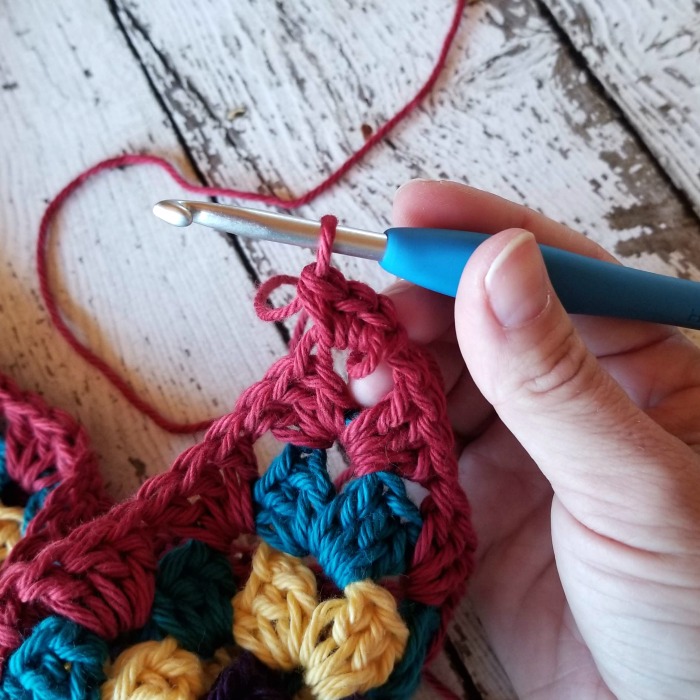
Row 1: Ch 1, 3 sc in ch 3 space (3 sc)
Row 2: ch 1, turn, 2 sc in first stitch, sc in next, 2 sc in last (5 sc)
Row 3: ch 1, turn, 2 sc in first stitch, sc in next 3 stitches, 2 sc in last (7 sc)
Row 4: ch 1, turn, 2 sc in first stitch, sc in next 5 stitches, 2 sc in last (9 sc)
Row 5: ch 1, turn, sc in each stitch across (9 sc)
Row 6 & 7: repeat row 5
(continue repeating row 5)
Row 8: color B
Row 9 – 11: color A
Row 12 & 13: color B
Row 14 & 15: color A
Row 16 – 18: color B
Row 19: color A
Row 20 – 26: color B
Row 27: color D
Row 28 – 30: color B
Row 31 – 32: color D
Row 33 – 34: color B
Row 35 – 37: color D
Row 38: color B
Row 39 – 45: color D
Row 46: color C
Row 47 – 49: color D
Row 50 – 51: color C
Row 52 – 53: color D
Row 54 – 56: color C
Row 57: color D
Row 58 – 60: color C
Continuing in color C
Row 61: ch 1, turn, sc2tog, sc in next 5 stitches, sc2tog (7 sc)
Row 62: ch 1, turn, sc2tog, sc in next 3 stitches, sc2tog (5 sc)
Row 63: ch 1, turn, sc2tog, sc in next, sc2tog (3 sc)
In the next row bring your strap (make sure it’s not twisted) to the opposite ch 3 corner of the bag and sc the strap to the bag
Row 64: ch 1, turn, inserting hook into the ch 3 space and stitch, sc in each stitch across (3 sc)
Fasten off, weave in all your ends.
And you’re done! I hope you love this fun bag!!
Looking for more patterns? Follow me on Facebook, Instagram, and Pinterest! Please share a pic of your finished product with me. I’d love to see it!


Just finished my bag, I used the exact same yarn and colors. The only thing I did different was to go around each square with single crochet before sewing them together so the whip stitch had a base. I also did single crochet all around the strap after it was done to give it some reinforcement and prevent stretch where the strap joins the actual bag. The pattern was really easy and came together quickly. Thanks.
That’s a great idea! I’m glad you liked the pattern 🙂
can you tell me is the square very tight or loose? I think I don’t have the right hook. my first starting square was pretty floppy?
Mine turned out fine following the pattern, but I suggest going down a hook size if yours is loose. I also made two of these bags, on my second one, I modified the corners a bit. On the start of your first DC corner, ch2 instead of 3 for that first DC. Hope this helps.
Such a beautiful easy to follow pattern!
Thank you for sharing this with us x
Thank you 🙂
Hi I would like to ask, for the Rep * to * part of round 4, are we supposed to 3dc each space between the 3dc groups from the previous row or just do a dc? I tried doing 1 dc but it made my square uneven
3 dc 🙂
How much yarn did you use to make this bag?
Loved this project! Thanks!