(CAL) Southwest Granny Square Blanket Crochet Pattern Part 13
We’re all done with squares and ready to start sewing! (I’m gonna be honest here…. this is the tedious part. But it’s so worth it in the end!) Thank you sticking with me for this CAL for the Southwest Granny Square Blanket Crochet Pattern here in Part 13! You can find the full materials list HERE, Part 1 HERE. part 2 HERE, part 3 HERE, part 4 HERE, part 5 HERE, part 6 HERE, part 7 HERE, part 8 HERE, part 9 HERE, part 10 HERE, and part 11 HERE, and part 12 HERE.

Be sure to join my Facebook Group to get the latest updates, share your progress with fellow crocheters, and ask questions!
Southwest Granny Square Blanket Crochet Pattern
-Get part 13 of the pattern below or if you would prefer to have access to the entire pattern at once, I have a inexpensive, clearly formatted, PDF instant download available in my Etsy Shop or Ravelry Shop.
-PIN for Later HERE
-Add to your Ravelry Queue HERE
Materials
(materials list is just for this week, find the full materials list HERE)
Red Heart Soft Essentials in Cream, Peony, Navy, and Minty
Scissors
Yarn needle
Level
Intermediate
SEWING
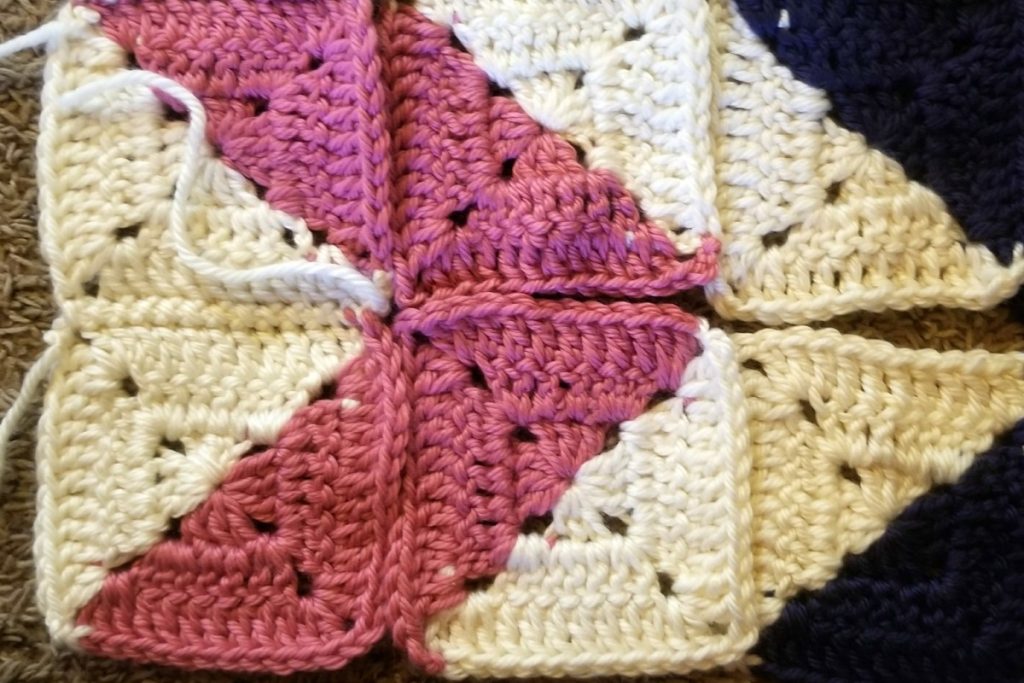
Once all your squares are made and blocked, arrange them like so:
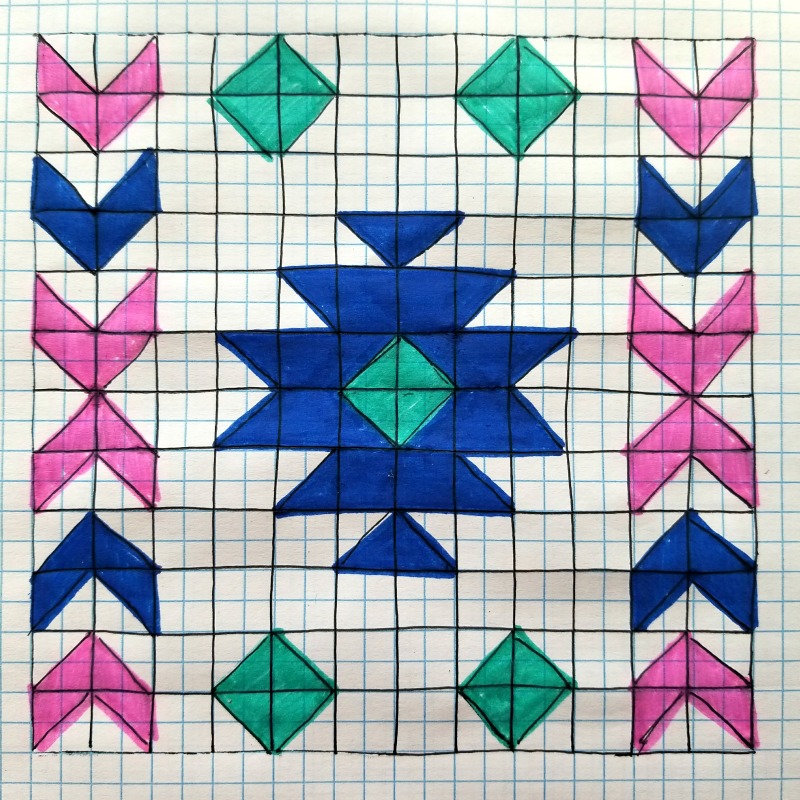
For the graph above, each black outlined square is one granny square
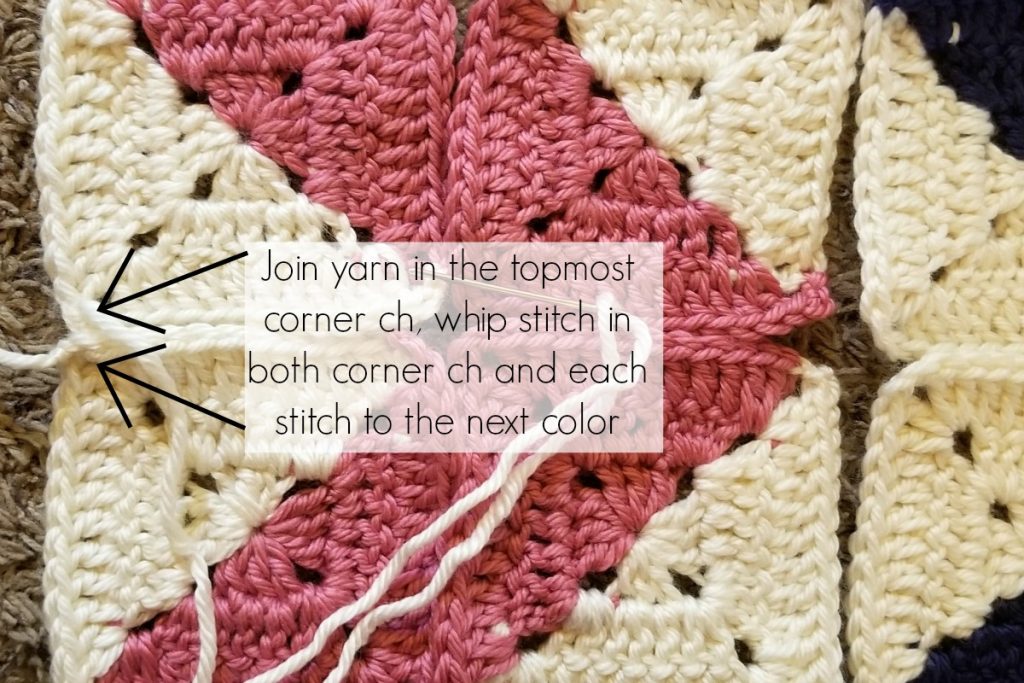
When sewing the squares, I used a whip stitch and I changed the joining color to match the squares I was joining to make the blanket look as seamless as possible. There are a lot of ends to weave in, but the seamless look it very much worth it!
At some points there will be squares with two different colors next to each other. I just used the cream to sew these squares.
After setting out all my squares I sewed down all the rows vertically and the across horizontally.
Cut a long piece of yarn (no longer than 48” – otherwise it will easily get tangled)
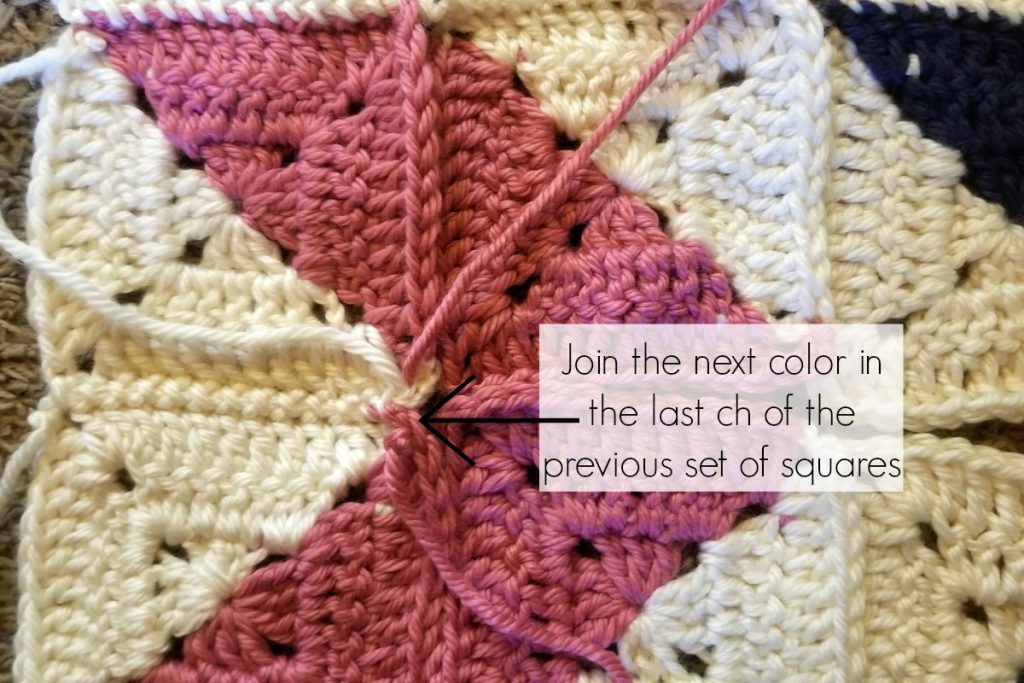
With your yarn needle, join yarn in the topmost ch of the first 2 squares. Using a whip stich sew the squares together. Continue until you reach a different color, then fasten off
Join the next color in the last ch of the previous squares, then continue to whipstitch the squares together
And that’s it for this week! Next week is the last week and we’ll weave in all our ends and add a simple border!
Looking for more patterns? Follow me on Facebook, Instagram, and Pinterest! Please share a pic of your finished product with me. I’d love to see it!