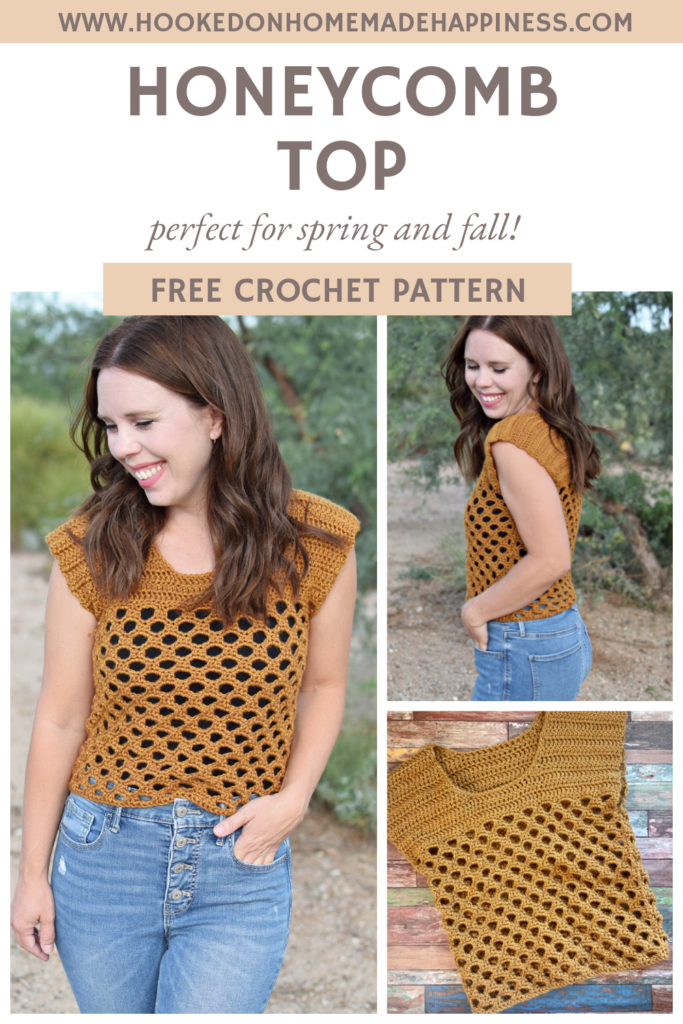
Honeycomb Top Crochet Pattern
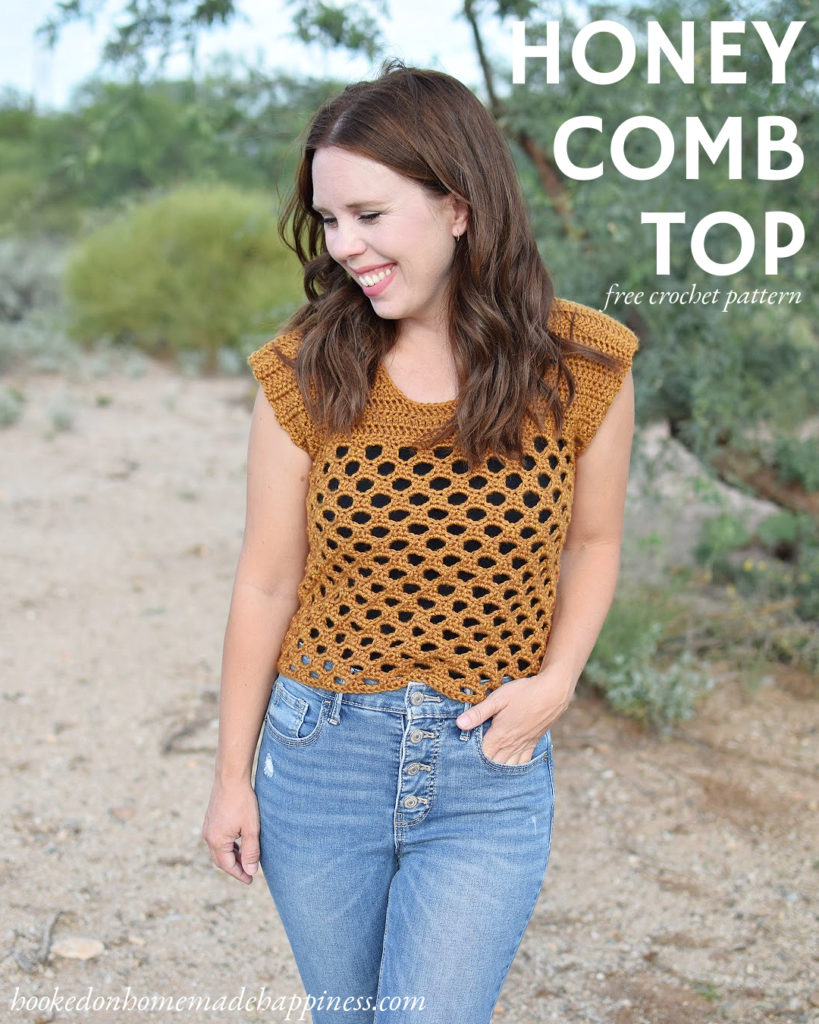
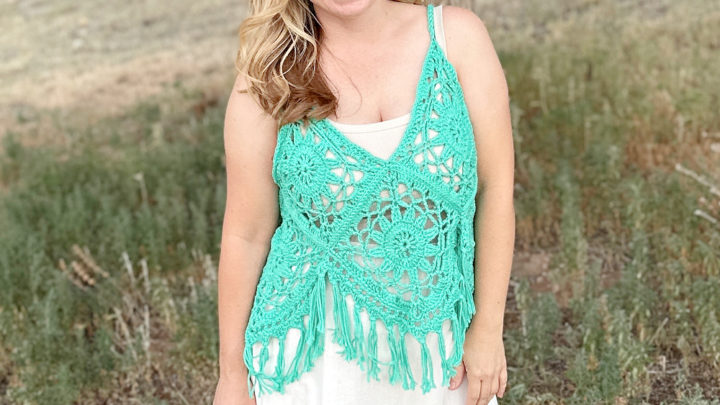
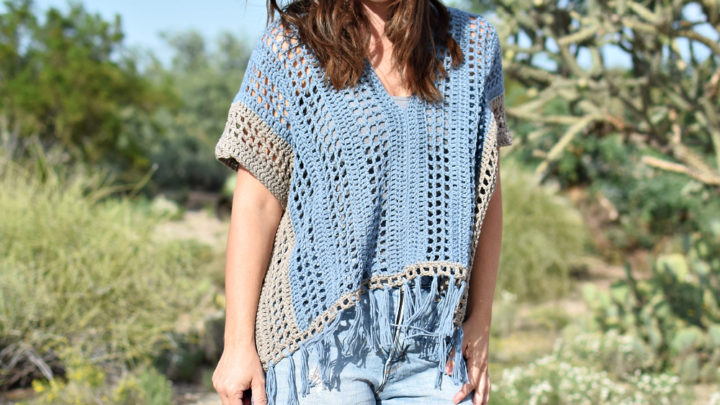
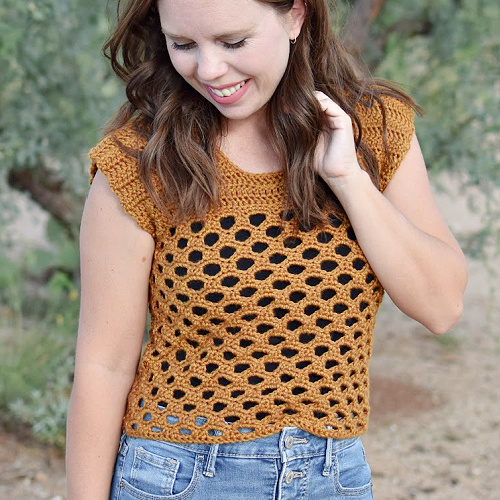
Light, breathable, and full of beautiful texture — the Honeycomb Top Crochet Pattern is the perfect project for warm weather. This easy-to-make top features the striking honeycomb stitch, which creates a fabric that is open and airy while still feeling sturdy and structured.
With simple construction and minimal shaping, this pattern is great for confident beginners and experienced crocheters. The top is made from two panels that are sewn together, making it an easy and relaxing project you can crochet while watching your favorite show or listening to a podcast.
Whether you wear it layered over a tank, swimsuit, or bralette, this honeycomb stitch top adds handmade charm to any spring or summer outfit.
Purchase the ad-free, printable PDF for easy printing.
Why You’ll Love This Pattern
- Beautiful honeycomb stitch texture
- Light and breathable — perfect for warm weather
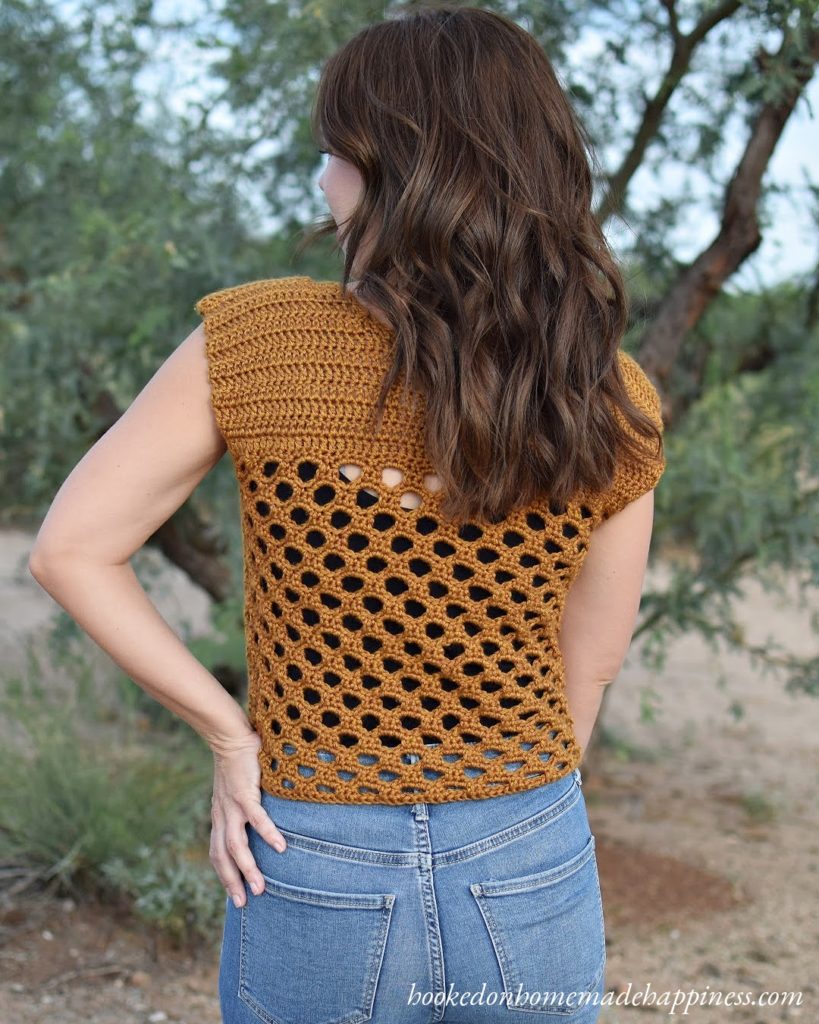
- Simple construction with two panels
- Minimal seaming
- Easy to customize the length
- Full step-by-step stitch tutorial on YouTube
Pattern Details
- Skill Level: intermediate
- Hook: H/5.0 mm crochet hook
- Yarn Weight: Worsted Weight (#4)
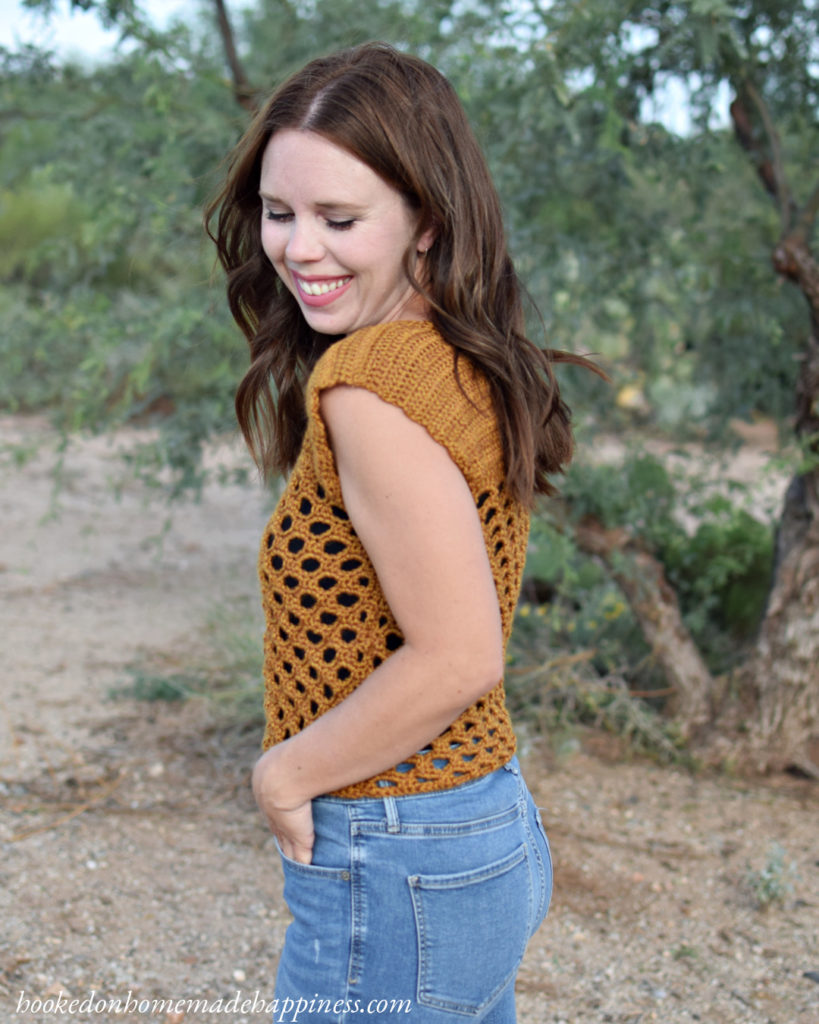
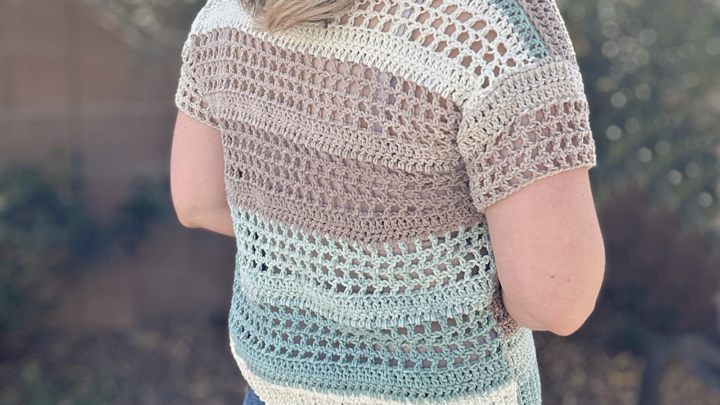
- Construction: Two panels sewn together at the sides and shoulders
- Stitches Used: Honeycomb stitch and double crochet
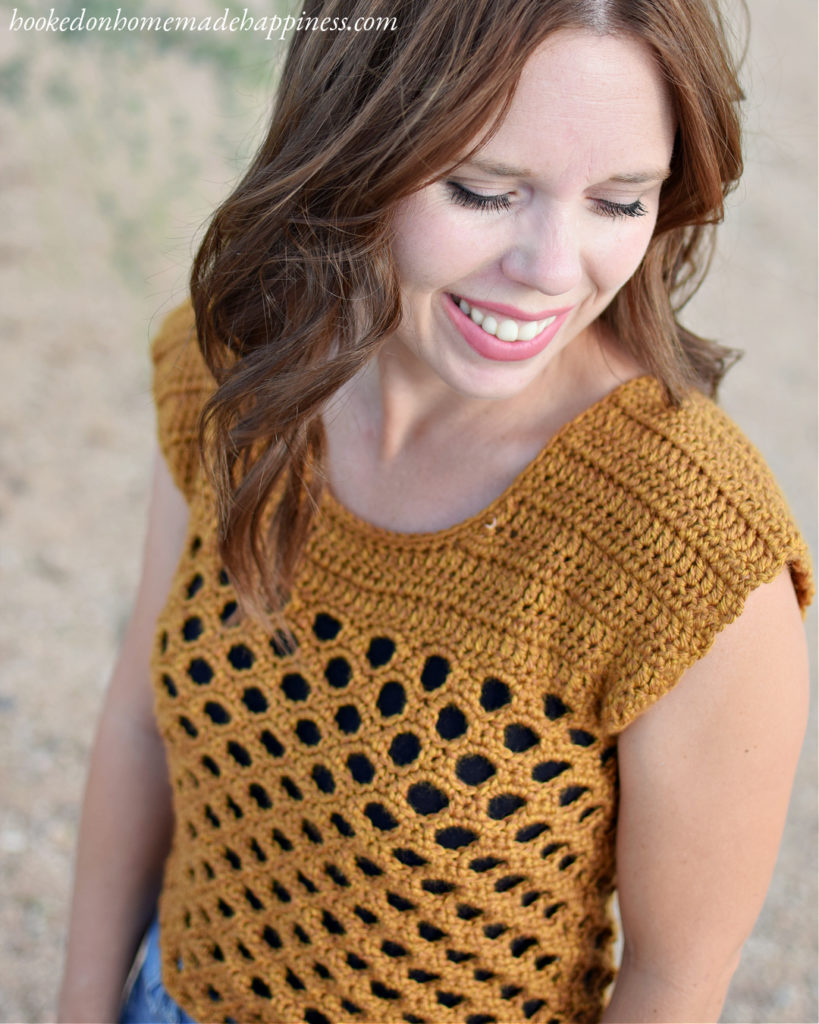
The honeycomb stitch creates a unique textured fabric with a light, open feel. It provides great airflow for warm weather while still giving the top enough structure to hold its shape.
The neckline and finishing rows use double crochet, which creates a clean and simple edge that complements the textured body of the top.
Yarn Information
This pattern uses worsted weight yarn, which makes it easy to find a yarn you love from your stash or local yarn shop.
For warm-weather garments, cotton and cotton blends work especially well because they are breathable and comfortable to wear. However, acrylic or acrylic blends can also work nicely depending on the look and feel you prefer.
Choose a yarn with good stitch definition to really highlight the honeycomb texture.
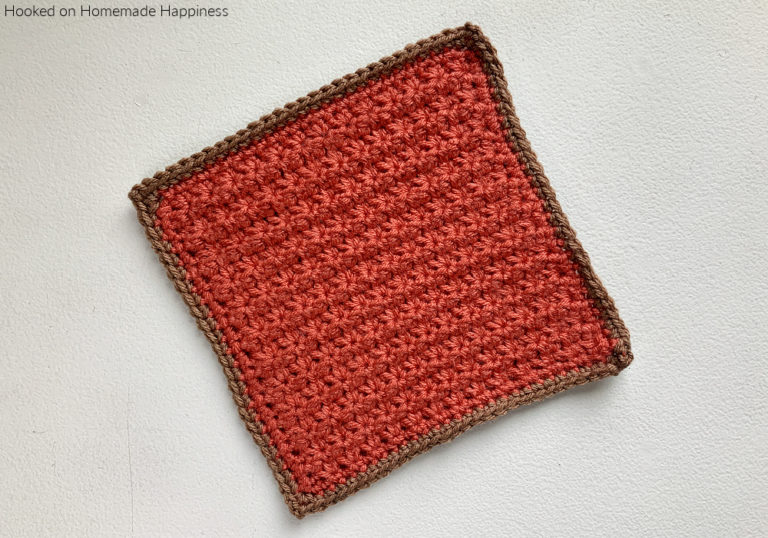
Honeycomb Stitch
The star of this pattern is the honeycomb stitch, which creates a textured pattern that resembles a honeycomb grid. It’s an easy stitch combination that forms a repeating pattern, making it relaxing and rhythmic to crochet.
Even though the fabric has an open look, the stitch structure keeps it sturdy enough for garments.
If you’ve never tried the honeycomb stitch before, don’t worry! A full video tutorial is available to guide you step-by-step.
FAQ
Ready to Crochet?
Scroll down to get the full Honeycomb Top Crochet Pattern and start crocheting your new favorite warm-weather top.
Don’t forget to check out the YouTube tutorial if you’d like extra help with the honeycomb stitch! 🧶
Making the Honeycomb Crochet Top Pattern
Get the full free pattern below or purchase the ad-free, printable PDF
Materials
Lion Brand Heartland in Bryce Canyon (any worsted weight acrylic yarn) – 2 skeins XS/S, 3 skeins M/L, 4 skeins XL/2X, 5 skeins 3X
H/5.0 mm hook
yarn needle
scissors
Level
intermediate
Pattern notes & stitches to know
fsc – foundation sc >>VIDEO TUTORIAL<<
ch – chain
sc – single crochet
hdc – half double crochet
dc – double crochet
tr – treble crochet
dc2tog – double crochet 2 together
dc3tog – double crochet 3 together
rs – right side
ws – wrong side
· Written in US terms
· ch 1 does not count as sc
· ch 5 counts as tr + ch 2
· This top is made with 2 panels sewn together
Sizes:
XS (S, M, L) (XL, 2X, 3X) – The pattern is written in these sizes consecutively. Example, when the pattern gives the end of the row count as (56 (71, 86, 101) (116, 131, 146) sc), the 56 is for XS, 71 is S, 86 is M, 101 is L, 116 is XL, 131 is 2X, 146 is 3X.
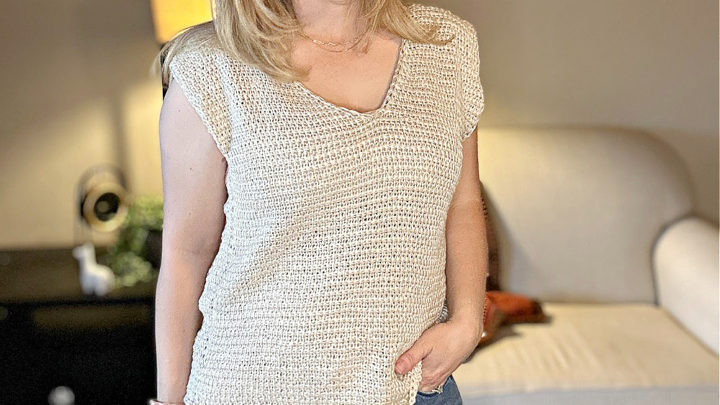
Close fitting with zero ease.
Approximate Finished Size:
Bust: XS (30”) S (34”) M (38”) L (42”) XL (46”) 2X (50”) 3X (54”)
Length: XS (18”) S (19”) M (22”) L (23”) XL (26”) 2X (27”) 3X (30”)
Armhole: XS (8.5”) S (9”) M (9.5”) L (10”) XL (10.5”) 2X (11”) 3X (11.5”)
Size small pictured. I’m 5’0″.
Gauge: 15 dc x 7 rows = 4” x 4”

Watch the Stitch Tutorial
See how it’s done! This easy-to-follow video tutorial will walk you through each step of the stitch.
Pattern Support
Looking for pattern support or want to share your progress? Join our Crochet Community Facebook Group! It’s the perfect place to ask questions, get help, and connect with fellow makers.
CROCHET PATTERN WRITTEN INSTRUCTIONS
FRONT
ch 2
Row 1 (rs): starting in 2nd ch from the hook fsc 56 (71, 86, 101) (116, 131, 146) (56 (71, 86, 101) (116, 131, 146) sc)
Row 2 (ws): ch 1, turn, sc in first 2 stitches, *ch 5, skip 2 stitches, sc in next 3* repeat from * to * across to last 4 stitches, ch 5, skip 2 stitches, sc in last 2 (34 (43, 52, 61) (70, 79, 88) sc)
Row 3 (rs): ch 1, turn, sc in first stitch, *5 sc in ch-5 space, skip next stitch, sc in next, skip next stitch* repeat from * to * across to last 2 stitches, skip next stitch, sc in last (67 (85, 103, 121) (139, 157, 175) sc)
Row 4 (ws): ch 5, turn, skip first 2 stitches, sc in next 3, *ch 5, skip 3 stitches, sc in next 3 stitches* repeat from * to * across to last 2 stitches, ch 2, skip next stitch, tr in last (33 (42, 51, 60) (69, 78, 87) sc, 2 tr)
Row 5 (rs): ch 1, turn, sc in first stitch, 2 sc in ch-2 space, skip next stitch, sc in next, skip next stitch, * 5 sc in ch-5 space, skip next stitch, sc in next, skip next stitch* repeat from * to * across to turning ch, 2 sc in ch space, sc in 3rd ch of turning ch (66 (84, 102, 120) (138, 156, 174) sc)
Row 6 (ws): ch 1, turn, sc in first 2 stitches, *ch 5, skip 3 stitches, sc in next 3 stitches* repeat from * to * across to last 5 stitches, sc in last 2 stitches (34 (43, 52, 61) (70, 79, 88) sc)
Row 7 – Row 35 (35, 39, 39) (43, 43, 47) (rs): repeat rows 3 – 6 ending with a row 3 repeat
Row 36 (36, 40, 40) (44, 44, 48) (ws): ch 1, turn, hdc in first stitch, skip 1 stitch, sc in next 4, *skip 1 stitch, sc in next 5* repeat from * to * across to last stitch, hdc in last stitch (54 (69, 84, 99) (114, 129, 144) sc, 2 hdc)
Row 37 (37, 41, 41) (45, 45, 49) – Row 39 (39, 43, 43) (47, 47, 51) (rs): ch 2, turn, dc in each stitch across (56 (71, 86, 101) (116, 131, 146) dc)
NECKLINE
The neckline is started in the next row. Only work partway across making one side of the neckline first. Then rejoin yarn later to make the other side.
Row 40 (40, 42, 42) (48, 48, 52) (ws): ch 2, turn, dc in 19 (24, 29, 34) (39, 44, 49) stitches, dc3tog (20 (25, 30, 35) (40, 45, 50) dc)
Row 41 (41, 43, 43) (49, 49, 51) (rs): ch 2, turn, dc2tog, dc in remaining stitches (19 (24, 29, 34) (39, 44, 49) dc)
Row 42 (42, 44, 44) (50, 50, 52) – Row 46 (48, 50, 52) (56, 58, 60) (ws): ch 2, turn, dc in each stitch across (19 (24, 29, 34) (39, 44, 49) dc)
Fasten off. Leave a long end for sewing
Lay the panel so the neckline just made is on the right.
Rejoin yarn in Row 40 (40, 42, 42) (48, 48, 52). Join at 22 (27, 32, 37) (42, 47, 52) stitches in from the left.
Row 40 (40, 42, 42) (48, 48, 52) (ws): ch 2, dc3tog, dc in remaining stitches across (20 (25, 30, 35) (40, 45, 50) dc)
Row 41 (41, 43, 43) (49, 49, 51) (rs): ch 2, turn, dc across to last 2 stitches, dc2tog (19 (24, 29, 34) (39, 44, 49) dc)
Row 42 (42, 44, 44) (50, 50, 52) – Row 46 (48, 50, 52) (56, 58, 60) (ws): ch 2, turn dc in each stitch across (19 (24, 29, 34) (39, 44, 49) dc)
Do not fasten off.
Ch 1, sc evenly along the inside of the neckline
Fasten off. Leave a long end for sewing.
BACK
ch 2
Row 1 (rs): starting in 2nd ch from the hook fsc 56 (71, 86, 101) (116, 131, 146) (56 (71, 86, 101) (116, 131, 146) sc)
Row 2 (ws): ch 1, turn, sc in first 2 stitches, *ch 5, skip 2 stitches, sc in next 3* repeat from * to * across to last 4 stitches, ch 5, skip 2 stitches, sc in last 2 (34 (43, 52, 61) (70, 79, 88) sc)
Row 3 (rs): ch 1, turn, sc in first stitch, *5 sc in ch-5 space, skip next stitch, sc in next, skip next stitch* repeat from * to * across to last 2 stitches, skip next stitch, sc in last (67 (85, 103, 121) (139, 157, 175) sc)
Row 4 (ws): ch 5, turn, skip first 2 stitches, sc in next 3, *ch 5, skip 3 stitches, sc in next 3 stitches* repeat from * to * across to last 2 stitches, ch 2, skip next stitch, tr in last (33 (42, 51, 60) (69, 78, 87) sc, 2 tr)
Row 5 (rs): ch 1, turn, sc in first stitch, 2 sc in ch-2 space, skip next stitch, sc in next, skip next stitch, * 5 sc in ch-5 space, skip next stitch, sc in next, skip next stitch* repeat from * to * across to turning ch, 2 sc in ch space, sc in 3rd ch of turning ch (66 (84, 102, 120) (138, 156, 174) sc)
Row 6 (ws): ch 1, turn, sc in first 2 stitches, *ch 5, skip 3 stitches, sc in next 3 stitches* repeat from * to * across to last 5 stitches, sc in last 2 stitches (34 (43, 52, 61) (70, 79, 88) sc)
Row 7 – Row 35 (35, 39, 39) (43, 43, 47) (rs): repeat rows 3 – 6 ending with a row 3 repeat
Row 36 (36, 40, 40) (44, 44, 48) (ws): ch 1, turn, hdc in first stitch, skip 1 stitch, sc in next 4, *skip 1 stitch, sc in next 5* repeat from * to * across to last stitch, hdc in last stitch (54 (69, 84, 99) (114, 129, 144) sc, 2 hdc)
Row 37 (37, 41, 41) (45, 45, 49) – Row 43 (45, 47, 49) (53, 55, 57) (rs): ch 2, turn, dc in each stitch across (56 (71, 86, 101) (116, 131, 146) dc)
NECKLINE
Row 44 (46, 48, 50) (54, 56, 58) (ws): ch 2, turn, dc in 19 (24, 29, 34) (39, 44, 49) stitches, dc3tog (20 (25, 30, 35) (40, 45, 50) dc)
Row 45 (47, 49, 51) (55, 57, 59) (rs): ch 2, turn, dc2tog, dc in remaining stitches (19 (24, 29, 34) (39, 44, 49) dc)
Row 46 (48, 50, 52) (56, 58, 60) (ws): ch 2, turn, dc in each stitch across (19 (24, 29, 34) (39, 44, 49) dc)
Fasten off. Leave a long end for sewing.
Lay the panel so the neckline just made is on the right.
Rejoin yarn in Row 44, 22 stitches in from the left.
Row 44 (ws): ch 2, dc3tog, dc in remaining stitches across (20 (25, 30, 35) (40, 45, 50) dc)
Row 45 (47, 49, 51) (55, 57, 59) (rs): ch 2, turn, dc across to last 2 stitches, dc2tog (19 (24, 29, 34) (39, 44, 49) dc)
Row 46 (48, 50, 52) (56, 58, 60) (ws): ch 2, turn dc in each stitch across (19 (24, 29, 34) (39, 44, 49) dc)
Fasten off. Leave a long end for sewing.
SEWING
Lay the front on top of the back with the right side of both pieces facing the inside.
Use the long ends to sew the shoulders with a whip stitch. Use the long ends to sew the sides. Leave an 8.5” (9”, 9.5”, 10”) (10.5”, 11”, 11.5”) opening at the top for armholes. – or any desired armhole size
Fasten off. Weave in the ends.
Turn right side out.
Blocking is recommended.
Looking for more patterns? Follow me on Facebook, Instagram, and Pinterest! Please share a pic of your finished product with me. I’d love to see it!


This is a very nice pattern I’ll try this pattern
wow, really great looking and so simple! love the color too, perfect! thanks for sharing on craft schooling sunday, have a wonderful crochet-filled summer.
This is just great! I love mesh crochet tops in the summer, but you’re right that they can get all stretched out. I’d love to try this, also because I really like how those faux-sleeves are created from the wider shoulders. Pinning! 🙂 Lisa
Awesome! Thank you, Lisa 🙂
Should the yarn be all acrylic or will a cotton/acrylic blend work?
A cotton/acrylic blend will work
When you say to make a larger size, the chain needs to be a multiple of 5+2. So does that mean it needs to divide into 5 as well as 2? I am confused because in the pattern the 52 does not divide by 5. Sorry just confused about how to make this bigger.
Hi Lori, your starting chain needs to be a multiple of 5, then add 2 more chains. I started with 50 (multiple of 5) then added 2 more and got 52 chains. Hope this helps 🙂
Hi! I have a question. After you get done with row 6 and then start on the repeat rows 7-35. Do you chain 1 before turning? It doesn’t say to chain 1 at the end of row 6 and it doesn’t say to chain 1 at the beginning of row 3 (technically row 7), but there has always been at least one chain 1 if not 2 at the end or beginning of rows. Thank you!!
Yes, there should be a ch 1 ? I’ll edit the post later today. Sorry!
Thank you so much!!!
Can you tell me what size this wool would be in UK terms would it be an Aran size thanks
Aran, yes.
Hi can I ask about Yarn? Would it be possible to use Sport Weight/Sock Yarn doubled up with 5mm Hook? Mine is polyester/polyacryl/elastane mix. Would it be tto stretchy for this project?? Thanks
Hi! I think that should work 🙂 You might want to do a little swatch to make sure!
Breann, Simply love your patterns and instructions! Thank you soooo much for sharing your wonderful creativity with all of us! Want to try this pattern, Honeycomb Top. Would you be able to tell me what the “positive ease” is in the fit for the Small and Medium Sizes of the “Honeycomb Top” above.” Thanking you in advance for your help!
Breann, Simply love your patterns and instructions! Thank you soooo much for sharing your wonderful creativity with all of us! Want to try this pattern, Honeycomb Top. Would you be able to tell me what the “positive ease” is in the fit for the Small and Medium Sizes of the “Honeycomb Top” above.” Thanking you in advance for your help!
Hi! Thank you so much!! Unfortunately this is one of my first designs and I only have it written in size small right now. There is some positive ease. I’ll be updating this pattern very soon with more detailed sizing 🙂
Love this! I’m at the neckline of the front. It says to double crochet two together but the next row still says 19 stitches which is what I started with. Don’t I lose a stitch when I do that? Thank you!
Hi! Row 1 of the neckline is 19 stitches + dc3tog = 20. Then row 2 is dc2tog, then dc across will give you 19 🙂