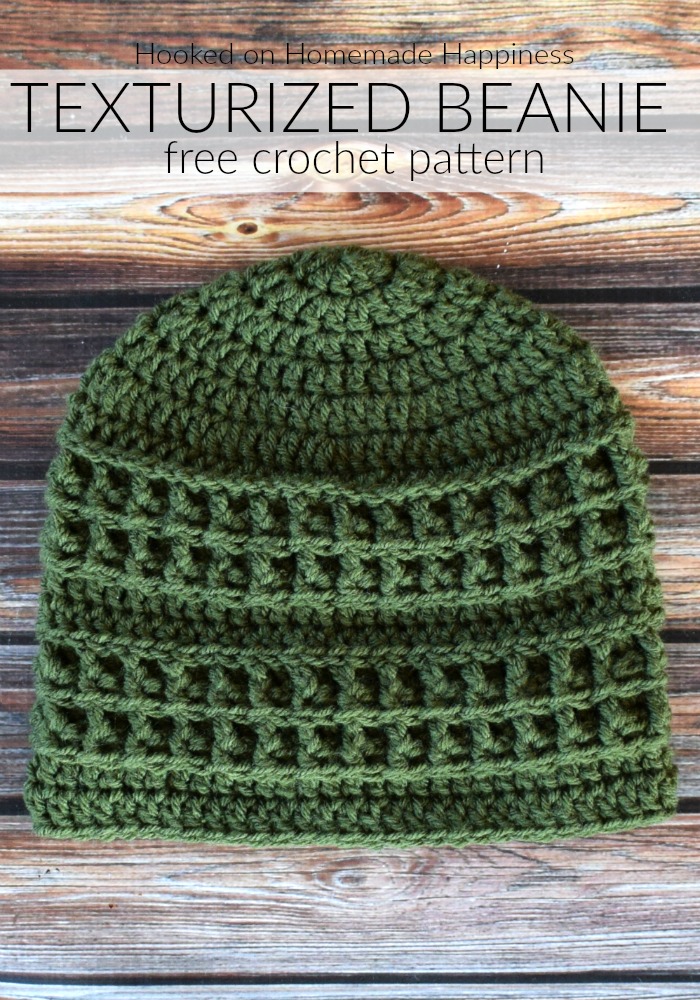
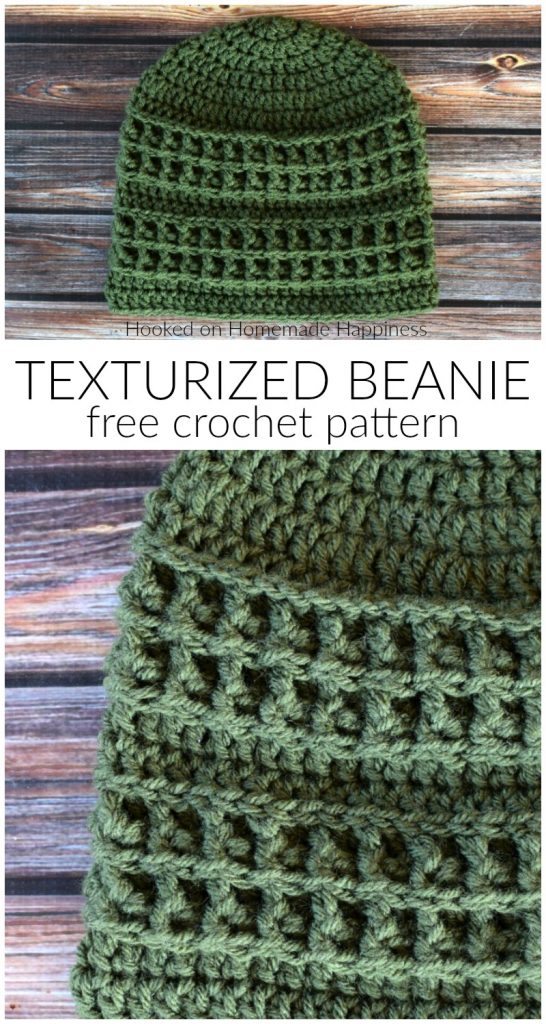
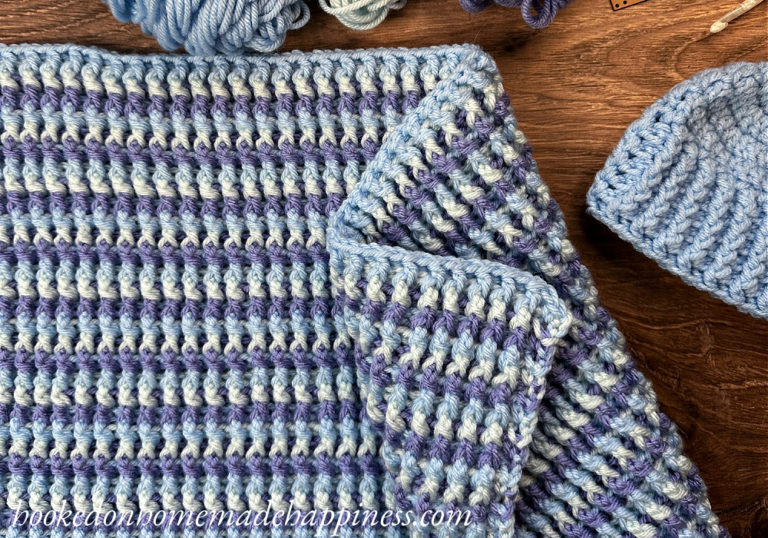
Texturized Crochet Beanie Pattern (CAL for a Cause)
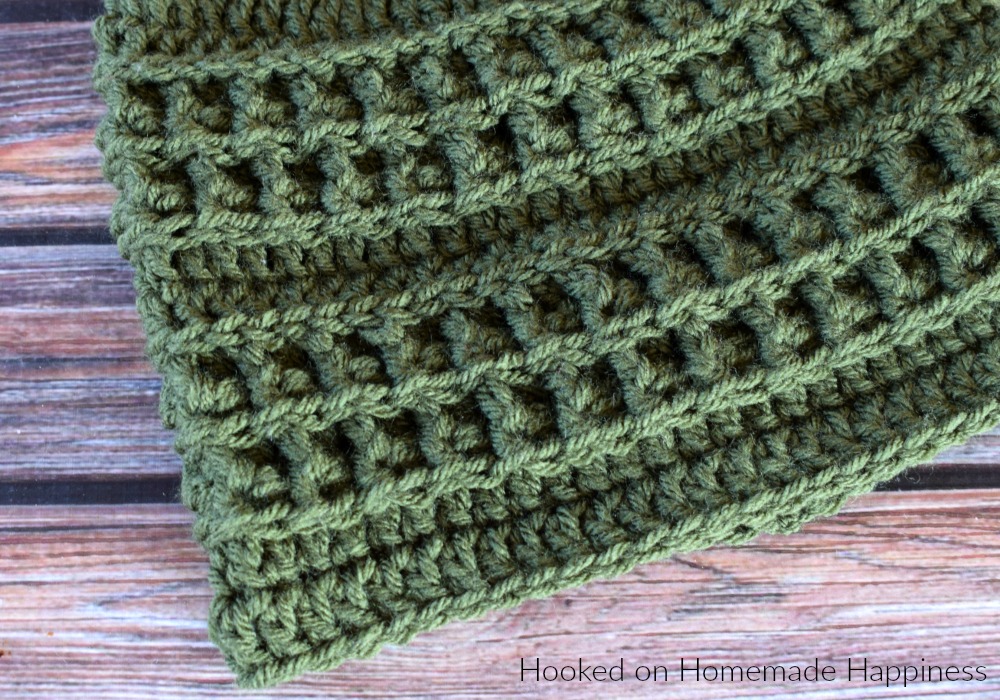
The Texturized Crochet Beanie Pattern uses some of my favorite stitches and techniques to create the fun textures.
This hat is the 2nd pattern in the Crochet Along for a Cause. We are making 1 hat per week to donate to a cancer center, school, or homeless shelter all summer long. There’s always time to join! You can find all the details and hat patterns HERE.
Last week’s hat was the Beach Day Bucket Hat.
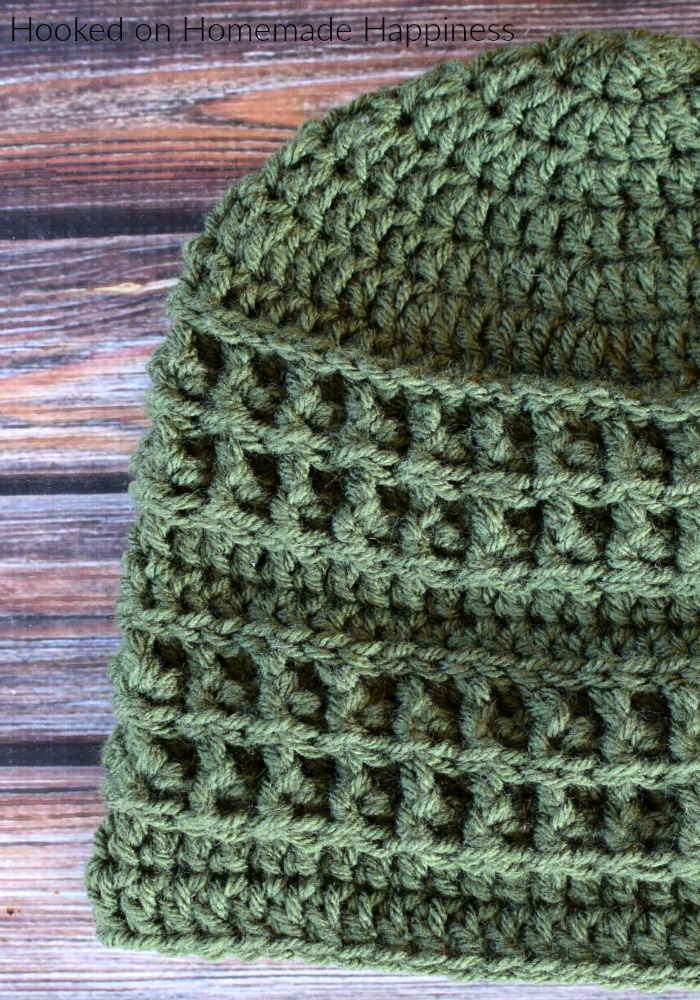
Texturized Crochet Beanie Pattern
– PIN for later HERE
– Add to your Ravelry Queue HERE
Materials
approx. 70g acrylic worsted weight yarn (I used I Love this Yarn)
H/5.0 mm hook
yarn needle
scissors
Level
intermediate
Pattern notes & stitches to know
magic loop
ch – chain
dc – double crochet
dc 3rd loop – insert hook into loop behind the top two loops and work a dc
fpdc – front post double crochet
bpdc – back post double crochet
· written in US terms
· ch 2 does not count as dc
· the hat is worked from the top down with joined rounds starting with a magic loop
Approx Finished Size (adult):
Length: 9”
Circumference: 19”
TEXTURIZED CROCHET BEANIE PATTERN
Make a magic loop
Round 1: ch 2, 10 dc in loop, pull loop closed tight, join to first dc with sl st (10 dc)
Round 2: ch 2, 2 dc in each stitch around, join to first dc with sl st (20 dc)
Round 3: ch 2, *dc in 1 stitch, 2 dc in next* repeat from * to * around, join to first dc with sl st (30 dc)
Round 4: ch 2, *dc in 2 stitches, 2 dc in next* repeat from * to * around, join to first dc with sl st (40 dc)
Round 5: ch 2, *dc in 3 stitches, 2 dc in next* repeat from * to * around, join to first dc with sl st (50 dc)
Round 6: ch 2, *dc in 4 stitches, 2 dc in next* repeat from * to * around, join to first dc with sl st (60 dc)
Diameter should be approx. 7”
Round 7: ch 2, dc in each stitch around, join to first dc with sl st (60 dc)
Round 8: ch 2, dc in 3rd loop in each stitch around, join to first dc with sl st (60 dc)
Round 9: ch 2, *fpdc, bpdc* repeat from * to * around, join to first fpdc with sl st (60)
Round 10: ch 2, dc in 3rd loop in each stitch around, join to first dc with sl st (60 dc)
Round 11: ch 2, *fpdc, bpdc* repeat from * to * around, join to first fpdc with sl st (60)
Round 12: ch 2, dc in 3rd loop in each stitch around, join to first dc with sl st (60 dc)
Round 13: ch 2, dc in each stitch around, join to first dc with sl st (60 dc)
Round 14 – 19: repeat round 8 – 13
Fasten off, weave in the ends.
And you’re done! See you next week for the next CAL for a Cause pattern!
Looking for more patterns? Follow me on Facebook, Instagram, and Pinterest! Please share a pic of your finished product with me. I’d love to see it!


Hi! Is this a child’s sized hat?
It’s adult
Sorry, but I don’t think round 8 is very clear. I am a seasoned crochet but am baffled by this round. Does it mean to ch 2 “and” dc in each stitch? What loop? I don’t have loops. Please clarify.
The 3rd loop is behind the two top loops you usually insert your hook into.
So, are you double crocheting into every dc from previous round, or skipping two, to account for the chain 2?
DC in every stitch around. The ch 2 does not count as a stitch.
I love this patten i will be useing it a lot thank you
Thanks!
Found this by accident and fell in love. It is so simple yet pretty. Thank you.
Thank you!!
No problem…. please ignore last comment, I’ve worked it out 😉
Hi, thank you for the pattern. I just finished the top portion. It’s 6″ not 7. Should I go around again with an increase? Or start over with an “I” hook?
Hi! You can add an additional increase round 🙂
Thank you! I’ve made this a few times, I must crochet tight? It’s always 6”, I’ve learned that using bigger hooks for larger sizes works well for me. Thank you for the beautiful pattern.
Hi again ☺️
I’m making this for a man. Do you think following the pattern with a J hook would work well? I thought I’d ask since maybe you’ve done it?
Thank you,
Susan
Hi! Yes, I think that would work 🙂
I just wanted to thank you, with deep and heartfelt appreciation… for designing top-down hat patterns. My fiance likes for his beanies to be custom-fit to his head, with the length “just so,” and I can ONLY do that with a top-down pattern. Bottom-up patterns just don’t fit right, no matter how I try to make them work (I’ve even tried to “reverse-engineer” them to work from the top down, with some laughable results) and sadly there are far more of those out there. He doesn’t even like the ribbing on the bottom-up patterns. It’s so frustrating to see fun looking patterns, just to discover that they’re worked from the bottom.
Anyway, I just wanted to thank you… and encourage you to keep on making top-down patterns! We love them!!!!
Yay! Thank you so much!!