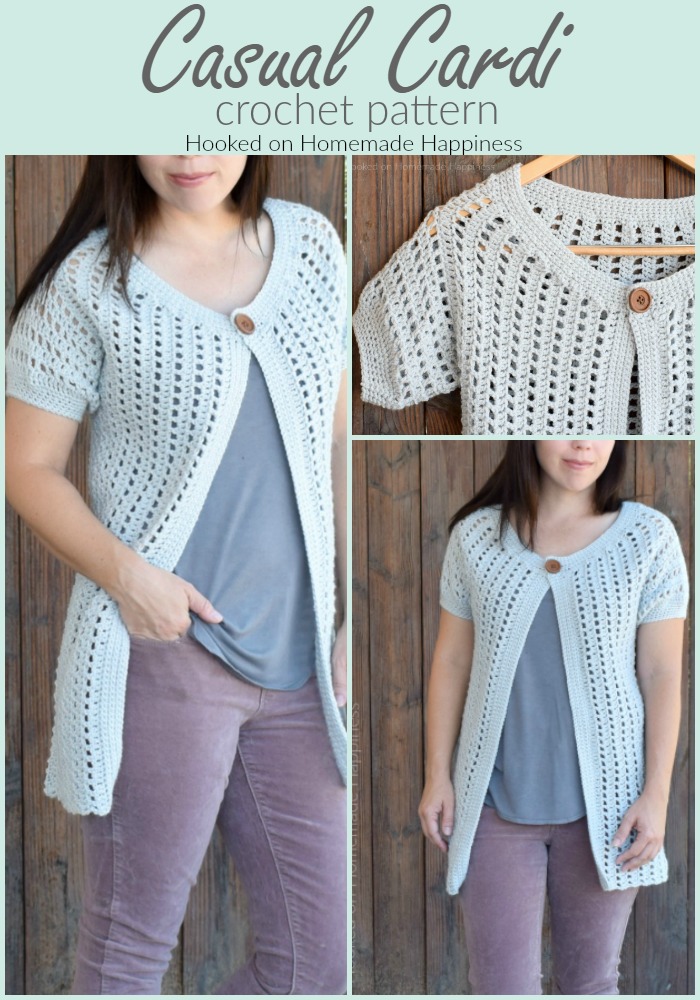
Casual Crochet Cardi Pattern
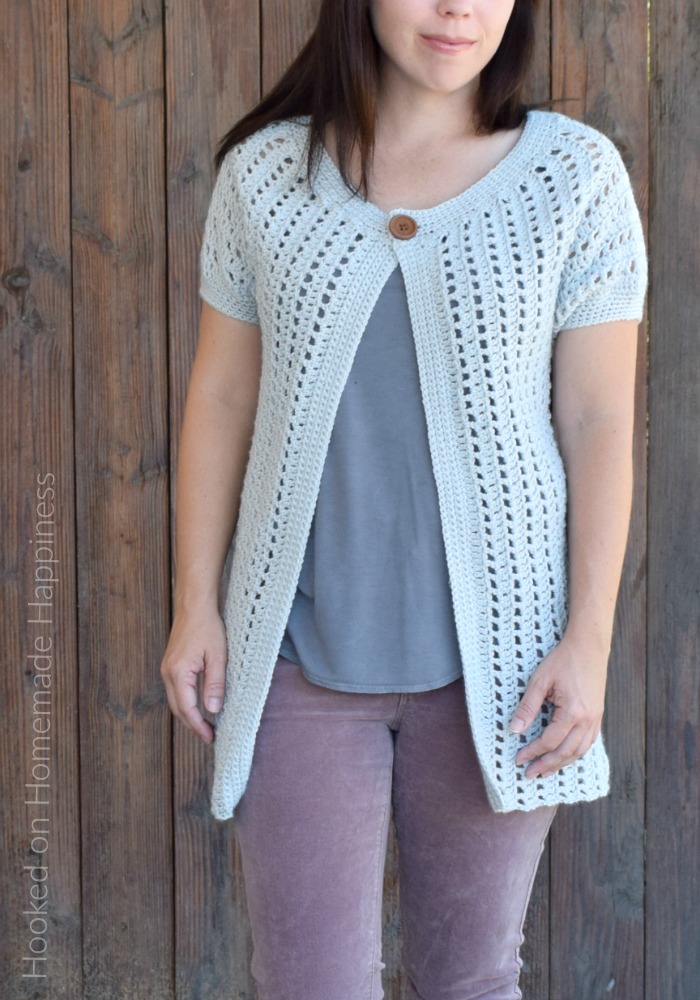
This Casual Crochet Cardi Pattern is my new favorite layering piece! It’s made with DK weight yarn, has an open and airy design, and is short sleeved. It’s the perfect Fall and Spring cardigan.
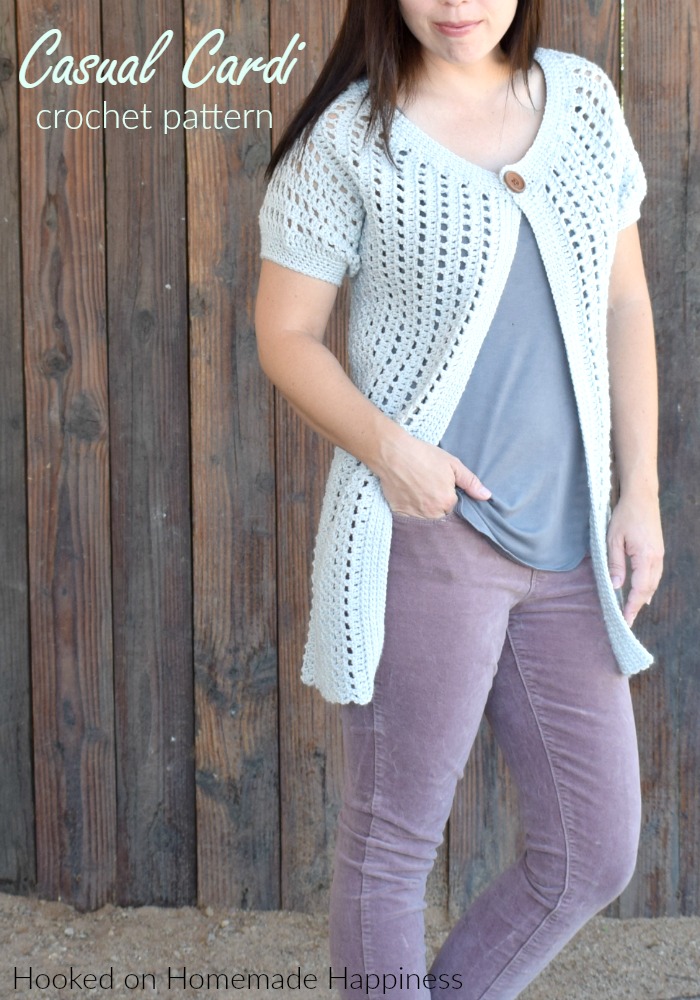
I think the BEST PART about this cardi is that there is NO SEWING! Yes! It’s made as one entire rectangle, then the sleeves and collar details are added.
More Homemade Happiness:
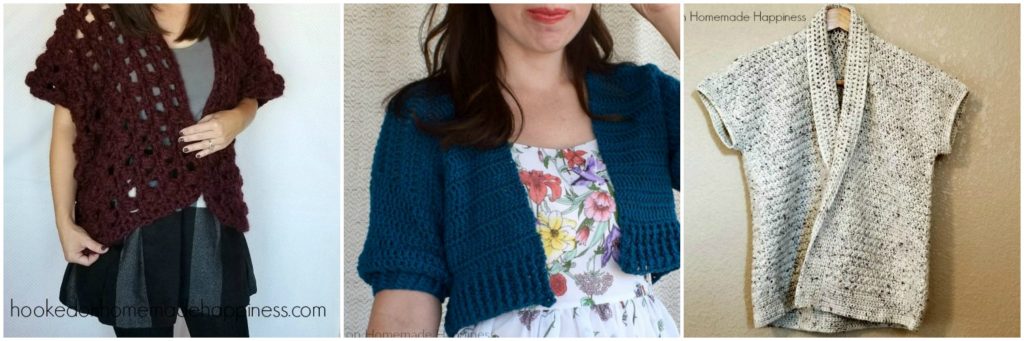
1. Puff Stitch Cardigan 2. Cropped Cardi 3. Tweed Cardi

Casual Crochet Cardi Pattern
– Get the free pattern below or this pattern is also available as an inexpensive, clearly formatted, PDF instant download in my Etsy Shop or Ravelry Shop!
– PIN for later HERE
– Add to your Ravelry Queue HERE
Materials
DK acrylic or cotton yarn (I used Paintbox Simply DK in Stormy Grey – 3 skeins for S & M, 4 skeins for L & XL))
4.5 mm hook
Yarn needle
Scissors
button
Level
Intermediate
Pattern notes & stitches to know
Sl st – slip stich
Ch – chain
Dc – double crochet
Dc3tog – double crochet 3 together
Sc – single crochet
Sc2tog – single crochet 2 together
Written in US terms
Ch 3 COUNTS as dc
Approximate Finished Size—Blocked (S pictured on 5’0” model)
Width: S (16”) M (18”) L (20”) XL (22”)
Length: S (28”) M (30”) L (32”) XL (34”)
Arm width: S (8”) M (9”) L (10”) XL (11”)
Sleeve Length: S (6”) M (7”) L (8”) XL (9”)
Gauge
14 dc = 4”
9 rows = 4”
CASUAL CARDI
– The sweater is made as one rectangle (with no sewing), then the sleeves and collar details are added
– Pattern written in S, M noted in ( ), L noted in [ ], XL noted in { }
Ch 87 (95) [103] {111}
Row 1: dc in 4th ch from the hook and in each ch across (85 dc (93 dc) [101 dc] {109 dc})
Row 2: ch 4 (counts as dc + ch 1), turn, skip 1 stitch, dc in next, *ch 1, skip 1 stitch, dc in next* repeat from * to * across (43 dc (47 dc) [51 dc] {55 dc})
Row 3: ch 3, turn, dc in next ch and in each stitch and ch across to last stitch, 3 dc in last stitch (87 dc (95 dc) [103 dc] {111 dc})
Repeat rows 2 & 3 to row 17 (19) [21] {23} (101 dc (111 dc) [121 dc] {131 dc})
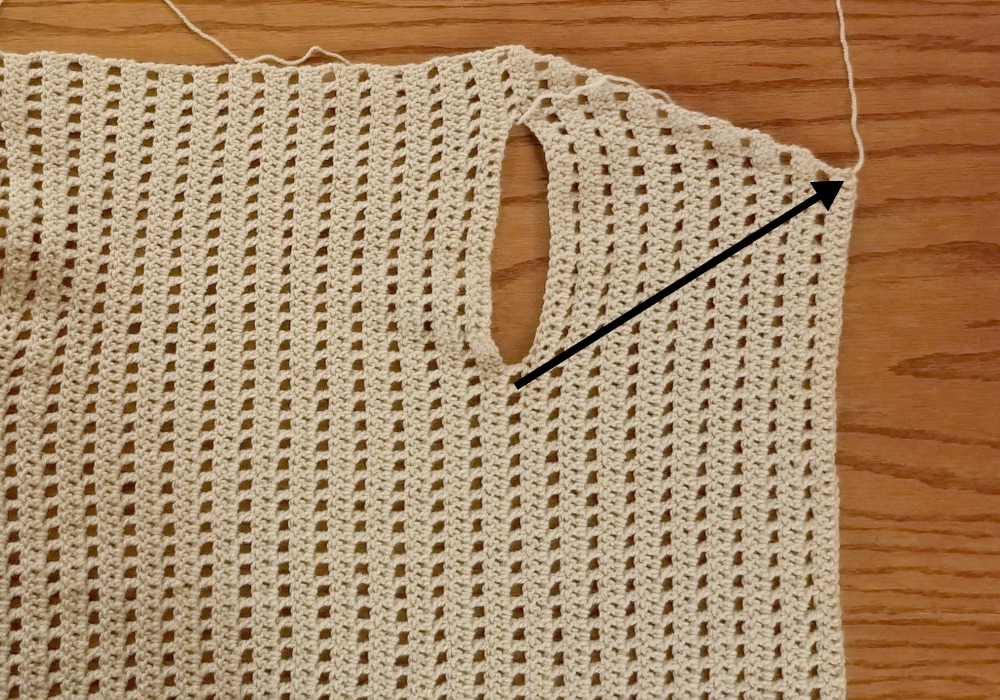
In the next row is the armhole
Row 18 (20) [22] {24}: ch 4 (counts as dc + ch 1), skip 1 stitch, dc in next, *ch 1, skip 1 stitch, dc in next* repeat from * to * 2 more times, ch 25 (29) [33] {37}, skip 25 (29) [33] {37} stitches, dc in next, repeat from * to * across
Row 19 (21) [23] {25}: ch 3, turn, dc in next ch and in each stitch and ch across (101 dc (111 dc) [121 dc] {131 dc})
Row 20 (22) [24] {26}: ch 4 (counts as dc + ch 1), turn, skip 1 stitch, dc in next, *ch 1, skip 1 stitch, dc in next* repeat from * to * across (51 dc (56 dc) [61 dc] {66 dc})
Repeat rows 19 & 20 to row 45 (49) [53] {57} (101 dc (111 dc) [121 dc] {131 dc})
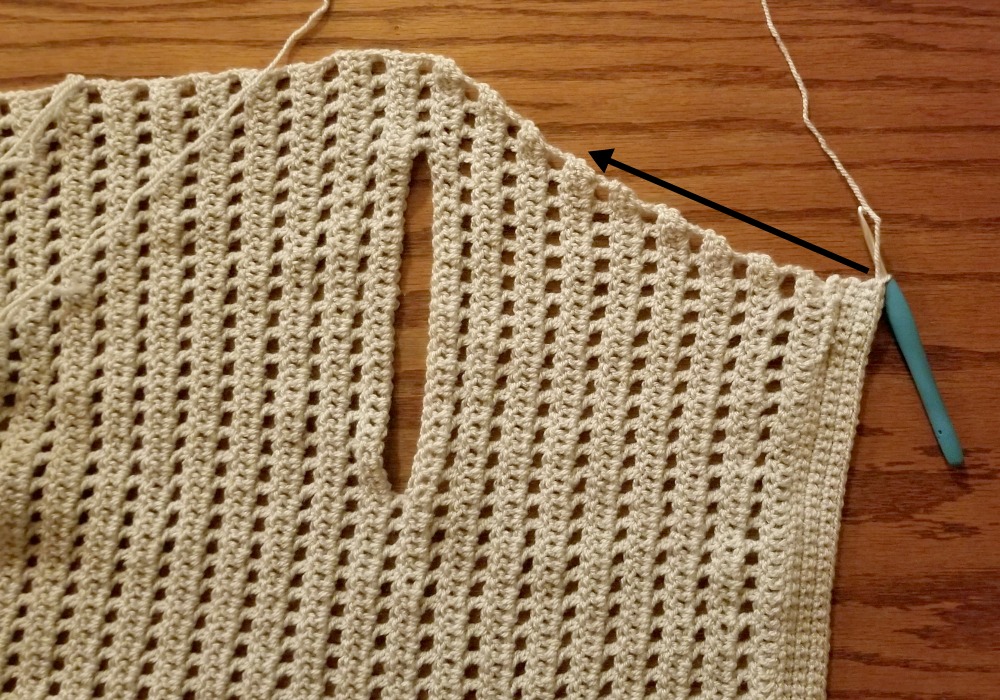
In the next row is the second armhole
Row 46 (50) [54] {58}: ch 4 (counts as dc + ch 1), turn, skip 1 stitch, dc in next, *ch 1, skip 1 stitch, dc in next* repeat from * to * 2 more times, ch 25 (29) [33] {37}, skip 25 (29) [33] {37} stitches, dc in next, repeat from * to * across
Row 47 (51) [55] {59}: ch 3, turn, dc in next ch and in each stitch and ch across to the last 3 stitches, dc3tog (99 dc (109 dc) [119 dc] {129 dc})
Row 48 (52) [56] {60}: ch 4 (counts as dc + ch 1), turn, skip 1 stitch, dc in next, *ch 1, skip 1 stitch, dc in next* repeat from * to * across (50 dc, (55 dc) [60 dc] {65 dc})
Repeat rows 47 (51) [55] {59} & 48 (52) [56] {60}to row 63 (69) [75] {81} (85 dc (93 dc) [101 dc] {109 dc})
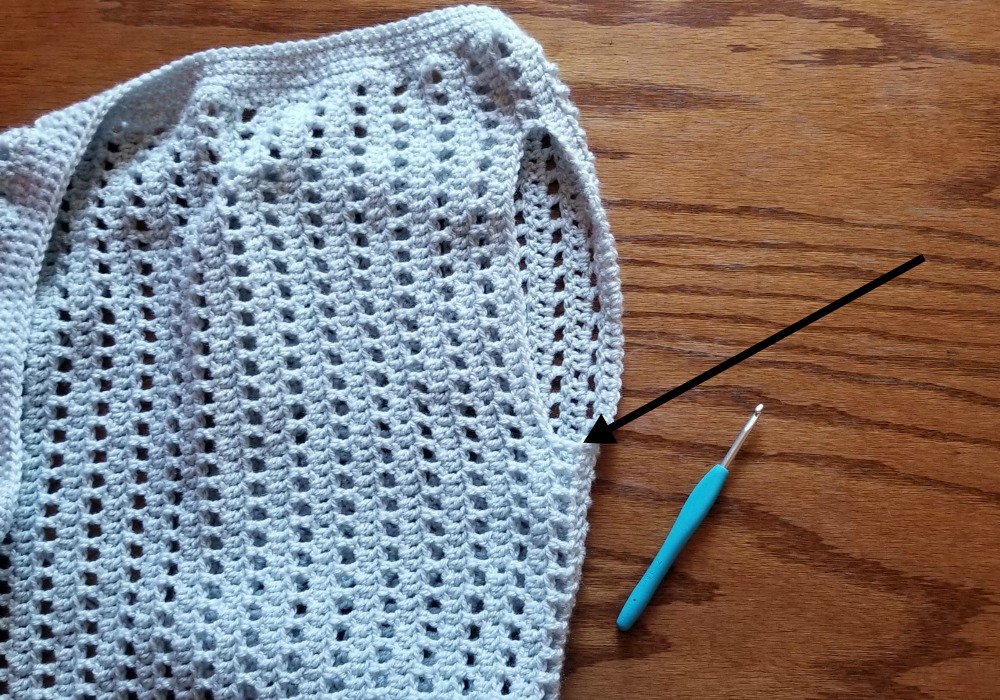
Ch 1 does not count as sc
Row 64 (70) [76] {82}: ch 1, turn, sc in each stitch across
Repeat previous row 5 more times
Fasten off. Join yarn to the top corner of the opposite side.
You will repeat the sc rows on the other side of the cardigan.
Ch 1, turn, sc in each stitch across
Repeat for 5 more rows.
Do not fasten off.
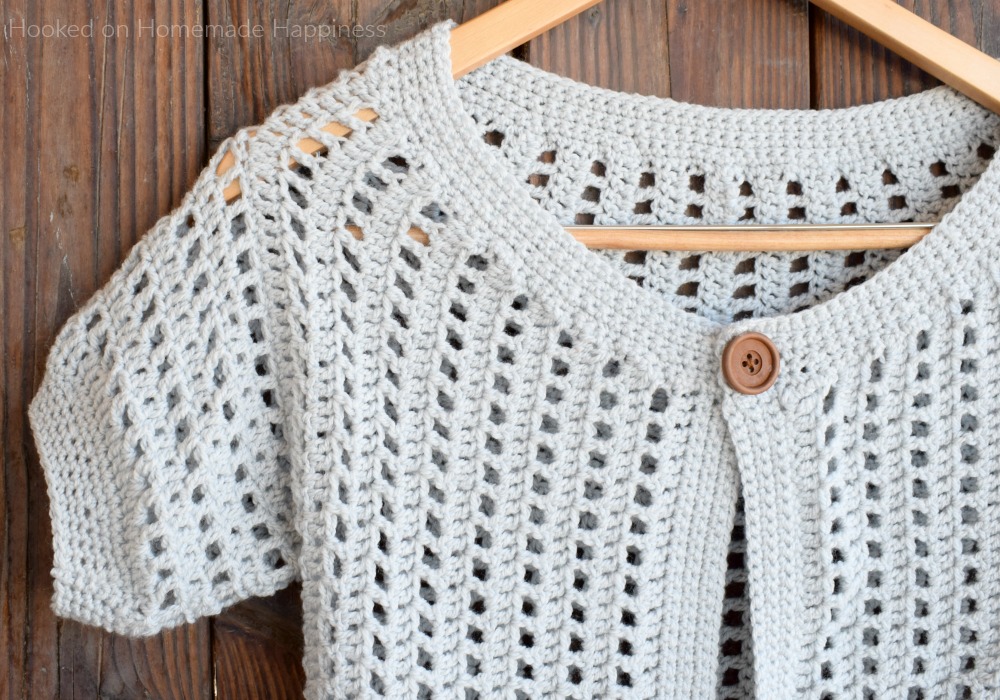
COLLAR
Now you will work across the top of the cardigan creating the collar
Row 1: Ch 1, sc evenly along the collar of the cardigan across to the opposite corner. Work 1 sc in the end of every sc row and 2 sc in the end of every dc row.
Row 2: ch 1, turn, *sc in 6 stitches, sc2tog* repeat from * to * across to last 6 stitches, sc in last 6 stitches
Row 3: ch 1, turn, *sc in 6 stitches, sc2tog* repeat from * to * across to last 6 stitches, sc in last 6 stitches
In the next row the button hole is made
Row 4: ch 1, turn, sc in each stitch across to last 5 stitches, ch 3, skip 3 stitches, sc in last 2
Row 5: ch 1, turn, sc in first 2 stitches, 3 sc in ch 3 space, sc in each stitch across
Row 6: ch 1, turn, sc in each stitch across
Fasten off, weave in all the ends
SLEEVES
Join yarn to bottom of arm hole
Ch 1 does not count as sc
Round 1: ch 1, sc evenly around (make sure to have an even number of stitches), join to first sc with sl st
Round 2: ch 4 (counts as dc + ch 1), skip 1 stitch, *dc in next, ch 1, skip 1 stitch* repeat from * to * around, join to first ch 3 with sl st
Round 3: ch 3, dc in next ch space and in each stitch and ch space around, join to first ch 3 with sl st
Repeat rounds 2 & 3 to round 9, (11), [13], {15}
Round 10 (12) [14] {16}: ch 1, sc in each stitch around, join to first sc with sl st
Round 11 (13) [15] {17}: ch 1, *sc in 3 stitches, sc2tog* repeat from * to * around, join to first sc with sl st
There is an additional decrease in the sleeves in the next round. This optional. If the sleeve is tight enough, sc evenly around
Round 12 (14) [16] {18}: repeat previous round
Round 13 (15) [17] {19}: ch 1, sc in each stitch around, join to first sc with sl st
Repeat previous round 2 more times
Fasten off, repeat on other sleeve.
Weave in all ends. Sew button on opposite corner from button hole.
And you’re done with your Casual Cardi!
Looking for more patterns? Follow me on Facebook, Instagram, and Pinterest! Please share a pic of your finished product with me. I’d love to see it!


How can you make it 3x. I Love The sweater. But I need a 3x.
Hi! You can add rows to the beginning and end of the rectangle to make is larger
Can this be made with fingering weight yarn?
Yes, but it would come out much smaller. You can go up a size or two
Thank you. How many yards would be needed?
Without making it with fingering, I really don’t know. Sorry!
That’s ok! Thank you for answering my questions:)
Hi there
I would like to make this cardigan longer. Do I need to add more chains at the initial start or more rows? Your response would be greatly appreciated.
Hi! Add more chains 🙂 Needs to be an odd number of chains
Hi Breann
I would like to make this with Premier Cotton which is a # 2….how many stitches would I need to add on as I need a 2X. Plus I’d like to make the sleeves long so would I do the decreases.
Thank-you.
Jeannie
Hi! I’m not really sure how you would do that. That’s a lot of changes :/
Thanks Breann for your quick response. I’ll play with it and see what I can come up with.
Thanks again.
Jeannie
How come one side didn’t slant like the other side? By the time I got to the second arm hole and to that edge it shows decreasing, showing it slant, but in the beginning it didn’t show adding rows from front panel beginning to first armhole to show that slant. Or did I miss it? Please help me, cause Im just about done with it. Id really hate to take ALL apart and start again, :{
Hi! Yes, there should be an increase on the first side (before the first armhole) and then it starts to decrease after the second armhole. Both sides should look the same 🙂
I love the pattern but would like to shorten the length to be more of a bolero jacket. I’m finding it impossible to find nice little summer weight sweaters for my sundresses and your pattern would be perfect. Can you suggest what length adjustments to make for the large or extra large? Thank you for your assistance. ( ending at the elbow or just above would be perfect)
Hi! To change the length, I would measure what you want the length to be, and then make your starting chain an inch or 2 longer than that.
Thank you so much!