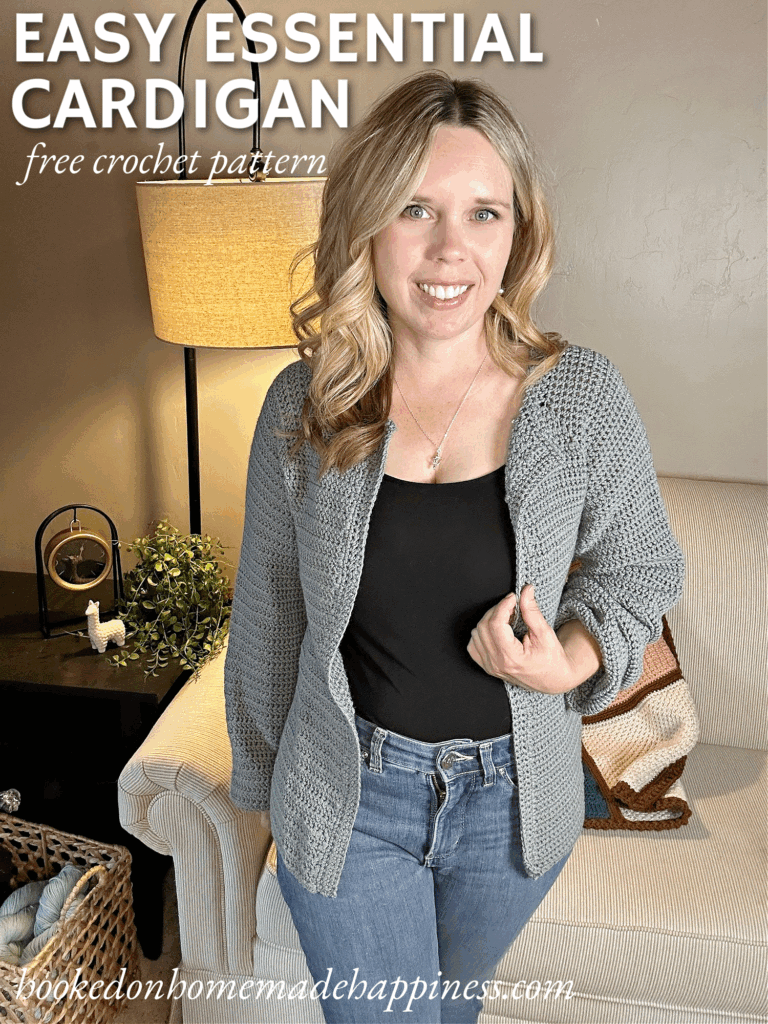
Easy Essential Cardigan Crochet Pattern
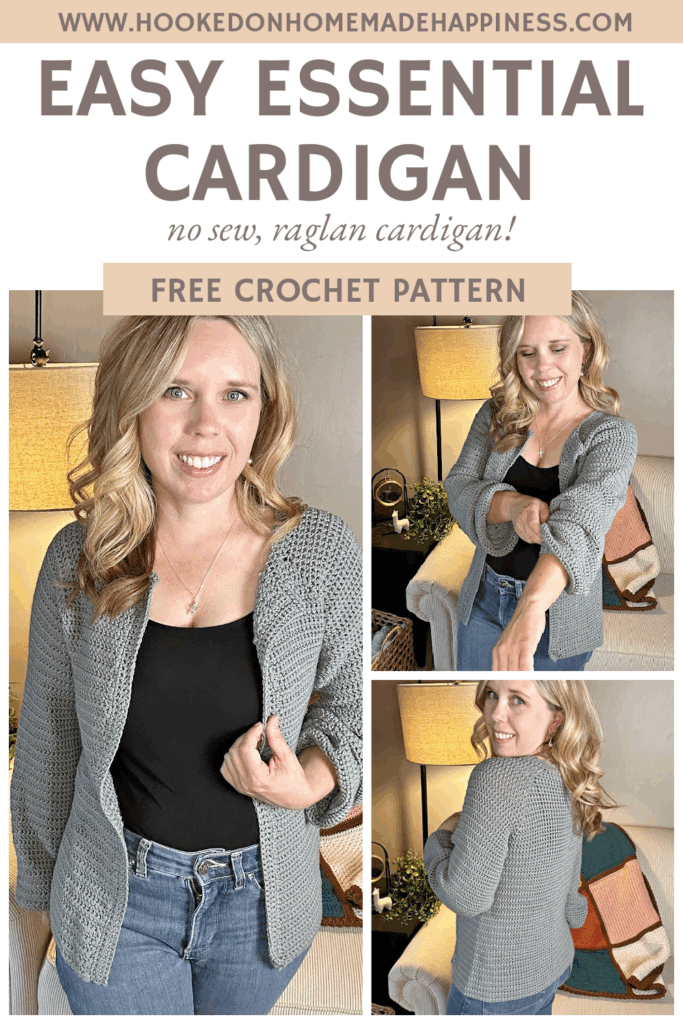
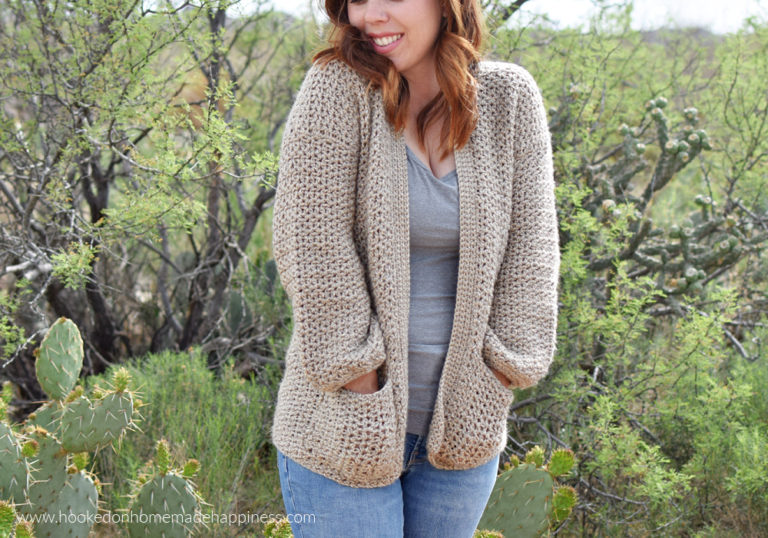
If you’ve been looking for the perfect beginner-friendly cardigan pattern, this Easy Essential Cardigan Crochet Pattern checks all the boxes! Designed with a raglan-style construction, this sweater works up seamlessly from the top down—no sewing required! Made with cozy worsted weight yarn, it’s warm, comfortable, and an instant wardrobe favorite.
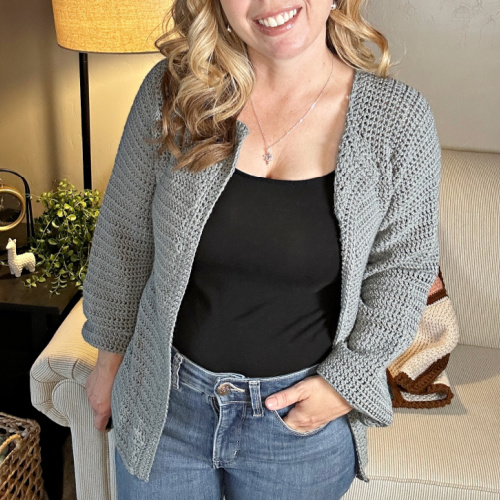
Whether you want to throw it over jeans for a casual day out or layer it for extra coziness at home, this cardigan is the kind of piece you’ll reach for again and again
Purchase the ad-free, printable PDF for easy printing.

Why You’ll Love This Cardigan
- Beginner-friendly raglan style – Simple stitches and top-down construction mean no complicated shaping or seaming.
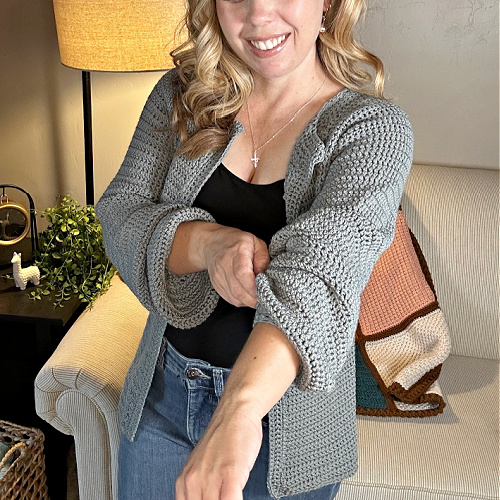
- Customizable fit – Easily adjust length and sleeve style to suit your style.
Yarn & Materials
This pattern uses worsted weight yarn, making it quick to crochet while still giving you a soft, warm drape. Choose your favorite yarn and color to make it truly your own.

Making the Easy Essential Cardigan Crochet Pattern
Get the full free pattern below or purchase the ad-free, printable PDF
Materials
Lion Brand ZZ Twist in Gray (500g for S, 600g for M/L, 700g for XL/2X, 800g for 3X) – any worsted weight yarn would work
H/5.0 mm mm hook
yarn needle
scissors
Level
intermediate
Pattern notes & stitches to know
ch – chain
sc – single crochet
foundation sc
esc – extended single crochet
esc2tog – extended single crochet 2 together (extended single crochet decrease)
· written in US terms
· ch 1 does not count as stitch
· This cardigan is raglan style and works from the top down. Then the sleeves are joined and added in turned rounds.
– Gauge: 15 esc x 13 rows = 4” x 4”
Sizes:
S, M, L, XL, 2X, 3X – The pattern is written in these sizes consecutively. Example, when the pattern gives the end of the row count as (74, 82, 90, 98, 106, 114 sc), the 74 is for S, 82 is M, 90 is L, 98 is XL, 106 is 2X, 114 is 3X.
This cardigan has a classic fit with some positive ease.
Approx Finished Size (blocked):
Bust: S (34”) M (37.5”) L (41”) XL (44.5”) 2X (48”) 3X (51.5”)
Length: S (21”) M (22.75”) L (24.5”) XL (26.25”) 2X (28”) 3X (29.75”)
Armhole Depth: S (7.25”) M (8”) L (8.75”) XL (9.5”) 2X (10.25”) 3X (11”)
Sleeve Length (from the neckline): S (26”) M (27”) L (28”) XL (29”) 2X (30”) 3X (31”)
Size Small pictured. I am 5’0” with 34” bust
Watch the Tutorial
See how it’s done! This easy-to-follow video tutorial will walk you through each step of the pattern.
CROCHET PATTERN WRITTEN INSTRUCTIONS
Row 1: ch 2, starting in 2nd ch from the hook, foundation sc 74, 82, 90, 98, 106, 114 (74, 82, 90, 98, 106, 114 sc)
Row 2: ch 1, turn, esc in each stitch across (74, 82, 90, 98, 106, 114 esc)
Row 3: ch 1, turn, esc in 10, 11, 12, 13, 14, 15 stitches, 2 esc in next, ch 2, 2 esc in next, esc in 13, 15, 17, 19, 21, 23 stitches, 2 esc in next, ch 2, 2 esc in next, esc in 20, 22, 24, 26, 28, 30 stitches, 2 esc in next, ch 2, 2 esc in next, esc in 13, 15, 17, 19, 21, 23 stitches, 2 esc in next, ch 2, 2 esc in next, esc in remaining stitches (82, 90, 98, 106, 114, 122 esc)
Row 4: ch 1, turn, *esc in each stitch to the ch 2 space, (esc, ch 2, esc) in ch 2 space,* repeat from * to * across, esc in remaining stitches (90, 98, 106, 114, 122, 130 esc)
Repeat row 4 to Row 19, 21, 23, 25, 27, 29 (210, 234, 258, 282, 306, 330 esc)
The armholes are created in the next row
Row 20, 22, 24, 26, 28, 30: ch 1, turn, esc in each stitch to the ch 2 space, esc in ch 2 space, ch 3, esc in next ch 2 space (skipping an entire side, this will be the first sleeve), esc in each stitch to next ch 2 space, ch 3, esc in next ch 2 space (this is the second sleeve), esc in remaining stitches (112, 124, 136, 148, 160, 172 esc)
Row 21, 23, 25, 27, 29, 31: esc in each stitch and ch around (118, 130, 142, 154, 166, 178 esc)
Row 22, 24, 26, 28, 30, 32: esc in each stitch around (118, 130, 142, 154, 166, 178 esc)
Repeat previous row to Row 70, 76, 82, 88, 94, 100 (118, 130, 142, 154, 166, 178 esc)
Or until desired length
Do not fasten off.
COLLAR
Row 1: ch 1, turn, working along the inside edge of the collar, work 1 sc in the end of each row across to the top corner
Row 2 – 4: ch 1, turn esc in each stitch across
Fasten off. Weave in the ends.
Join yarn to opposite side and repeat collar pattern.
SLEEVES
Join yarn to the bottom of an arm hole
Round 1: ch 1, esc in each stitch around, join to first esc with sl st
Round 2: ch 1, turn, esc in each stitch around, join to first esc with sl st
Repeat round 2 to Round 80, 83, 86, 89, 92, 95
Or until desired length
The sleeve will decrease over the next 2 or 3 rounds to make the cuff. For my sample, I decreased for 3 rounds. If that’s too tight, only decrease for 2 rounds.
For the next 3 rounds: ch 1, turn, *esc, esc2tog* repeat from * to * around, join to first esc with sl st
For the next 2 rounds: ch 1, turn, esc in each stitch around, join to first esc with sl st
Fasten off. Weave in the ends.
Repeat pattern for other sleeve.
NECKLINE
Join yarn to the top of the neckline to add length and tighten up the neckline. This is optional. If the neckline works for you, skip this section.
Row 1: ch 1, esc evenly in each stitch around to the opposite corner of the neckline
Row 2 – 3: ch 1, turn, *esc in 6 stitches, esc2tog* repeat from * to * across
Fasten off. Weave in the ends.
Blocking is recommended.
And you’re done with this beautiful cardigan! I hope you love it!
Looking for more patterns? Follow me on Facebook, Instagram, and Pinterest! Please share a pic of your finished product with me. I’d love to see it!


Please explain esc??, have not heard of this stitch before how do I do it. T?
Hi! Yes, insert your hook into the stitch, yarn over, pull up a loop, yarn over, pull through one loop, yarn over, pull through two loops
Hi, how much yarn is needed for a sleeve?
About 1 skein ?
I find the esc stitch confusing. Could I use a double crochet instead ? It kind of looks like it.
Hi! You can but a double crochet will make this garment larger than the pattern suggests.
I have never come across the esc stitch in my 30+ years of crocheting, but I caught on easily and enjoyed learning a new stitch!!! : ) Thank you!
Awesome! Thank you so much!!
Thank you for this lovely freebie! Once we are into 2021 I am going to give it a go, it looks like one I might finish! Compliments of the season and stay safe!
Cynthia
Yay! Merry Christmas 🎄
Thanks Breann
If I pin it for later does it still remain free?
Hi! The free pattern will be on my blog to view, but the printable PDF will not be free after today 🙂
Just downloaded, excited to try this! Thank you!
You’re welcome!!
Thanks
Hi the video is fantastic. Very clear instructions.
Would it be possible to add a hood on this neckline? Is the shape good? I’ve not made top down cardigan before
Thank you
Hi! Sure! I think a hood would work great 🙂
I’m confused about a couple of things.
1) “Do not fasten off” – at the bottom of the body. Why, if the next thing you work is the collar?
2) “Join yarn to opposite side and repeat collar pattern” – I just don’t follow.
Thanks in advance.
Hi! You don’t need to fasten off because you will continue up that side of the cardigan. Then rejoin to the other side to repeat the collar pattern.
Oh… I think I see now. It’s for the front edging, right? (I don’t think I’d call it the “collar”) Thanks! =)
Hello there! I hope this comment finds you well and that you are having a lovely day.
I’m working on this pattern at the moment as a Christmas present and have just started work on the the sleeves. I have two questions about it, if you don’t mind. Firstly, how long did it take you to make the sleeves on yours? Secondly, are the sleeves supposed to look as if they are getting slightly wider with your first few rows? I believe I may have added stitches by accident, but wanted to check first before I pull everything apart. This is my first time making a cardigan and following a proper written pattern, so this has been quite the challenge for me. I hope all of this makes sense. Thank you so much in advance!
Hi! The sleeves should be straight. Make sure you’re not adding a stitch where the round joins 😊
My first cardigan – easy to follow directions! I made a size medium, but it was just a little big- I’m 5’2” and 110 lbs. next time I’ll just go down a hook size. The front panels overlapped, so I added buttonholes and buttons. Decreased on the sleeves so there were a bit narrower. Also, I used 5 rows of sc all around for edging rather than esc- and did it continuously rather than having a seam where neck meets the front edging. I’m very happy with it. Wish I could post a picture, but this comment form doesn’t seem to allow it.