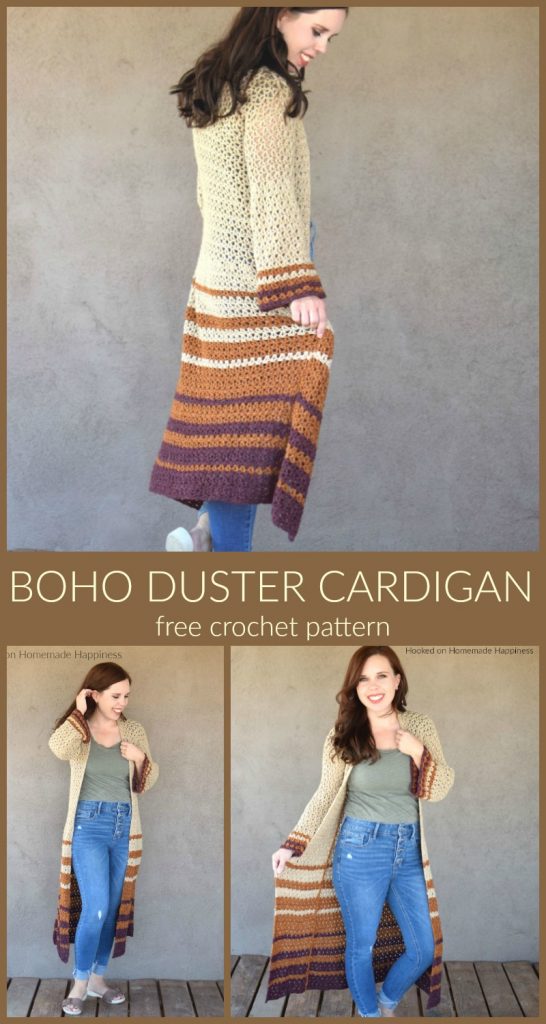
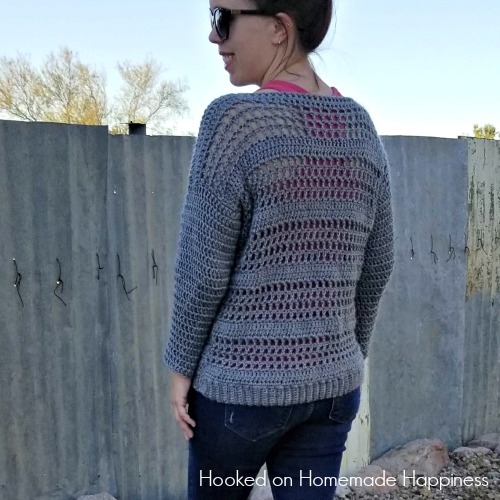
Boho Duster Cardigan Crochet Pattern
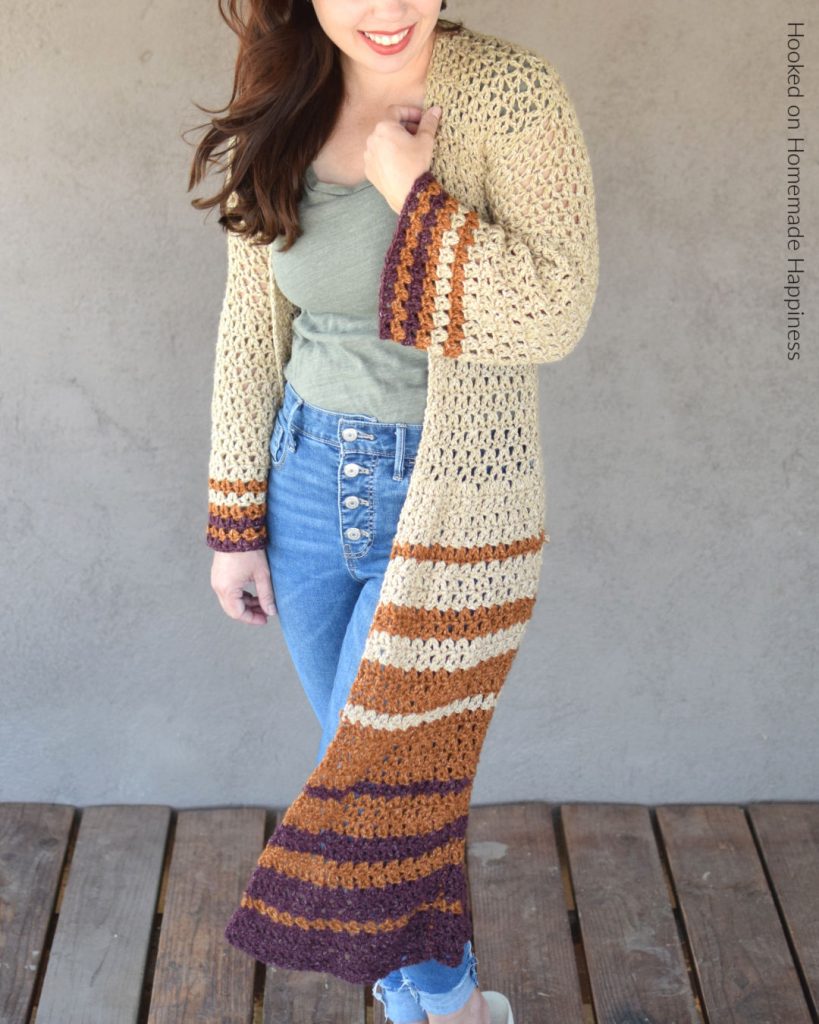
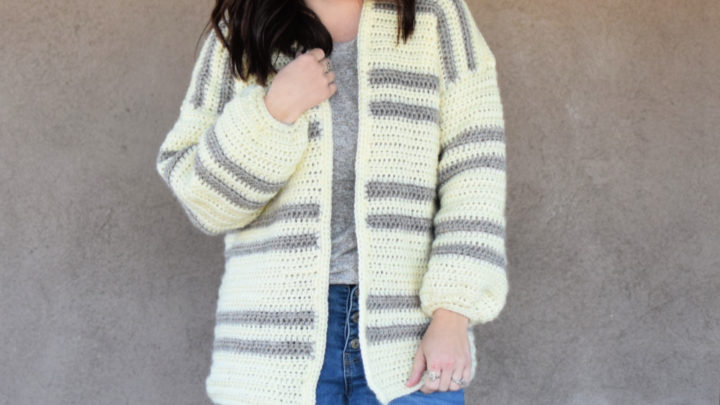
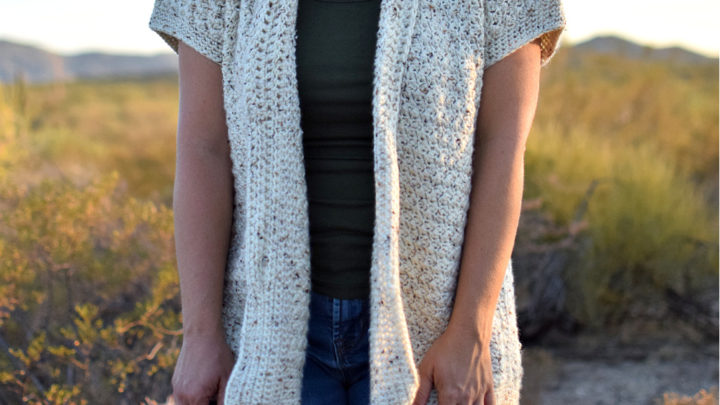
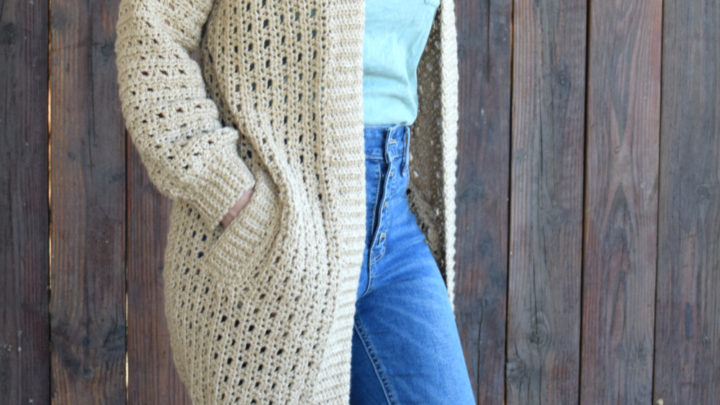
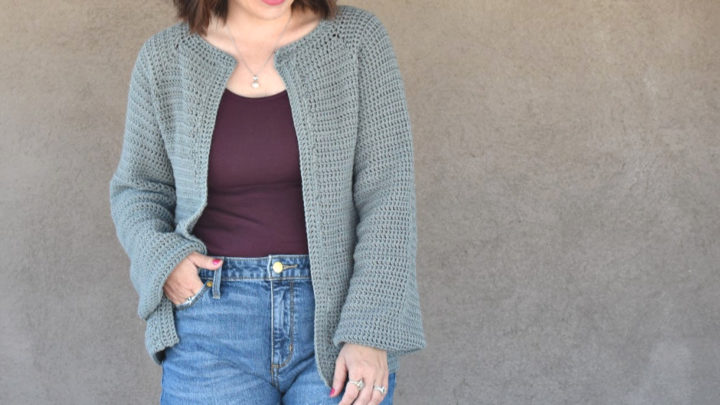
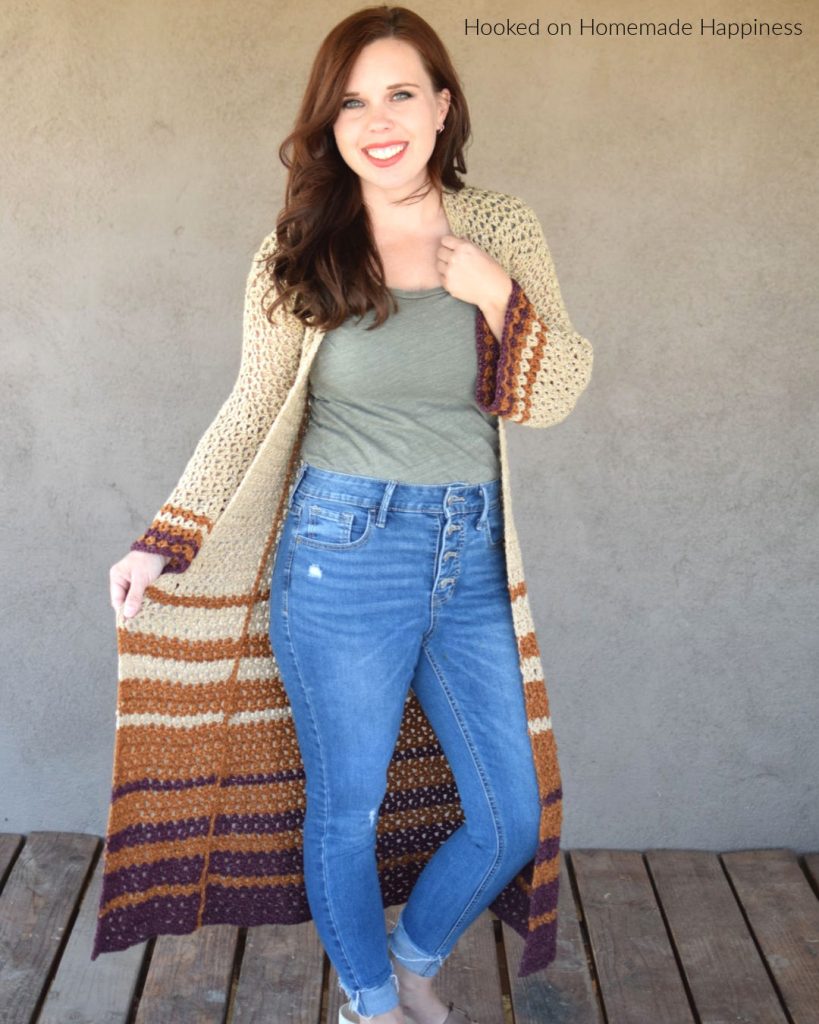
The Boho Duster Cardigan Crochet Pattern is just what you need for fall! It’s long, comfy, and has a fun flare at the hips and in the sleeves. But I especially love the length of this cardigan.
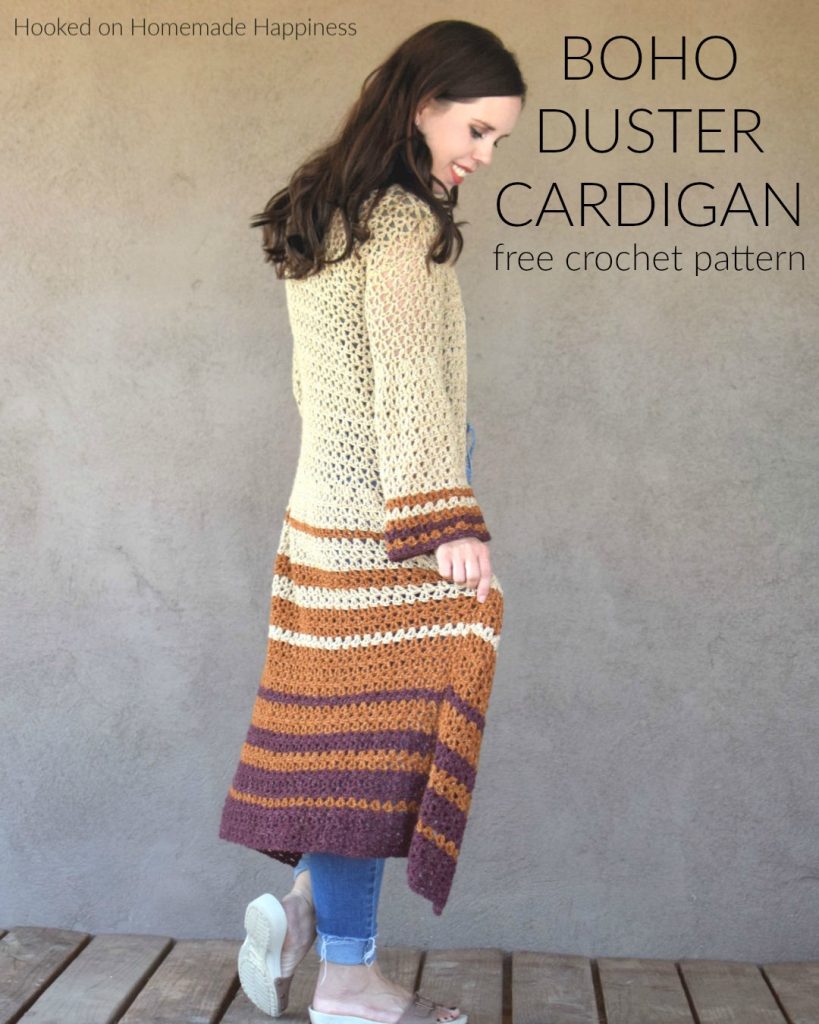
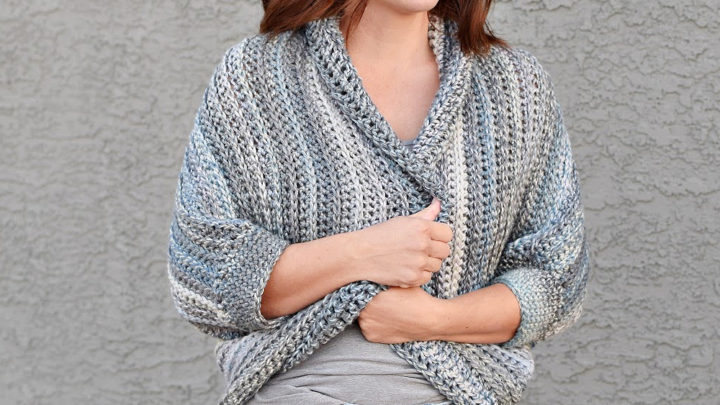
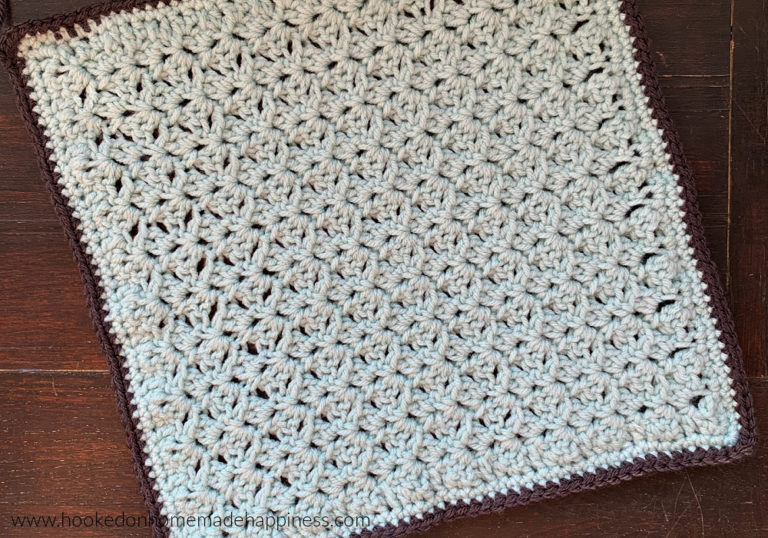
Don’t let the extra long length of this duster worry you. It’s finished up quicker than you might think. I used the Offset V Stitch and not only does it give a pretty and open design, but it made this a fast project. Plus, this stitch is an easy 1 row repeat.
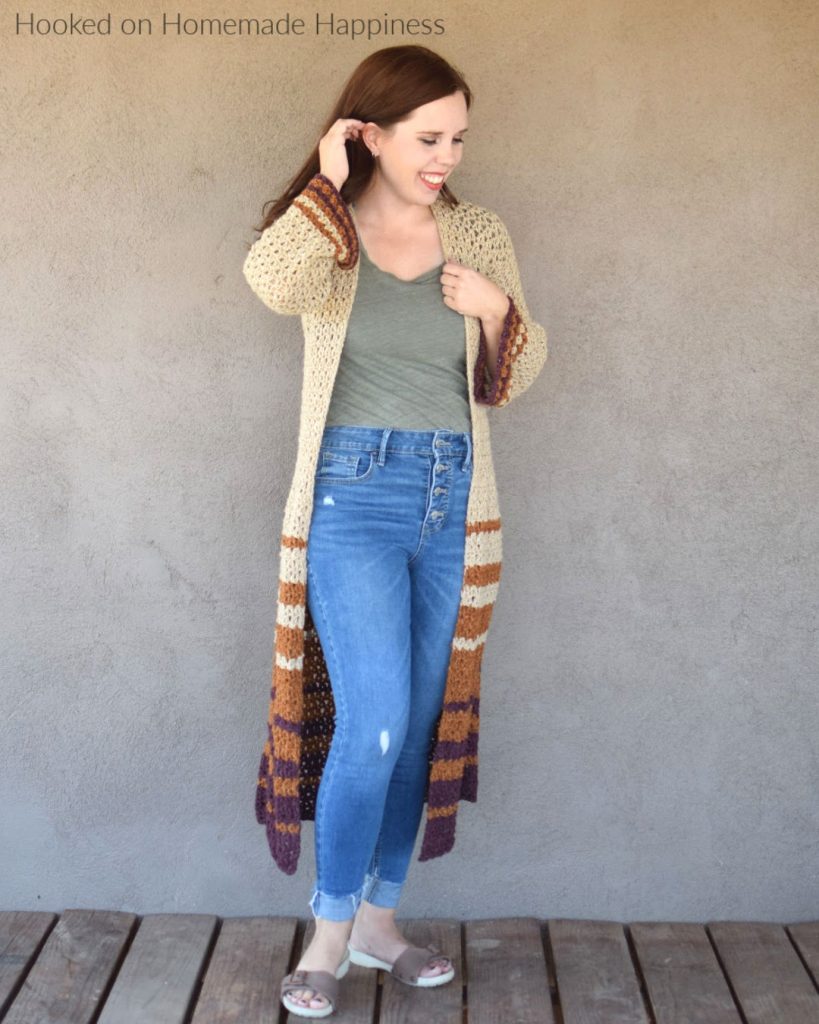
For this cardigan I used one of my favorite acrylic yarns, Lion Brand Jean’s Yarn! It’s so soft and squishy, but it’s a a durable acrylic which makes it super easy to take care of. There are some great colors to choose from. I picked these because they just screamed fall to me. I am so ready for cooler weather so I can wear this duster out and about. I think it would be so cute with skinny jeans and booties. So grab you favorite worsted weight yarn and let’s go!
click here to pin this pattern for later >>
Boho Duster Cardigan Crochet Pattern
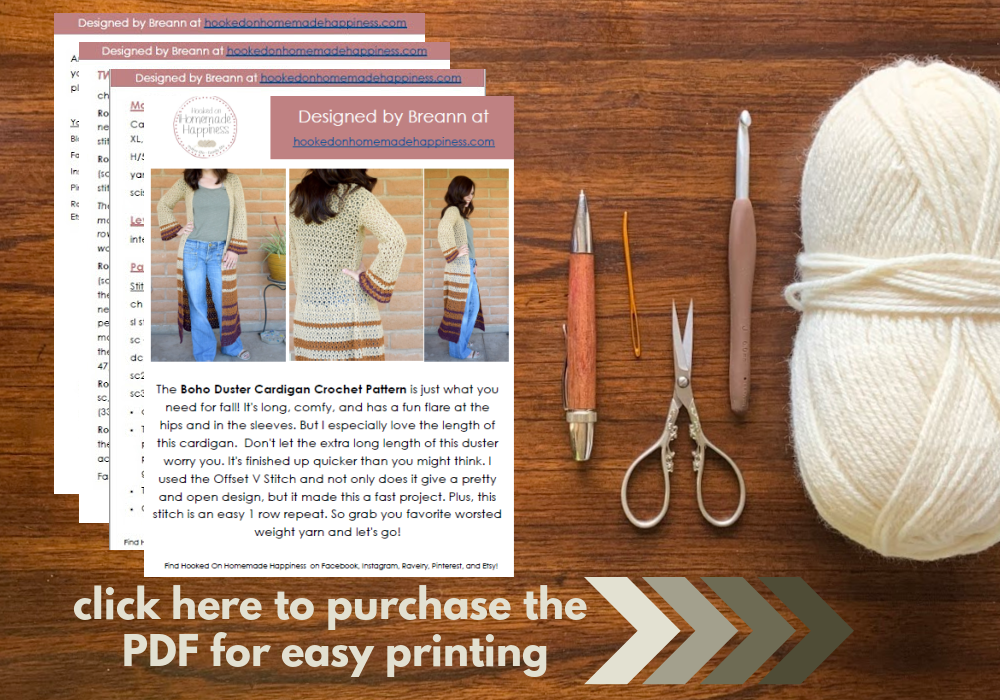
Get the full pattern below or purchase the ad-free, printable PDF in my Ravelry Shop
PIN for later HERE
Add to your Ravelry Queue HERE
Materials
Worsted weight yarn – approximately 500g for S/M, 600g for L/XL (I used Lion Brand Jean’s Yarn in Khaki, Top Stitch, and Corduroy)
H/5.0 mm hook
Yarn needle
Scissors
Level
Intermediate
Pattern notes & stitches to know
Sl st – slip stich
Ch – chain
Dc – double crochet
V stitch – (dc, ch 1, dc) in same stitch
Written in US terms
Ch 3 counts as dc
Approximate Finished Sizes (S pictured on 5’0” model)
Length: S (43”) M (44.5”) L (46”) XL (47.5”)
Shoulder Width: S (18”) M (20”) L (22”) XL (24”)
Hip Width: S (22.5”) M (25”) L (27.5”) XL (30”)
Sleeves: S (19”) M (21”) L (23”) XL (25”) (note about sizing in pattern)
Gauge:
5 v stitches = 4”
6 rows = 4”
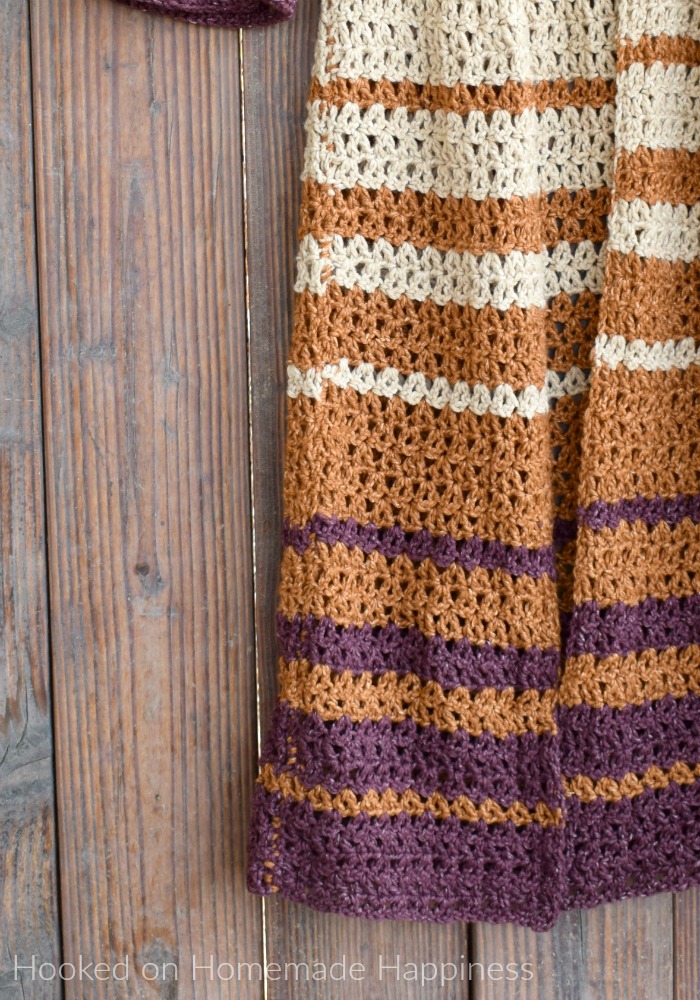
COLOR KEY & STRIPE PATTERN
Khaki = A
Top Stitch = B
Corduroy = C
Begin on row 33 (35) [37] {39}:1 row: B
3 rows: A
2 rows: B
2 rows: A
3 rows: B
1 row: A
5 rows: B
1 row: C
3 rows: B
2 rows: C
2 rows: B
3 rows: C
1 row: B
5 rows: C
BOHO DUSTER CARDIGAN
BACK
Pattern written in S, M noted in ( ), L noted in [ ], XL noted in { }
In Color A ch 62 (68) [74] {80}, leave a long starting end for sewing
Row 1: dc in 5th ch from the hook, (ch 4 counts as dc + ch 1) *skip 2 stitches, v stitch in next* repeat from * to * across to last 3 stitches, skip 2, dc in last (19 v stitches, (21 v stitches), [23 v stitches], {25 v stitches}, 1 dc)
Row 2: ch 4 (counts as dc + ch 1), dc in same stitch, *skip next dc and ch, v stitch in next dc* repeat from * to * across to last v stitch, dc in last stitch (the turning ch from previous row) (19 v stitches, (21 v stitches), [23 v stitches], {25 v stitches}, 1 dc)
Repeat row 2 to Row 28 (30) [32] {34}
The next row will have an increase that creates the bell shape
NOTE: A this point, the cardigan should reach the top of your hips. If it doesn’t, add or take out rows as needed
Row 29 (31) [33] {35}: ch 4 (counts as dc + ch 1), dc in same stitch, skip next dc and ch, v stitch in next dc, v stitch in next ch space, * v stitch in next dc, skip next dc and ch, v stitch in next dc, v stitch in next ch space* repeat from * to * across to last v stitch, dc in last stitch (28 v stitches, (31 v stitches), [34 v stitches], {37 v stitches} ,1 dc)
If the repeat doesn’t work out perfectly, that’s ok. It doesn’t matter exactly how many v stitches there are, just that a “bell” shape is created
(if you want the stripes as pictured, use stripe guide above)
Row 30 (32) [34] {36} – 66 (68) [70] {72}: ch 4 (counts as dc + ch 1), dc in same stitch, *skip next dc and ch, v stitch in next dc* repeat from * to * across to last v stitch, dc in last stitch (28 v stitches, (31 v stitches), [34 v stitches], {37 v stitches} ,1 dc)
Fasten off, leave a long end for sewing
Weave in other ends
FRONT (make 2)
In Color A ch 32 (35) [38] {41} (multiple of 3 + 2), leave a long starting end for sewing
Row 1: dc in 5th ch from the hook, (ch 4 counts as dc + ch 1) *skip 2 stitches, v stitch in next* repeat from * to * across to last 3 stitches, skip 2, dc in last (9 v stitches, (10 v stitches), [11 v stitches] {12 v stitches], 1 dc)
Row 2: ch 4 (counts as dc + ch 1), dc in same stitch, *skip next dc and ch, v stitch in next dc* repeat from * to * across to last v stitch, dc in last stitch (the turning ch from previous row) (9 v stitches, (10 v stitches), [11 v stitches] {12 v stitches], 1 dc)
Repeat row 2 to row 28 (30) [32] {34}
The next row will have an increase that creates the bell shape
NOTE: If rows were added or taken out in the back panel, do the same for the front
Row 29 (31) [33] {35}: ch 4 (counts as dc + ch 1), dc in same stitch, skip next dc and ch, v stitch in next dc, v stitch in next ch space, *v stitch in next dc, skip next dc and ch, v stitch in next dc, v stitch in next ch space* repeat from * to * across to last v stitch, dc in last stitch (13 v stitches, (15 v stitches), [16 v stitches], {18 v stitches}, 1 dc)
If the repeat doesn’t work out perfectly, that’s ok. It doesn’t matter exactly how many v stitches there are, just that a “bell” shape is created
(use the same striping pattern as the back)
Row 30 (32) [34] {36} – 66 (68) [70] {72}: ch 4 (counts as dc + ch 1), dc in same stitch, *skip next dc and ch, v stitch in next dc* repeat from * to * across to last v stitch, dc in last stitch (13 v stitches, (15 v stitches), [16 v stitches], {18 v stitches}, 1 dc)
Fasten off, leave a long end for sewing
Weave in other ends
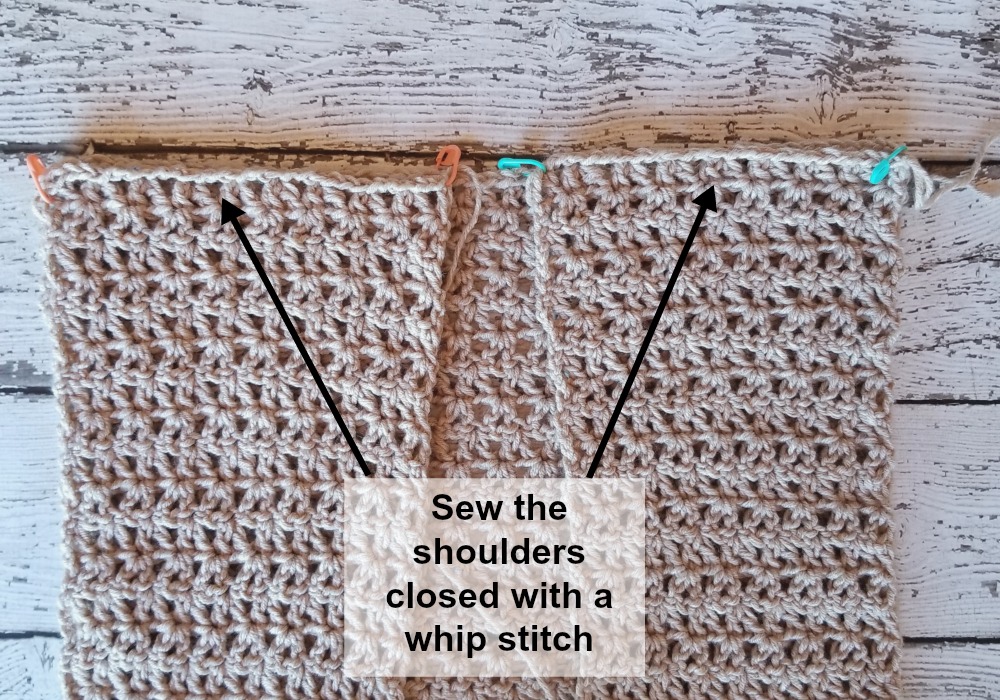
SEWING
Lay the two front pieces on top of the back. Sew across the shoulders with a whip stitch. I marked where to sew with stitch markers and then I used the long ends for sewing.
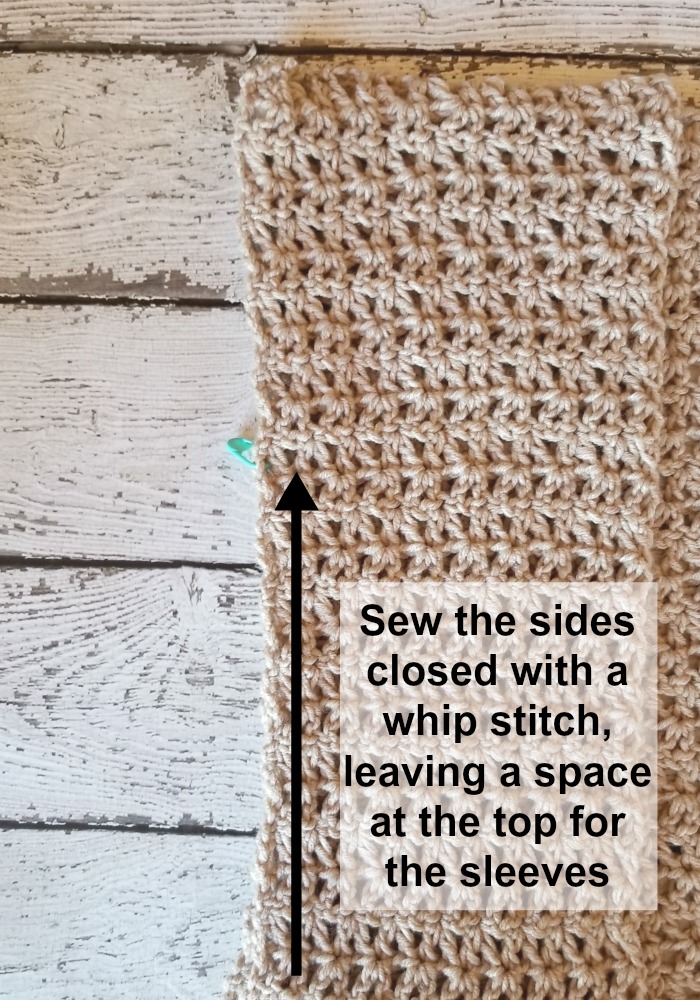
After sewing the shoulders I tried the cardigan on. I use a stitch marker to mark where I wanted the sleeves to be.
(As a guide, leave approximately 10 rows for a S, 12 rows for a M, 14 rows for a L, 16 rows for a XL — or wherever you want them 🙂 )
Sew the sides closed with a whip stitch. I used the long ends for sewing.
Fasten off, weave in all your ends.
SLEEVES
NOTES FOR THE SLEEVE:
- I did not include the number of stitches for each round, as they might be a little different for everyone
- You will be working in rounds
- The offset V stitch will be made different than it was with the body of the sweater because you will be working in rounds
- Sleeve measurements are from round 1 to the end, does not count the body of the cardigan
Join Color A
Round 1: ch 1, sc evenly around (the amount needs to be a multiple of 3), join to first sc with sl st
Round 2: ch 4 (counts as dc + ch 1), dc in same stitch, skip 2 stitches, *v stitch in next, skip 2 stitches* repeat from * to * around, join to first ch 3 with sl st
Round 3: sl st over 2 stitches to the next dc, ch 4 (counts as dc + ch 1), dc in same stitch, skip next dc and ch, *v stitch in next, skip next dc and ch* repeat from * to * around, join to first ch 3 with sl st, join to first ch 3 with sl st
Round 4: ch 4 (counts as dc + ch 1), dc in same stitch, skip ch and next dc, *v stitch in next, skip ch and next dc* repeat from * to * around, join to first ch 3 with sl st, join to first ch 3 with sl st
Repeat round 3 & 4 to round 9 (11) [13] {15}
The next row will have an increase that creates the bell shape
NOTE: At this point, the sleeve should reach approximately to your elbow. If it doesn’t, add or take out rows as needed
Round 10 (12) [14] {16}: ch 4 (counts as dc + ch 1), dc in same stitch, *skip ch and next dc, v stitch in next, v stitch in ch space, skip next dc, v stitch in next* repeat from * to * around, join to first ch 3 with sl st
If the repeat doesn’t work out perfectly, that’s ok. It doesn’t matter exactly how many v stitches there are, just that a “bell” shape is created
Repeat round 3 & 4 to round 27 (29) [31] {33} (stripe pattern below)
Stripes are as follows:
Begin stripes on round 22 (24) [26] {28}:
1 row of B, A, B, C, B, C
Sleeve should reach approximately to your wrist. If it doesn’t, add or take out rows as needed
Fasten off, weave in your ends
And you’re done!! I hope you love this duster cardigan!
Looking for more patterns? Follow me on Facebook, Instagram, and Pinterest! Please share a pic of your finished product with me. I’d love to see it!


I love all your work , i wish you did videos , I’m a big time visual learner and although I’ve been crocheting for many years i still get confused with patterns , especially when things need to be sewn together….. Any chance of you ever doing you tube videos
Hi! No, I don’t make videos at this time.
I wish you did do videos, this is beautiful I too am a visual learner my daughter would love this…How long did it take you?
Thank you
Kay
Hi! Hmm… I’m not sure how long it took me. This stitch works up pretty quick.
I’m stuck. 🙁 I’m to the point of laying the front panels on top of the back panel. As I whip stitch the first front panel to the back I’m realizing that after doing both fronts there is no opening for where the cardigan should be against your neck. Am I only supposed to whip stich a few stitches? If so how many for a size large. Thank you
Hi! You should have a little bit of space between the two front panels. Maybe about an inch?
https://youtu.be/BQLTV6rGClU
This will give you a brake down of the stitch. I hope this helps!
Hi, really nice cardigan ! I’ll definitely try it !
When you say 500gr for S/M, is it for main color or main + accent color?
Thanks !
That’s the total amount 🙂
nice…i want to try this but only a normal cardigan length. At what row approximatly would I have to stop?
Would lion brand Flikka yarn work with this pattern , although it’s catergorized as a #3 yarn it’s thicker.
Hi! It could work, it will come out a but smaller so you might have to adjust or go up a size
How much do we need to buy of each color. You say 600 g for L/XL but there is no guidance of how much of each color.
Thanks.
If you wanted to do the stripes as pictured, I would say about 4 of the main color (khaki), 2 of the second (top stitch), 1 of the third (corduroy)
It’s good to hear your estimate at least about how many skeins of each color are needed. It would also be good to hear how many yards instead of grams. I don’t understand why giving the weight is becoming trendy when any experienced crocheter or knitter knows that it’s the yardage and the thickness of the yarn that is most important.
Hi Breann, I am absolutely loving this pattern! I’m at the part where I have to sew the front panels to the back. I was wondering, do you sew everything inside out, and then crochet the sleeves inside out too, or is everything done right side out? Thank you so much for this pattern, I cannot wait to finish it up!
Hi! I sew inside out, then turn it right side out to make the sleeves 🙂
Do you see the whole way across the shoulders? How much space do you leave open or not sown on for the neck whole/opening?
Hi! I lined up the stitches across the shoulders on each side. This should leave an inch or two opening between each side on the front.
Hi ! Love this pattern! Wondering if you could tell me how to connect a hood on it
Hi! I have a hood on this pattern ( https://www.hookedonhomemadehappiness.com/the-fest-vest-crochet-pattern/ ) and you might be able to use it as a guide 🙂
I don’t see how long your begging chain for the back is supposed to be. Are they the numbers in parentheses?
This is the starting ch instructions:
In Color A ch 62 (68) [74] {80}, leave a long starting end for sewing
Hi! I’m currently making this amazing cardigan for a friend of mine and would love to show my progress using my own photos on my blog. Is it cool if I share a link back to your awesome work?
Yes, of course 🙂
Yay!! Thank you so much!
What about that crazy increase row? It seems that the cardigan, from the waist down, will poof out too much. Can you show a picture of your garment to this point?
Hi! There’s only one increase row. It creates a little bit of a bell shape but it doesn’t poof out. The one I’m wearing in the photo has the increase row at the hips 🙂
Hey, I recently found your site and I am loving what I have found so far.
I have not yet started to crochet as I am confused by the chain lengths for the front and back pieces. Taking the small as an example. The back piece is a chain of 62, and the front pieces are chains of 32. Mathematically, this would mean that when the chains are lined up, there is a slight overlap at the middle, however, in the picture there is a gap between the two front pieces. Am I reading it wrong, or does it come out slightly differently when the first rows are finished?
I have only really done baby blankets and scarves before now so sorry if this is a dumb question.
Hi! There should be a space of 1 v stitch between the two front panels for a small
I’m assuming to make the cardigan a larger size, I would increase all the counts as needed?
Yes. The starting ch needs to be a multiple of 3 + 2 more ch
Hi, I am currently making this cardigan but I am really struggling with the sleeves. I cannot figure where to slip stitch into at the end of each row. At both the end of row 3 and the end of row 4 it says ‘ slip stitch to first chain 3, slip stitch to first chain 3’. Because I can’t seem to get this part sorted the slip stitch over 2 stitches at the beginning of row 3 is not making sense. Are you able to clarify this please?
Thanks Paula.
Hi! At the end of the round you should join to the top of the first ch 3 of the round. But because you want to start this round in the next double crochet work a sl st in the next ch space, then a sl st in the next double crochet. This is where the round will start. Hope that helps!
Hi I have had this pattern saved forever,I was looking for a long boho vest pattern and found this duster pattern in my pattern folder. I was looking over the instructions and relized that the sleeves are made seprate so I have reworked it to make a vest. I will send you a picture when I am finished with it. thank you. I will also be making the duster cardigan.
Awesome! A vest would be so cute!
Hi, I have only just found this cardigan and it is gorgeous. I’m wanting to make this as a gradient, so was wondering if you know how much yarn each panel (back, front X2, sleeves X2) uses as opposed to the total amount for the cardigan.
Hi! Sorry, I don’t :/ I’m thinking the front and back use equal amounts. I would get (at least) one additional skein. Whenever I’m trying to match up colors/stripe patterns I always end up with some waste because it didn’t match up.