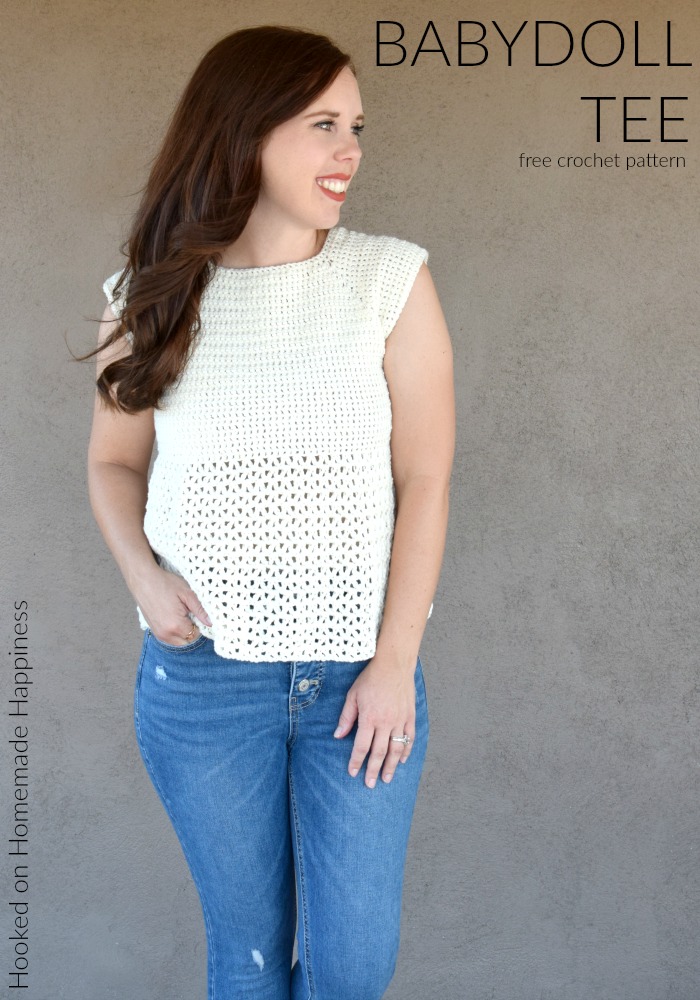
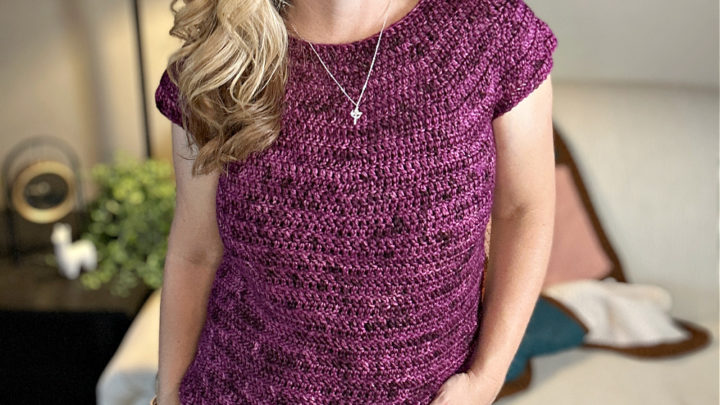
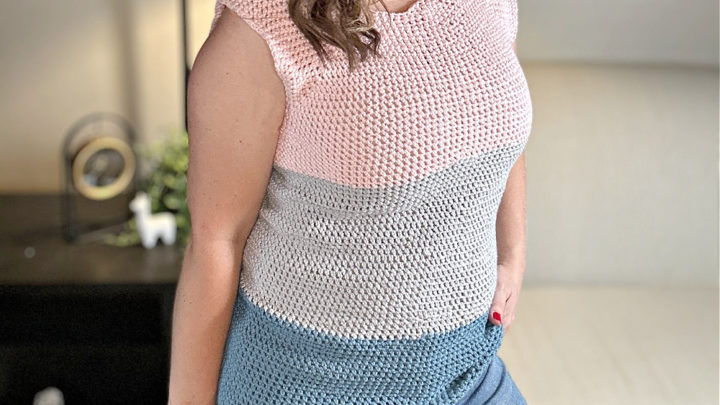
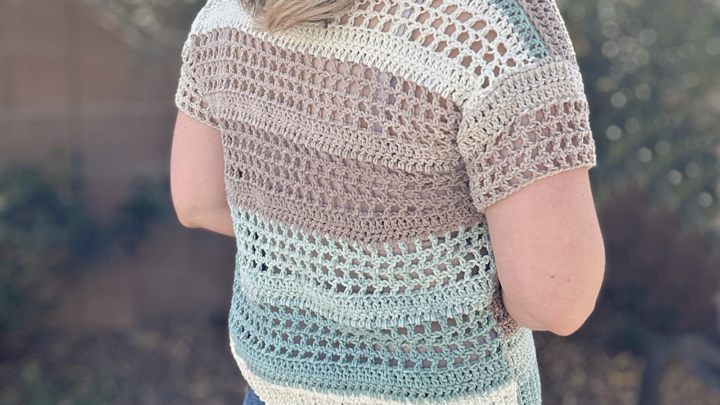
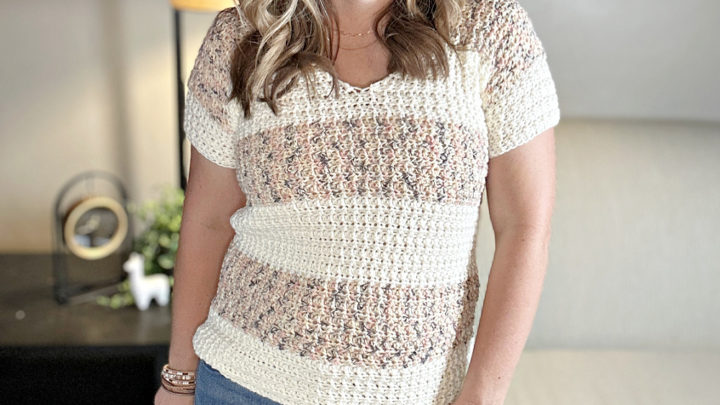
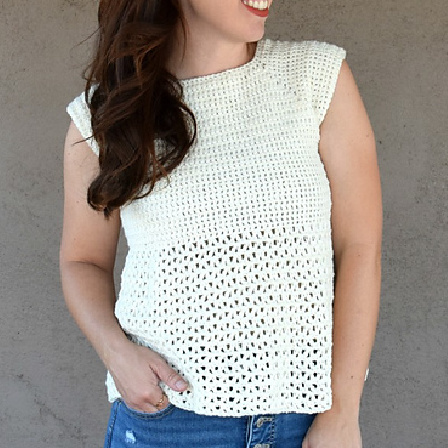
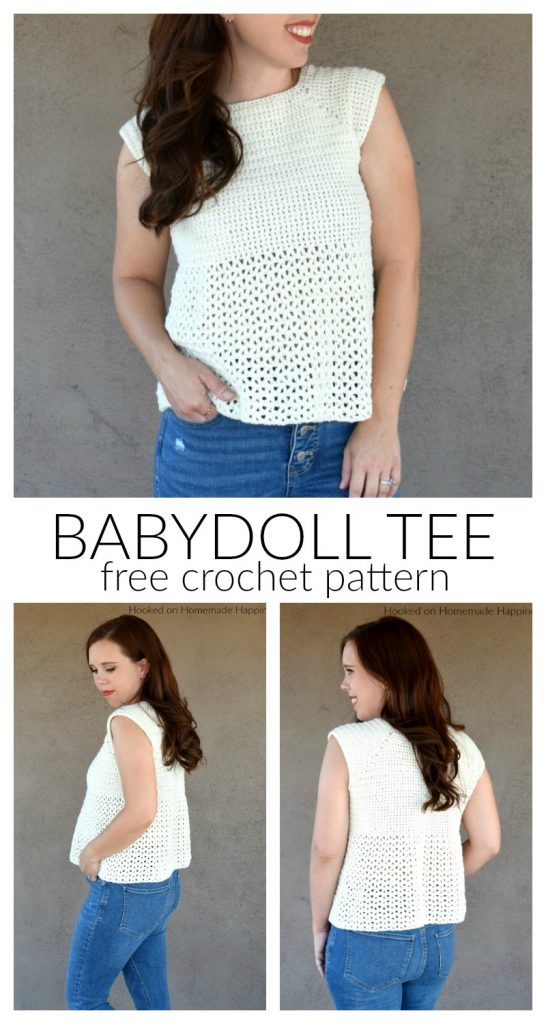
Babydoll Tee Crochet Pattern
Looking for a lightweight, flattering crochet top for warmer days? The Babydoll Tee is the perfect blend of comfort and style! With its flowy silhouette and simple construction, this top is a fun and relaxing make you’ll love wearing all season long.
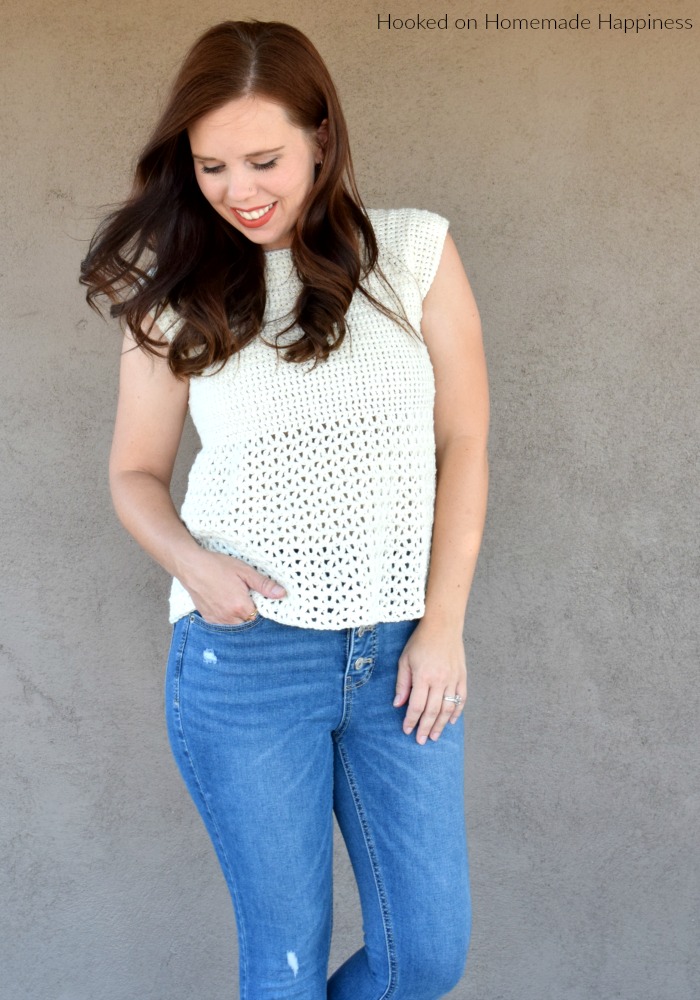
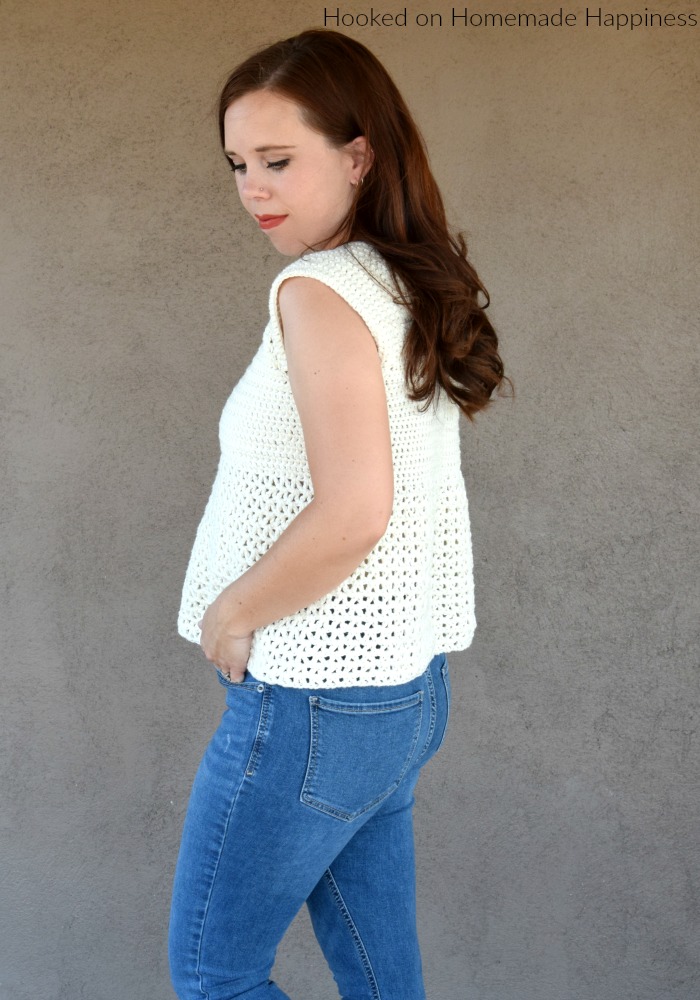
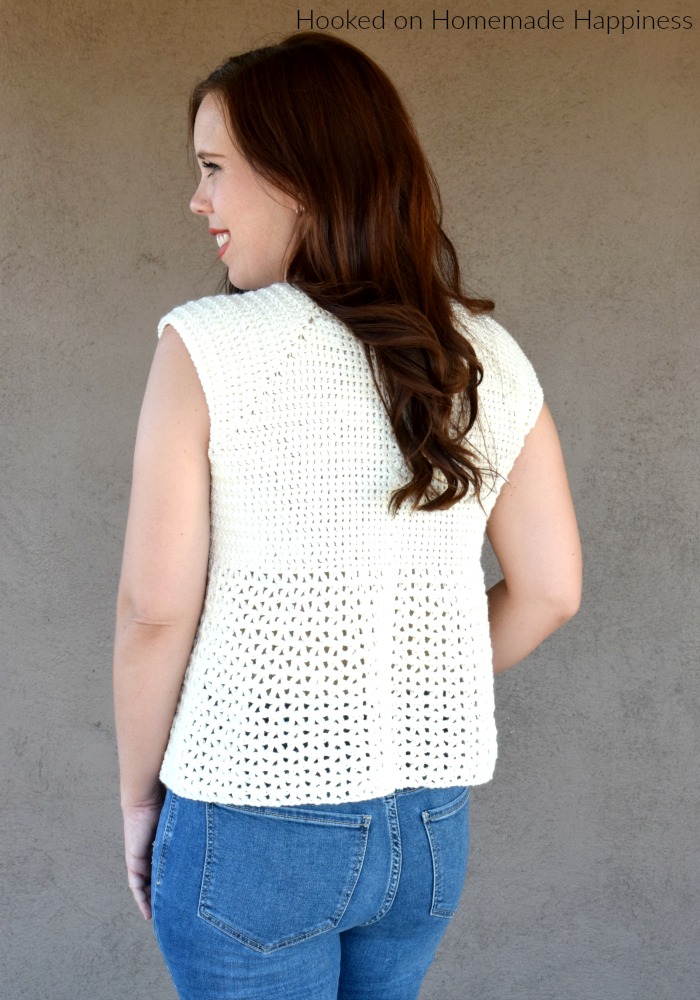
Designed with a top-down raglan construction, this tee allows you to easily customize the fit and length. The fitted bodice transitions into a breezy, flared bottom for that classic babydoll look.
Purchase the ad-free, printable PDF for easy printing.
Why You’ll Love This Pattern
- Flowy and flattering babydoll silhouette
- Top-down construction for easy customization
- Lightweight and breathable for spring and summer
- Simple stitch combinations with beautiful texture
- Minimal finishing required
Pattern Details
- Yarn: DK weight yarn
- Sample made with Comfy Cotton Blend (now discontinued – see substitutions below)
- Hook: G/4.0 mm
- Construction: Top-down raglan
- Stitches Used:
- Extended Single Crochet (bodice)
- V Stitch (skirt section)
Yarn Substitutions
Since the original yarn has been discontinued, here are a few great alternatives:
- Any DK weight cotton or cotton-blend yarn
- WeCrochet CotLin
- Lion Brand Coboo
- Paintbox Cotton DK
Look for something lightweight with good drape to keep that soft, flowy feel.
Design & Construction
The Babydoll Tee is worked from the top down, beginning with a raglan yoke. This means you can try it on as you go and adjust the length of both the bodice and the skirt to suit your style.
The top portion is worked in extended single crochet, creating a smooth, slightly textured fabric that provides structure and coverage. Once the yoke and bodice are complete, the pattern transitions into a V stitch, giving the bottom portion a light, airy drape that creates the signature babydoll flare.
FAQ
Ready to Crochet?
Grab your favorite DK weight yarn, your hook, and get ready to make a cute and comfy top you’ll reach for again and again!
Happy crocheting! 🧶💕
Making the Babydoll Tee Crochet Pattern
Get the full free pattern below or purchase the ad-free, printable PDF
Materials
Lion Brand Comfy Cotton Blend in Whipped Cream (2 skeins for S/M, 3 skeins for L/XL, 4 skeins for 2X/3X) – any DK weight yarn will work
G/4.0 mm hook
yarn needle
scissors
Level
Easy -you must be very familiar with basic crochet stitches
Pattern notes
Stitches & Abbreviations – US terms
ch – chain
foundation sc (VIDEO TUTORIAL)
sl st – slip stitch
esc – extended single crochet (insert hook into stitch, yarn over, pull up a loop, yarn over, pull through one loop, yarn over, pull through 2 loops)
dc – double crochet
v stitch – (dc, ch 1, dc) all in the same space
· ch 1 does not count as sc or esc
· ch 2 does not count as dc
· the pattern is worked from the top down (raglan style) in turned rounds
Sizes:
S, M, L, XL, 2X, 3X – The pattern is written in these sizes consecutively. Example, when the pattern gives the end of the row count as (74, 82, 90, 98, 106, 114 sc), the 74 is for S, 82 is M, 90 is L, 98 is XL, 106 is 2X, 114 is 3X.
Approximate Finished Size:
Bust: S (34”) M (37.5”) L (41”) XL (44.5”) 2X (48”) 3X (51.5”)
Width across the back: S (17”) M (18.75”) L (20.5”) XL (22.25”) 2X (24”) 3X (25.75”)
Length: S (17.5”) M (20”) L (22.5”) XL (25”) 2X (27.5”) 3X (30”)
Armhole: S (6.5”) M (7.25”) L (8”) XL (8.75”) 2X (9.5”) 3X (10.25”)
Gauge: 14 esc x 15 rows = 4” x 4”
Pattern Support
Looking for pattern support or want to share your progress? Join our Crochet Community Facebook Group! It’s the perfect place to ask questions, get help, and connect with fellow makers.
CROCHET PATTERN WRITTEN INSTRUCTIONS
Row 1: ch 2, starting in 2nd ch from the hook, foundation sc 74, 82, 90, 98, 106, 114, join to the first sc with sl st to make a circle (74, 82, 90, 98, 106, 114 sc)
Round 2: ch 1, turn, esc in each stitch around, join to first esc with sl st (74, 82, 90, 98, 106, 114 esc)
Round 3: ch 1, turn, esc in 10, 11, 12, 13, 14, 15 stitches, 2 esc in next, ch 2, 2 esc in next, esc in 13, 15, 17, 19, 21, 23 stitches, 2 esc in next, ch 2, 2 esc in next, esc in 20, 22, 24, 26, 28, 30 stitches, 2 esc in next, ch 2, 2 esc in next, esc in 13, 15, 17, 19, 21, 23 stitches, 2 esc in next, ch 2, 2 esc in next, esc in remaining stitches, join to first esc with sl st (82, 90, 98, 106, 114, 122 esc)
Round 4: ch 1, turn, *esc in each stitch to the ch 2 space, (esc, ch 2, esc) in ch 2 space,* repeat from * to * around, esc in remaining stitches, join to first esc with sl st (90, 98, 106, 114, 122, 130 esc)
Repeat round 4 to Round 19, 21, 23, 25, 27, 29 (210, 234, 258, 282, 306, 330 esc)
The sleeves are created in the next round
Round 20, 22, 24, 26, 28, 30: ch 1, turn, esc in each stitch to the ch 2 space, esc in ch 2 space, ch 3, esc in next ch 2 space (skipping an entire side, this will be the first sleeve), esc in each stitch to next ch 2 space, esc in ch 2 space, ch 3, esc in next ch 2 space (this is the second sleeve), esc in remaining stitches, join to first esc with sl st (112, 124, 136, 148, 160, 172 esc)
Round 21, 23, 25, 27, 29, 31: ch 1, turn, esc in each stitch and ch around, join to first esc with sl st (118, 130, 142, 154, 166, 178 esc)
Round 22, 24, 26, 28, 30, 32: ch 1, turn, esc in each stitch around, join to first esc with sl st (118, 130, 142, 154, 166, 178 esc)
Repeat previous round to Round 33, 37, 39, 41, 43, 45 (118, 130, 142, 154, 166, 178 esc)
Round 34, 38, 40, 42, 44, 46: ch 2, turn, V stitch in first stitch, *skip 1 stitch, V stitch in next* repeat from * to * around, join to first dc with sl st (58, 65, 71, 77, 83, 89 V stitches)
Round 35, 39, 41, 43, 45, 47: ch 2, turn, V stitch in each ch 1 space around, join to first dc with sl st (58, 65, 71, 77, 83, 89 V stitches)
Repeat previous round to Round 50, 56, 62, 68, 74, 80 (58, 65, 71, 77, 83, 89 V stitches)
Or until desired length
Fasten off. Weave in the ends.
And you’re done with this cute top!!
Looking for more patterns? Follow me on Facebook, Instagram, and Pinterest! Please share a pic of your finished product with me. I’d love to see it!


Thank you for sharing your gift in talent ♥️ You are creative! Your crochet patterns are beautiful! ♥️
I just love your work and style. And the fact that you can it any length. Your the greatest!!!
Thank you for all the beautiful Summer Tee’s. Where I live in California it seems sometimes it skips some seasons. Sometimes misses most of Winter, short Spring and Fall. I always like to wear a tank top and or light weight Tee.
Hi! I’ve tried my swatch with a 4mm hook at first and it wasn’t wide enough… But then when I went up to a 5mm hook, the swatch is almost the right width, but the height is way too tall. It definitely isn’t a square anymore lol. Any suggestions?? I love this top so much! But I don’t want to start on it and have it come out all wrong size wise. Thank you!!
Hi! I would use the 5 mm and then just make the top as long as you want 🙂
Thank you!! I have one last question, it’s probably a silly one… But… When you work into the chain 1 spaces, do you just go into the space below it, or do you actually work into the chain? The reason I’m asking is because in the past I’ve struggled to get stitches into the actual chain. So I’ve never been sure if I’m doing it right lol.
This looks really cute. I am making my first crochet cardigan now, so this might have to be my next project!
Hi
But I dun quite understand “Round 3: ch 1, turn, esc in 10, 11, 12, 13, 14, 15 stitches, 2 esc in next, ch 2, 2 esc in next, esc in 13, 15, 17, 19, 21, 23 stitches”,
When I have ch 1 n turn how do I esc in 10…? Wats the 10, 11, 12 etc…?.
Hi! Those are the numbers for the difference sizes. What size are you making?
I’m confused on the round 4-23. ch 1, turn, esc in each stitch to the ch 2 space, (esc, ch 2, esc) in ch 2 space, I should have 210 stitches by row 23. I’m not adding any stitches and I still have 106. Maybe I should do 2 sec ch2 2 sec in the chain 2 space?
Hi! You should be adding 8 stiches each round 🙂 Each corner increases by 2 stitches by adding (1 esc, ch 2, 1 esc) in each ch-2 corner space.
Thanks for getting back to me! I finally got it and it’s coming out great thanks for the pattern!