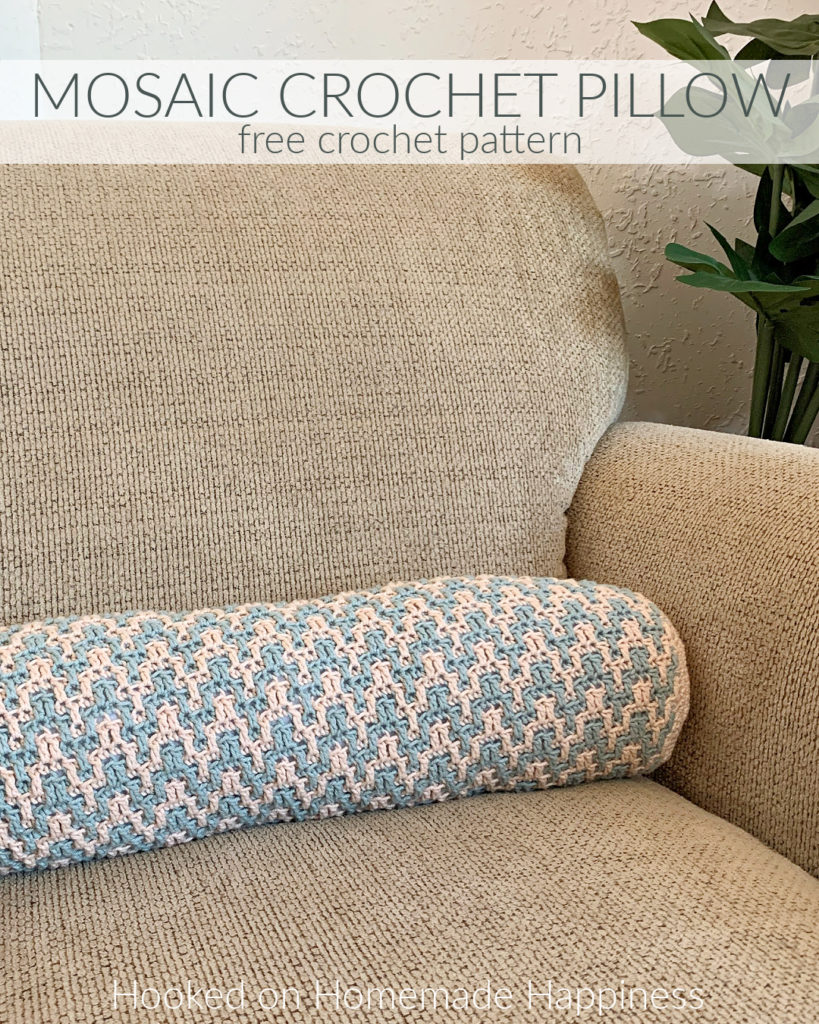
Mosaic Crochet Pillow Pattern
The Mosaic Crochet Pillow Pattern has a fun cylinder shape. It’s easily made with one rectangle and two circles.
This pattern is part of the Home Décor Crochet Along! This CAL has four patterns that all feature this stitch pattern. Get all the details HERE.

Mosaic Crochet Pillow Pattern
Get the full pattern below or download the ad-free, printable PDF HERE
Materials
200g Dishie total in Linen & Inlet (any worsted weight cotton or acrylic would work)
G/4.0 mm hook
yarn needle
scissors
stitch markers
poly-fil
Level
intermediate
Pattern notes & stitches to know
ch – chain
magic ring
sl st – slip stitch
fsc – foundation single crochet
sc – single crochet
sc blo – single crochet back loop only
ldc flo – long double crochet (work stitch in the row below the previous row) in the front loop only
· written in US terms
· ch 1 does not count as sc
· To change the size, multiple needed for row 1 is 5+2
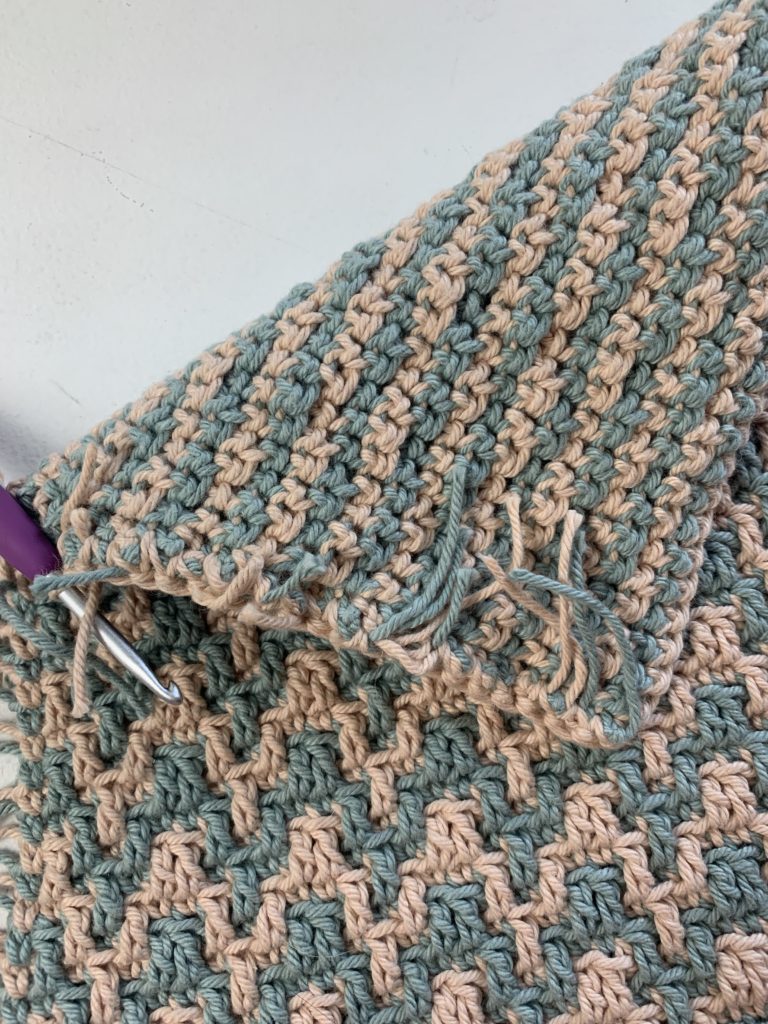
· All rows are worked on the right side. Cut yarn each row and rejoin in the first stitch.
· Change color every row (2 colors are needed)
· Gauge: 15 sc x 20 rows
· Approx finished size: 21.5” x 5”
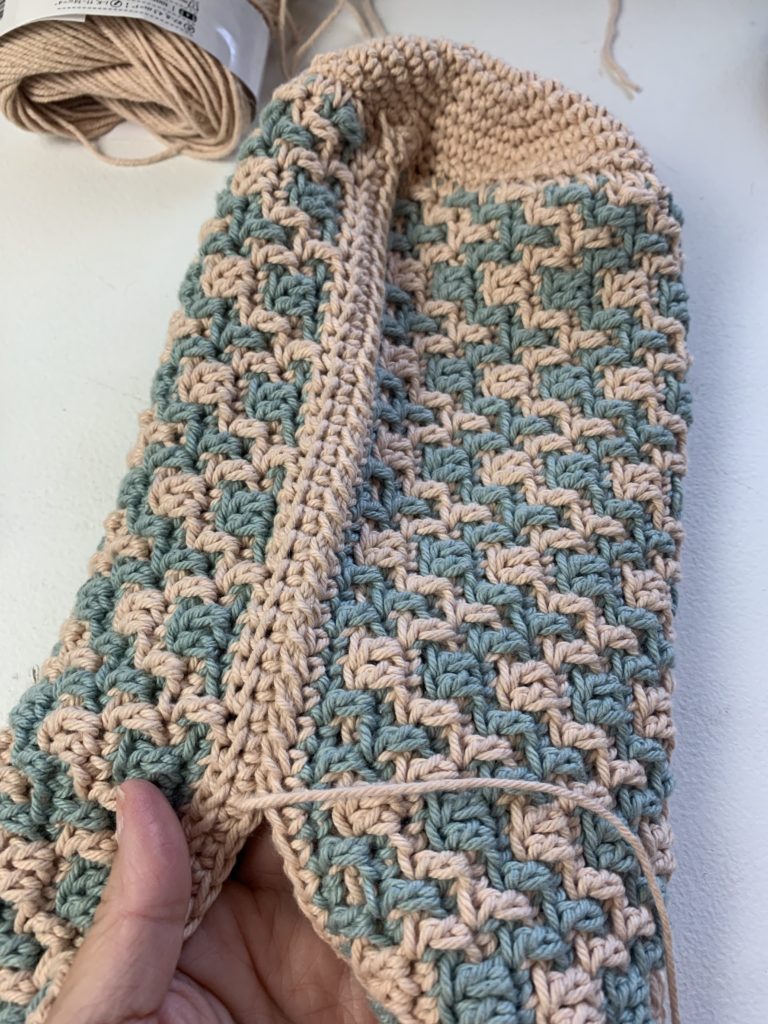
MOSAIC CROCHET PILLOW PATTERN
>>>STITCH VIDEO TUTORIAL<<<
starting with main color, ch 2
Row 1: starting in the 2nd ch from the hook fsc 72 (72 sc)
If you would rather start with a chain, ch 73, sc in 2nd ch from the hook and across
Remember to cut yarn after each row and rejoin to first stitch on the right side
Row 2: sc in first stitch, sc blo in 70 stitches, sc in last (72 sc)
Row 3: sc in first stitch, *sc blo in 2 stitches, ldc flo in next, sc blo in 2 stitches* repeat from * to * across, sc in last (72)
Row 4: sc in first stitch, ldc flo in next, sc blo in 3 stitches, *ldc flo in next 2, sc blo in 3 stitches* repeat from * to * across to last 2 stitches, ldc flo in next, sc in last (72)
Row 5: sc in first stitch, *sc blo in next stitch, ldc flo in next, sc blo in next, ldc flo in next, sc blo in next* repeat from * to * across, sc in last (72)
Row 6 – 56: repeat rows 3 – 5, ending with a row 5 repeat
Row 57: sc in each stitch across (72 sc)
Do not fasten off.
BORDER
When working the border, crochet over the ends. Tie the ones next to each other together to tighten them. Trim them to a couple inches long. When single crocheting around, make sure to crochet over them.
sc down the side of the rectangle, working 1 sc in the end of each row. As you work over the ends, the back might look messy but remember that this will be on the inside of the pillow.

Continue working across to the bottom corner, across the bottom, and then up the opposite side from where you started.
Fasten off. Leave a long end for sewing.
END CIRCLES (make 2)
With main color, make a magic ring
Round 1: ch 1, 8 sc in ring, pull ring closed tight, join to first sc with sl st (8 sc)
Round 2: ch 1, 2 sc in each stitch around, join to first sc with sl st (16 sc)
Round 3: ch 1, *sc, 2 sc in next stitch* repeat from * to * around, join to first sc with sl st (24 sc)
Round 4: ch 1, *sc in 2 stitches, 2 sc in next* repeat from * to * around, join to first sc with sl st (32 sc)
Round 5: ch 1, *sc in 3 stitches, 2 sc in next* repeat from * to * around, join to first sc with sl st (40 sc)
Round 6: ch 1, *sc in 4 stitches, 2 sc in next* repeat from * to * around, join to first sc with sl st (48 dc)
Round 7: ch 1, *sc in 5 stitches, 2 sc in next* repeat from * to * around, join to first sc with sl st (56 dc)
Round 8: ch 1, *sc in 6 stitches, 2 sc in next* repeat from * to * around, join to first sc with sl st (64 dc)
Round 9: ch 1, *sc in 7 stitches, 2 sc in next* repeat from * to * around, join to first sc with sl st (72 dc)
Fasten off. Leave a long end for sewing.
SEWING
Face everything wrong side out. Wrap the large rectangle in a circular shape and secure one end piece with stitch markers.
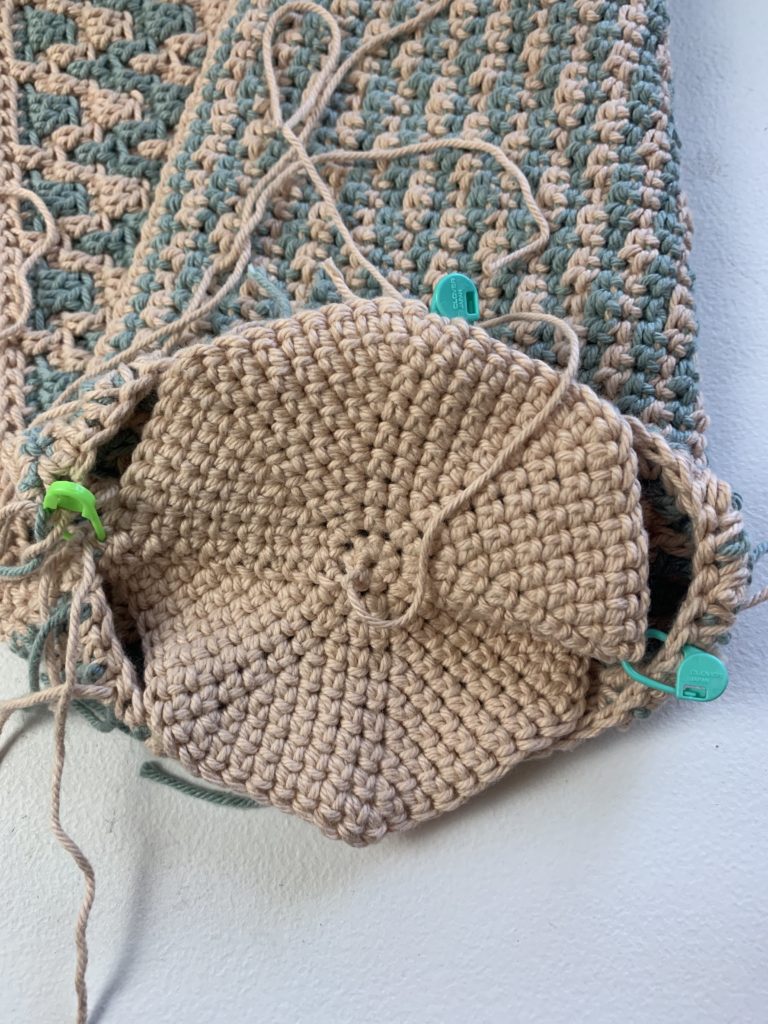
Use the long end from the circle to whip stitch them together.
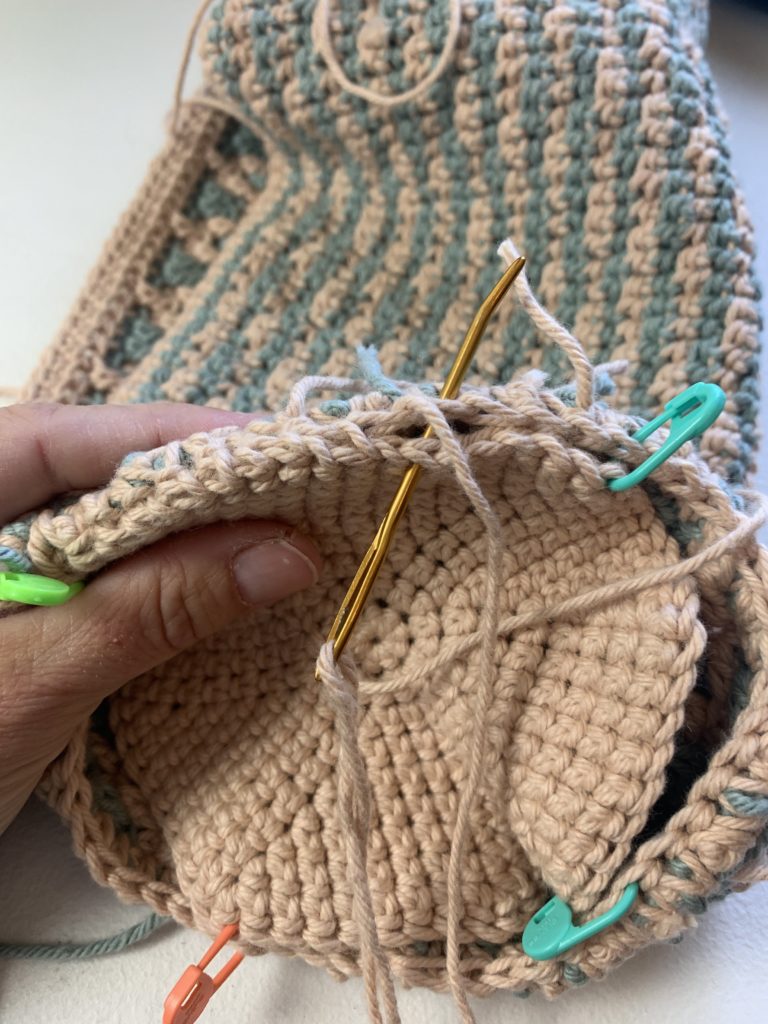
Repeat on other side.
Weave in all the ends.
Turn right side out.
Use long end from rectangle to sew the bottom of the pillow closed with whip stitch.
About halfway across, begin to stuff with poly-fil. Continue sewing and continue stuffing until there are a few stitches left.
Stuff, stuff, stuff!
Then finish up sewing. Fasten off.
Weave in the ends.
Looking for more patterns? Follow me on Facebook, Instagram, and Pinterest! Please share a pic of your finished product with me. I’d love to see it!


I’m working on the pillow & noticed on the end circles starting with round 6 that you specify ch2 instead of ch1. Also, the stitch count for round 9 should be 72 not 90.