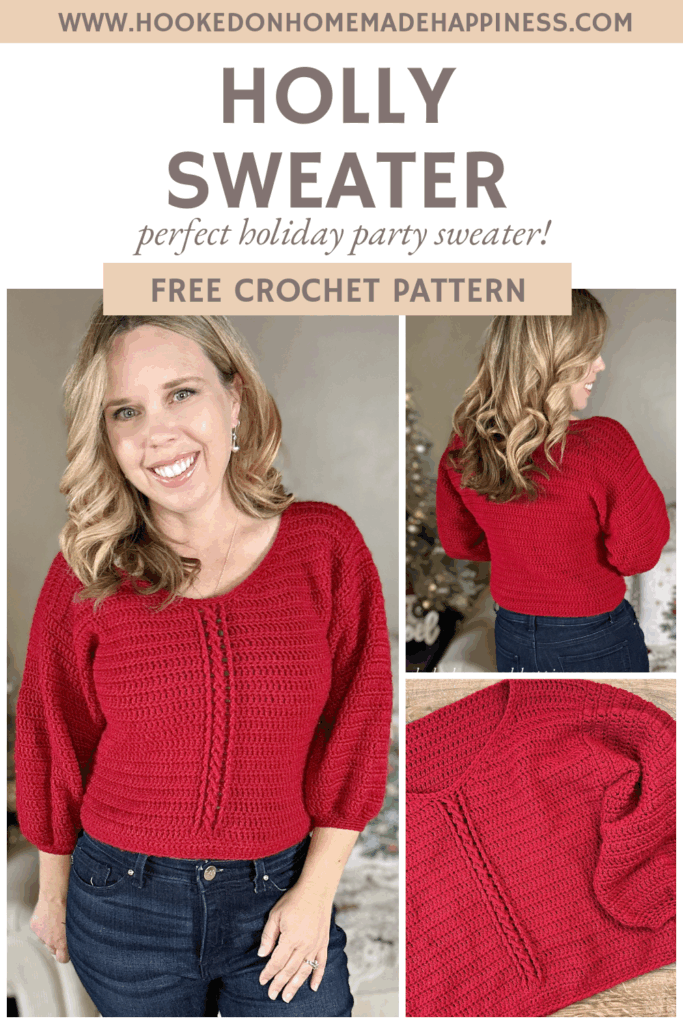
Holly Sweater Crochet Pattern
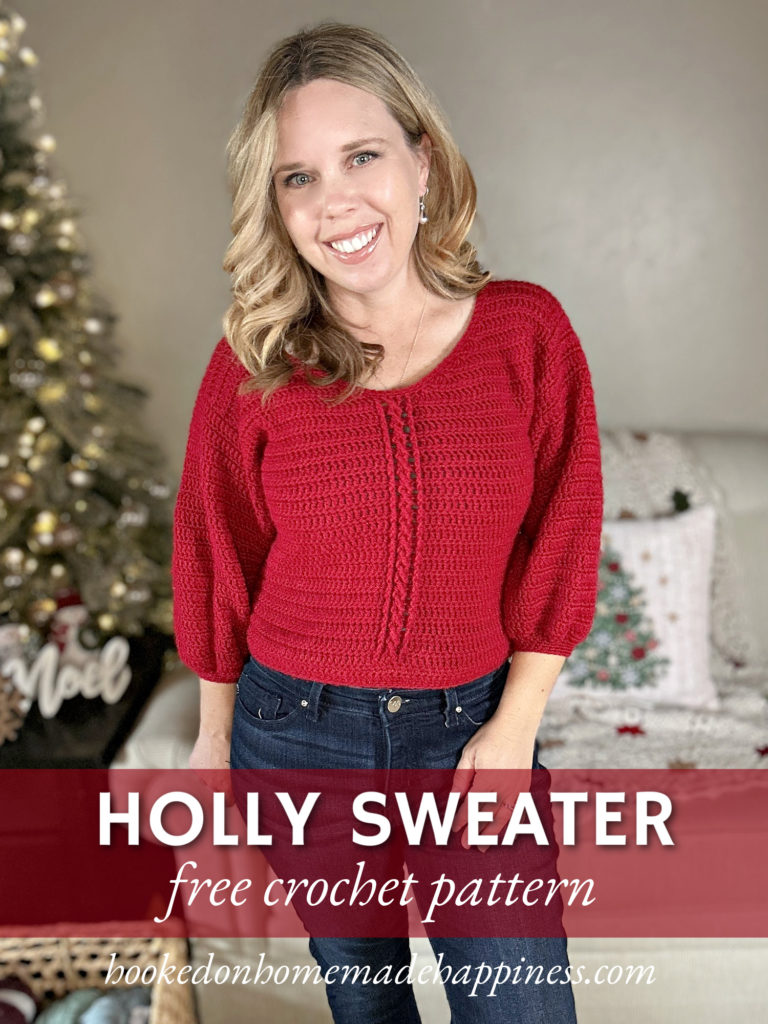
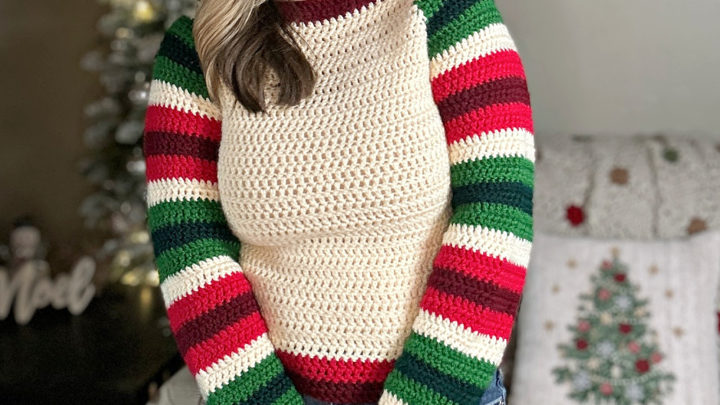
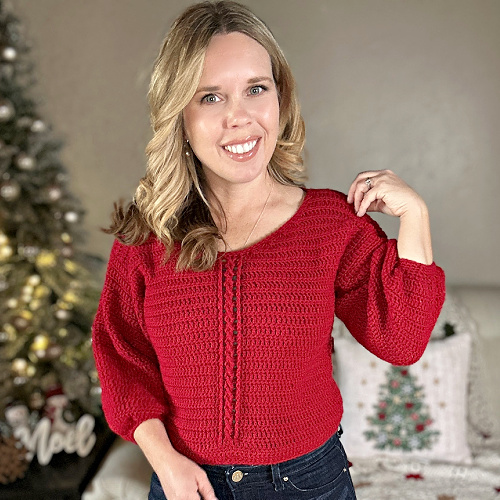
The Holly Sweater Crochet Pattern is a beautiful and classic design perfect for the holiday season — and beyond! This stunning crochet sweater features a flattering V-neck, elegant balloon 3/4 sleeves, and a simple cable down the front center for a timeless look. Made with soft DK weight yarn, this lightweight sweater is great for layering and can easily be dressed up or down, making it a versatile handmade wardrobe staple.
Whether you’re stitching a cozy Christmas sweater or creating a neutral everyday top, the Holly Sweater will become one of your favorite pieces to wear all year long. Pair it with jeans for a casual winter outfit or style it with a skirt and boots for a festive holiday look.
Purchase the ad-free, printable PDF for easy printing.
Features
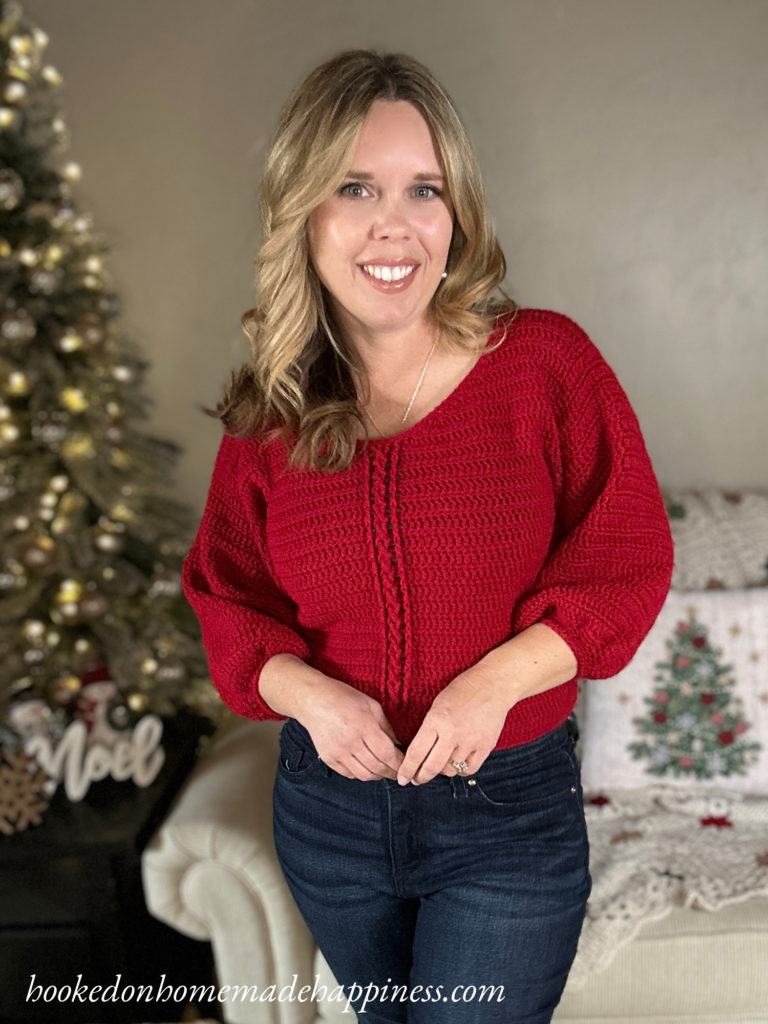
- V-neckline for a flattering, classic look
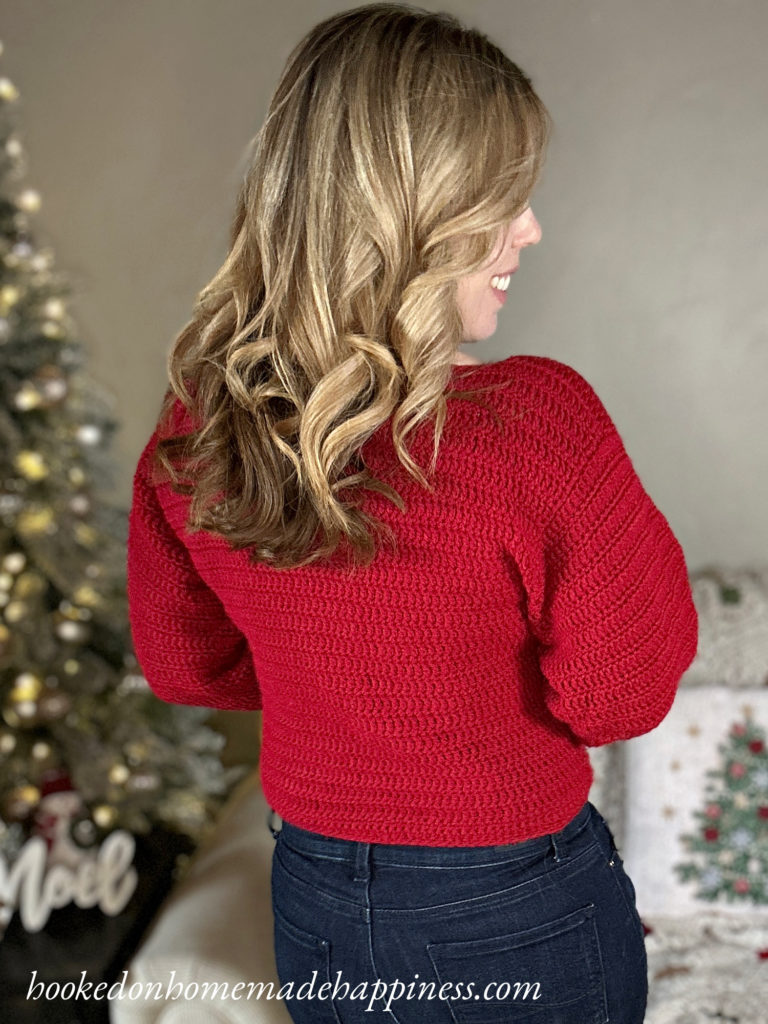
- Balloon 3/4 sleeves for a soft and feminine silhouette
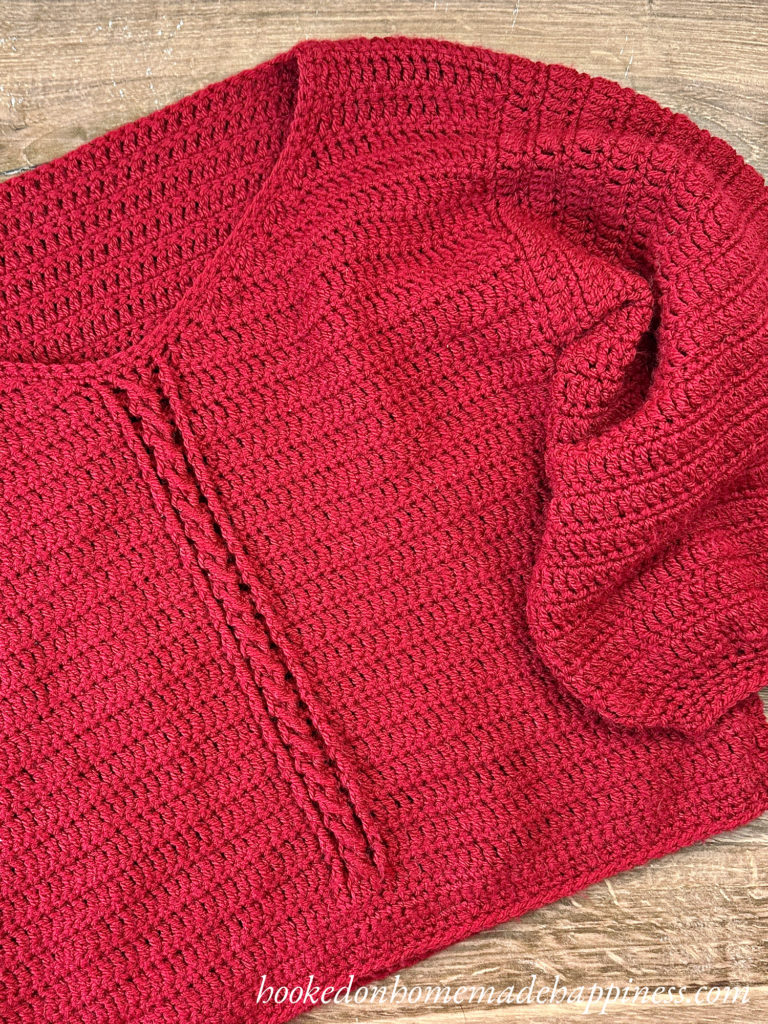
- Simple front cable detail adds subtle texture and interest
- Designed with DK weight yarn for drape and comfort
- Easy to style — perfect for the holidays or everyday wear
- Great for confident beginners/intermediate crocheters
Why You’ll Love This Pattern
- A festive look in holiday colors
- Works beautifully in neutrals for year-round wear
- Cable detail is elegant but easy to learn
- Relaxing stitches — enjoyable project without constant counting
- Trendy but timeless design
Yarn & Construction
- Yarn: DK weight yarn
- Recommended Fiber: acrylic or wool blend
- Fit: Slightly relaxed, flattering V-neck
- Skill Level: Advanced beginner to intermediate
- Construction: Front an back are worked separately (bottom up) then seamed. Sleeves are joined and made in turned rounds.
- Cable: Simple, beginner-friendly stitch pattern
Styling Ideas
- 🎄 Holiday Look: Deep red, pine green, cream, or gold
- 🌿 Everyday Wear: Neutrals like oatmeal, black, taupe, or dusty rose
- 👗 Dress it up with a skirt and boots
- 👖 Wear casual with jeans and ankle boots
- 🧣 Add a cozy scarf for winter layering
A handmade sweater that looks beautiful at Christmas — and still perfect in April.
Making the Holly Sweater Crochet Pattern
Get the full free pattern below or purchase the ad-free, printable PDF
Materials
Paintbox Simply DK in red wine (4 skeins for S/M, 5 skeins for L/XL, 6 skeins 2X/3X) – any DK weight yarn will work
4.5 mm hook
4.0 mm hook
yarn needle
scissors
Level
intermediate
Pattern notes & stitches to know
sl st – slip stich
ch – chain
dc – double crochet
sc – single crochet
fptr – front post treble crochet
sc3tog – single crochet 3 together
dc3tog – double crochet 3 together
sc2tog – single crochet 2 together
· Written in US terms
· ch 1 does not count as sc
· ch 2 does not count as dc
· Always work the fptr stitches in row below previous row.
· This sweater is made with two panels (made from the bottom up), seamed, then the sleeves are made in joined rounds.
· To adjust the length, add rows before starting the neckline.
Gauge: 16 dc x 12 rows (alternating rows of dc & sc) = 4” x 4”
Sizes:
(S, M, L) (XL, 2X, 3X) – The pattern is written in these sizes consecutively. Example, when the pattern gives the end of row count ((65, 73, 81) (89, 97, 105) sc) the 65 is for S, 73 is M, 81 is L, 89 is XL, 97 is 2X, 105 is 3X.
This sweater is a classic fit with 1-2” positive ease.
Approx Finished Size
Bust: S (35”) M (39”) L (43”) XL (47”) 2X (51”) 3X (55”)
Length: S (18”) M (19.25”) L (20.5”) XL (21.75”) 2X (23”) 3X (24.25”)
Armhole Width: S (8.5”) M (9”) L (9.5”) XL (10”) 2X (10.5”) 3X (11”)
Sleeve Length (from seam): S (14”) M (14.75”) L (15.5”) XL (16.25”) 2X (17”) 3X (17.75)
Size Small pictured. I am 5’0” with 34” bust
Pattern Support
Looking for pattern support or want to share your progress? Join our Crochet Community Facebook Group! It’s the perfect place to ask questions, get help, and connect with fellow makers.
CROCHET PATTERN WRITTEN INSTRUCTIONS
FRONT
Using the 4.5 mm hook, ch ((66, 74, 82) (90, 98, 106)) (leave a long end for sewing)
Row 1: sc in 2nd ch from the hook and in each ch across ((65, 73, 81) (89, 97, 105) sc)
Row 2 – 4: ch 1, turn, sc in each stitch across ((65, 73, 81) (89, 97, 105) sc)
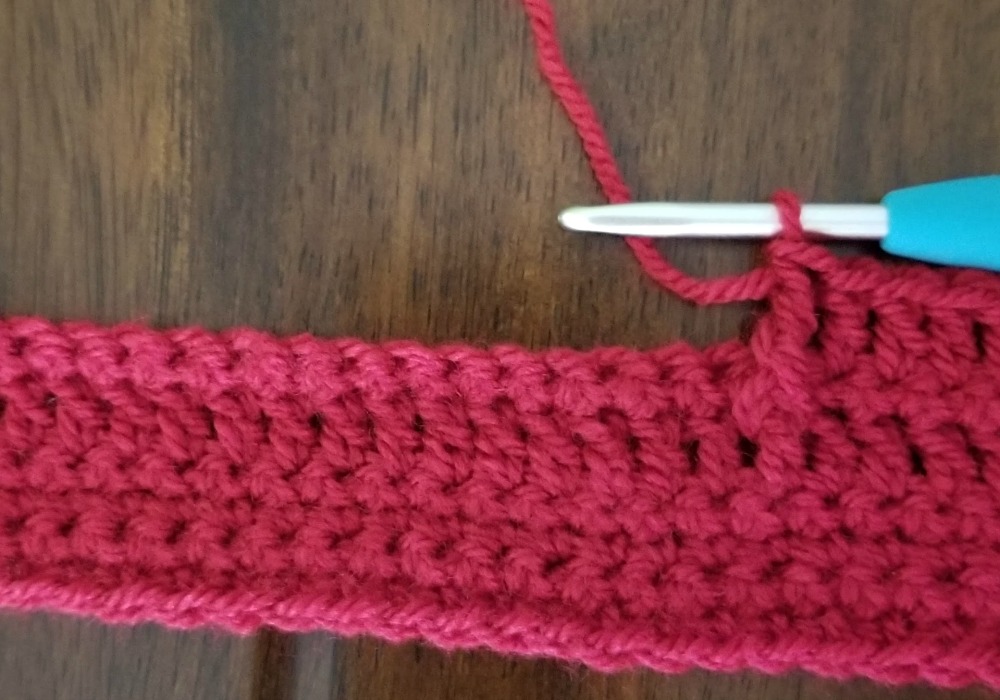
Row 5: ch 2, turn, dc in each stitch across ((65, 73, 81) (89, 97, 105) dc)
Row 6: ch 1, turn, sc in each stitch across ((65, 73, 81) (89, 97, 105) sc)
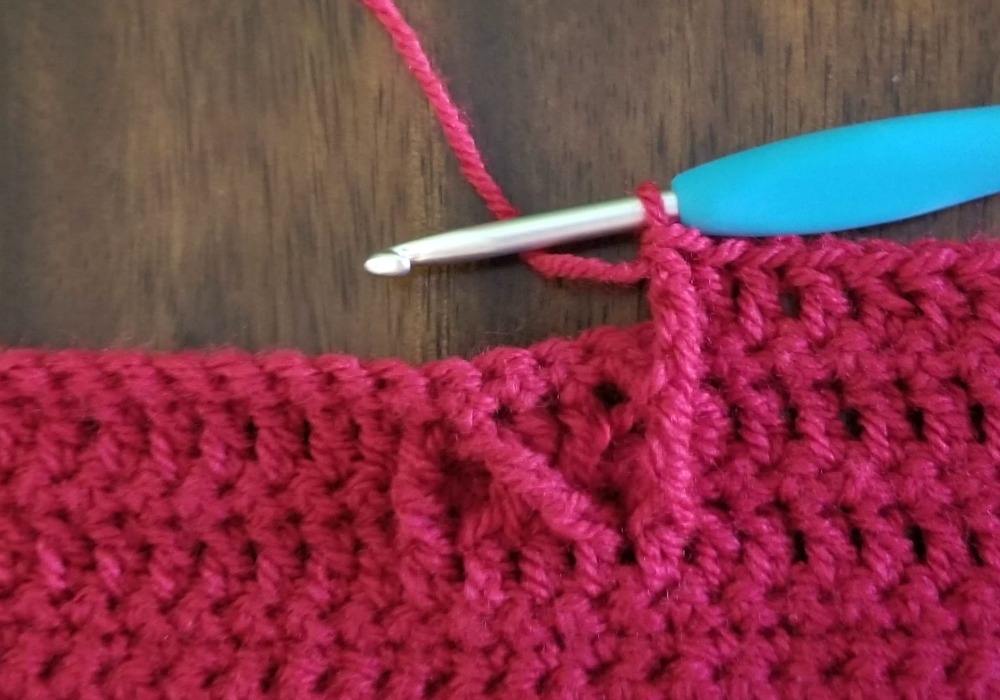
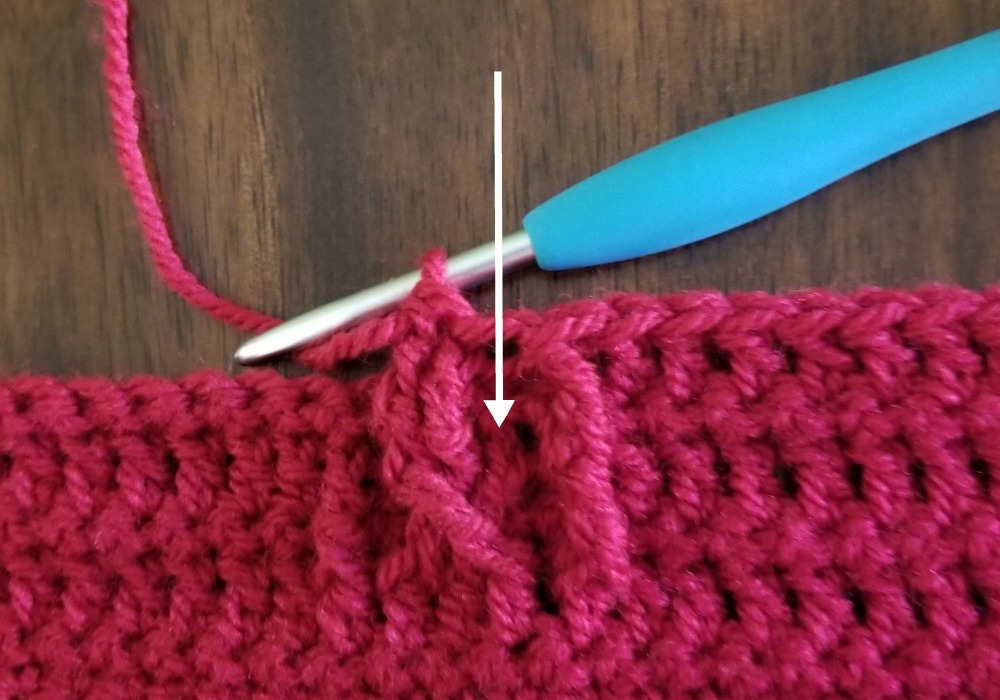
Row 7: ch 2, turn, dc in first (30, 34, 38) (42, 44, 48) stitches, fptr around the dc from the dc row below,
Skip one stitch, fptr in the next 2 dc, working in front of the last 2 stitches, fptr in skipped dc
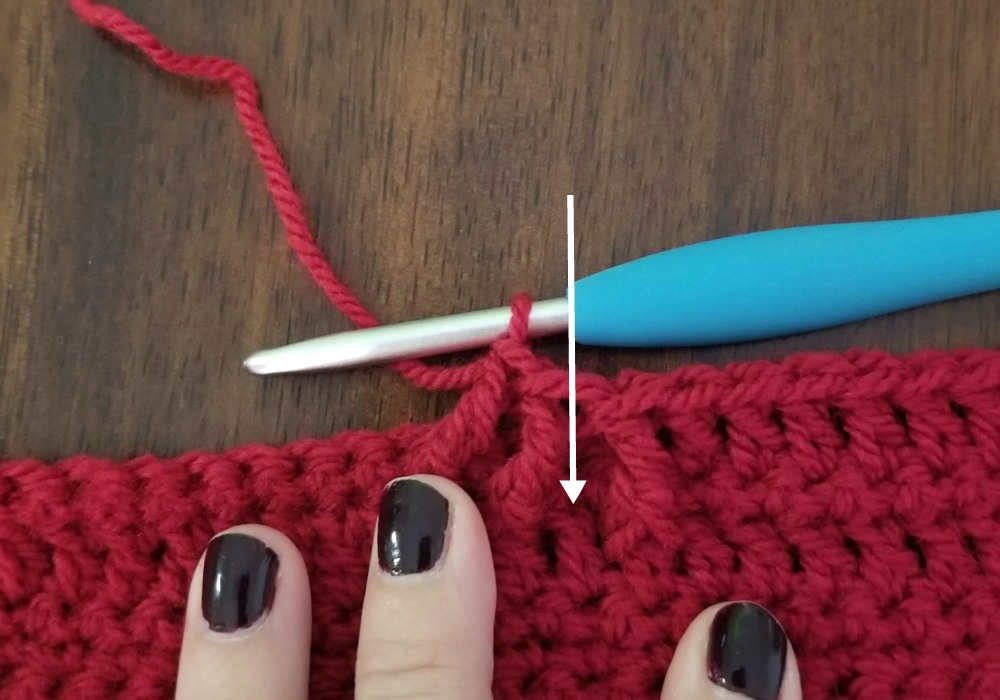
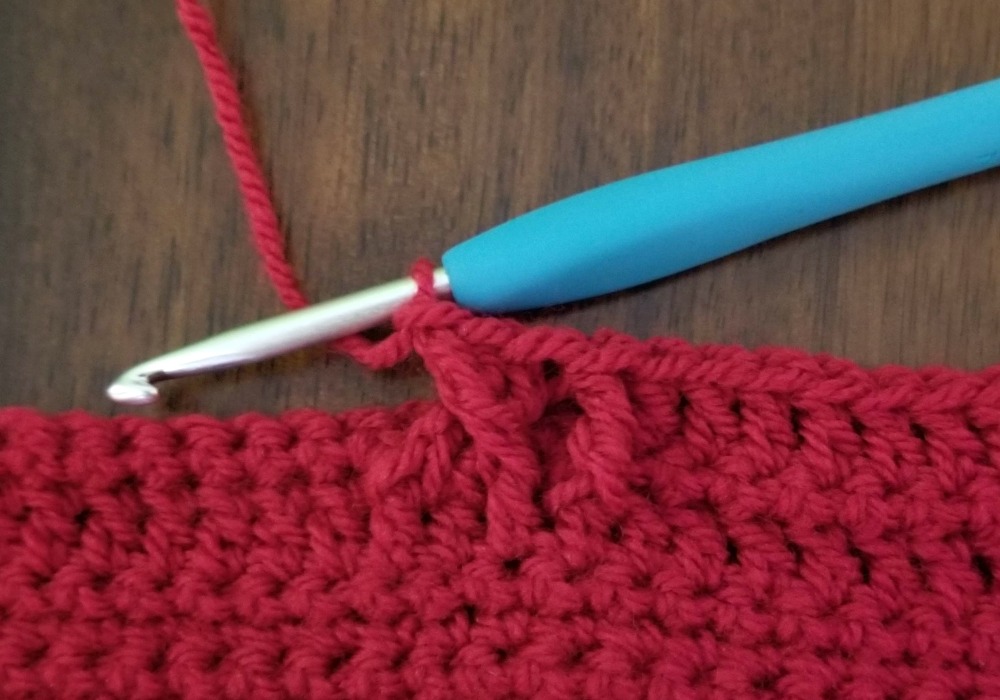
fptr in next, dc in remaining stitches ((65, 73, 81) (89, 97, 105))
Row 8: ch 1, turn, sc in each stitch across ((65, 73, 81) (89, 97, 105) sc)
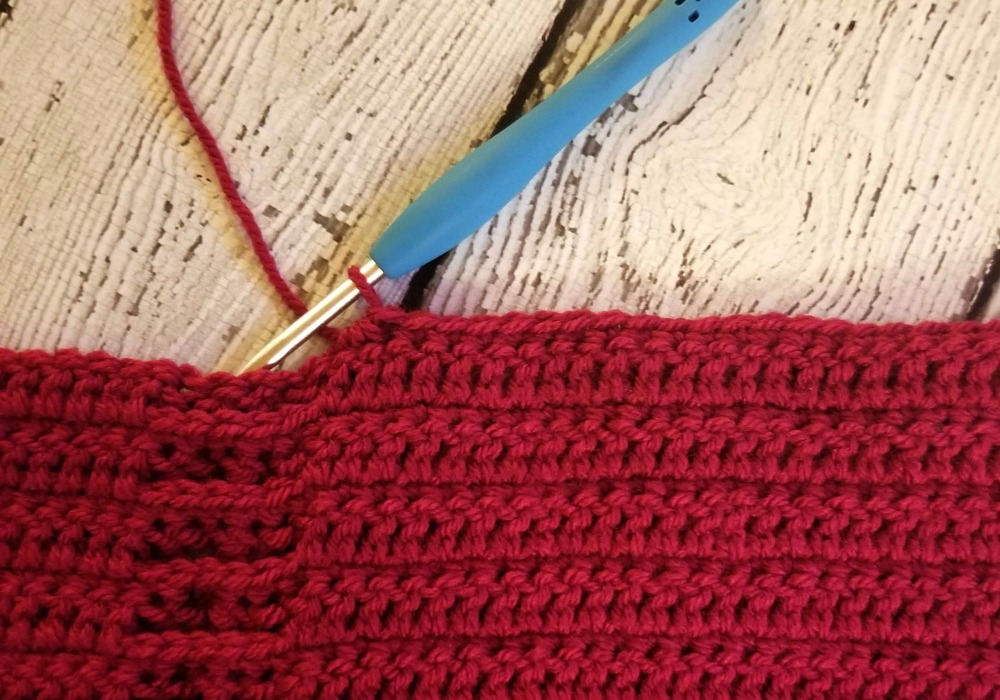
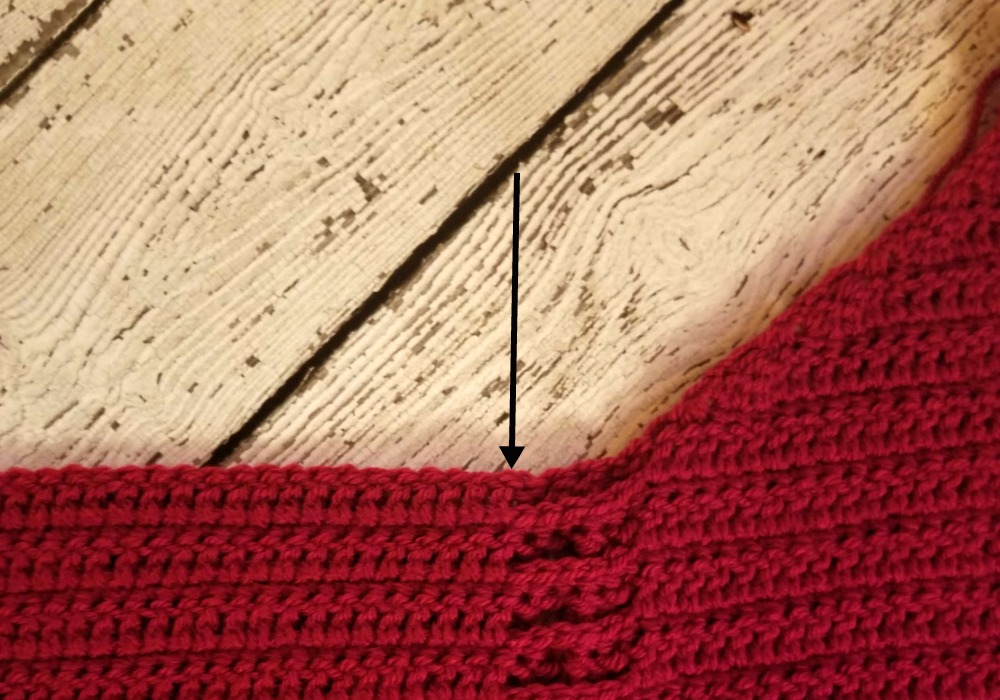
Row 9: ch 2, turn, dc in first (30, 34, 38) (42, 44, 48) stitches, fptr in next
Skip one stitch, fptr in the next 2 fptr, working in front of the last 2 stitches, fptr in skipped fptr
fptr in next, dc in remaining stitches ((65, 73, 81) (89, 97, 105))
Repeat rows 8 & 9 to Row (39, 41, 43) (45, 47, 49)
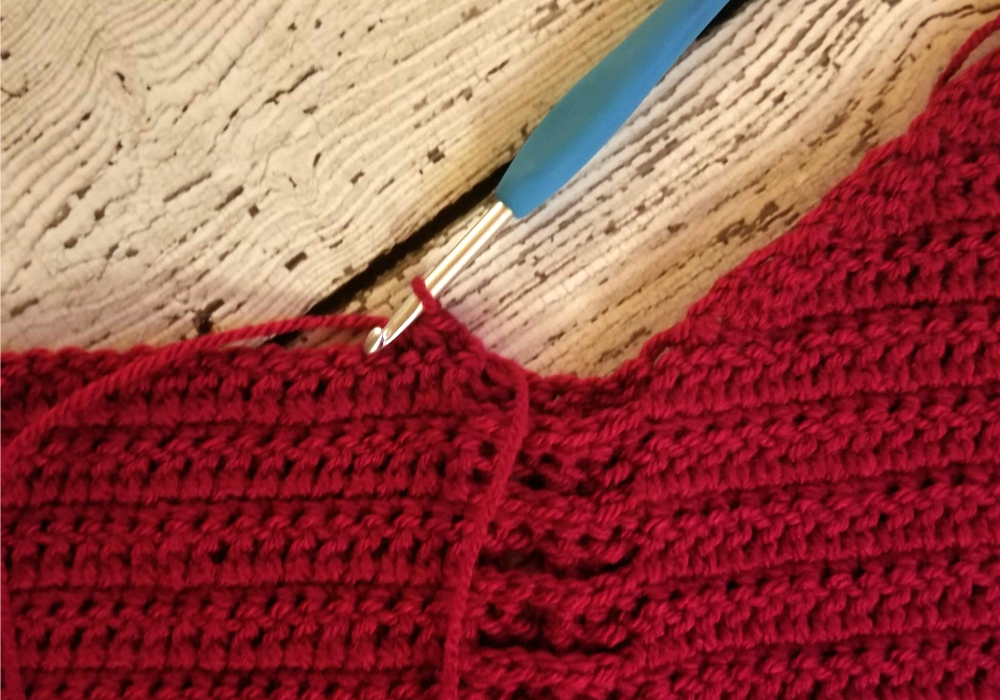
Begin the neckline in the next row. Only work partway across. The row ends with 1 sc3tog. Use a stitch marker to mark row 1 of neckline.
NECKLINE
Row 1: ch 1, turn, sc in (27, 31, 35) (39, 43, 47) stitches, sc3tog ((28, 32, 36), (40, 44, 48) sc)
Row 2: ch 2, turn, dc3tog, dc in remaining stitches across ((26, 30, 34)(38, 42, 46) dc)
Row 3: ch 1, turn, sc in each stitch to the last 3, sc3tog ((24, 28, 32), (36, 40, 44) sc)
Repeat last 2 rows to Row 8
Row 9: ch 1, turn, sc in each stitch across ((14, 18, 22) (26, 30, 34)
Row 10: ch 2, turn, dc in each stitch across ((14, 18, 22) (26, 30, 34)
Repeat previous 2 rows to row (14, 16, 18) (20, 22, 24)
Fasten off, leave a long end for sewing.
Lay panel with the finished neckline on the right. Join yarn in row 1 of the neckline in the dc to the left of the cable
Row 1: ch 1, sc3tog
sc in each remaining stitches across ((28, 32, 36), (40, 44, 48) sc)
Row 2: ch 2, turn, dc in each stitch to the last 3, dc3tog ((26, 30, 34)(38, 42, 46) dc)
Row 3: ch 1, turn, sc3tog, sc in each remaining stitch across ((24, 28, 32), (36, 40, 44) sc)
Repeat last 2 rows to Row 8
Row 9: ch 1, turn, sc in each stitch across ((14, 18, 22) (26, 30, 34)
Row 10: ch 2, turn, dc in each stitch across ((14, 18, 22) (26, 30, 34)
Repeat previous 2 rows to row (14, 16, 18) (20, 22, 24)
Do not fasten off
Ch 1, turn sc evenly around the scoop neck to the opposite corner
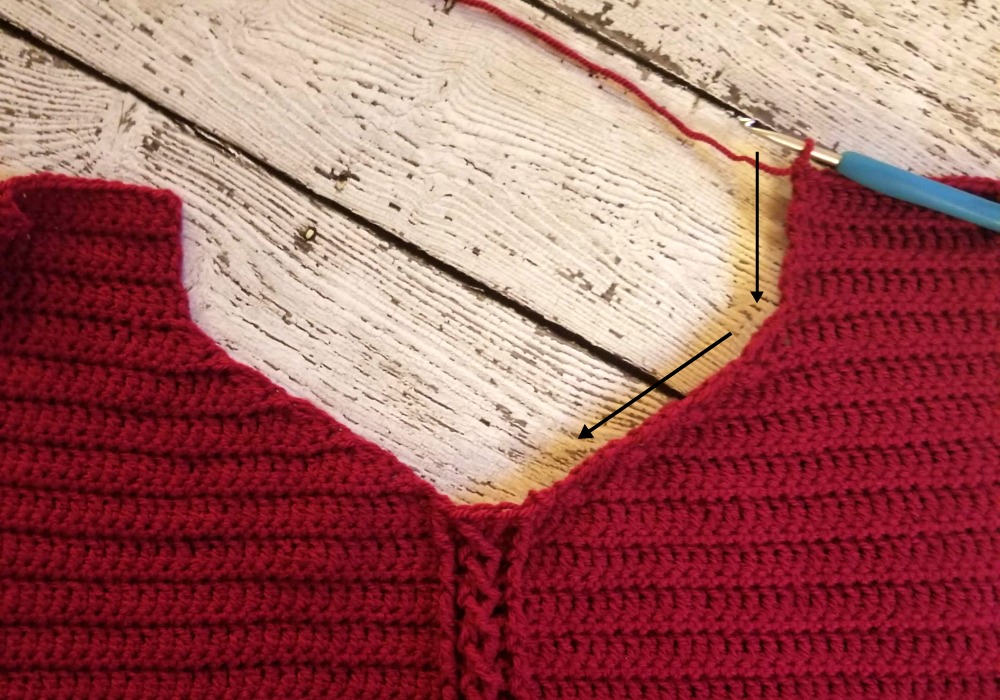
Fasten off leave a long end for sewing
BACK
Using the 4.5 mm hook, ch ((66, 74, 82) (90, 98, 106)) (leave a long end for sewing)
Row 1: sc in 2nd ch from the hook and in each ch across ((65, 73, 81) (89, 97, 105) sc)
Row 2 – 4: ch 1, turn, sc in each stitch across ((65, 73, 81) (89, 97, 105) sc)
Row 5: ch 2, turn, dc in each stitch across ((65, 73, 81) (89, 97, 105) dc)
Row 6: ch 1, turn, sc in each stitch across ((65, 73, 81) (89, 97, 105) sc)
Repeat rows 5 & 6 to Row (53, 57, 61) (65, 69, 73)
Fasten off, leave a long end for sewing
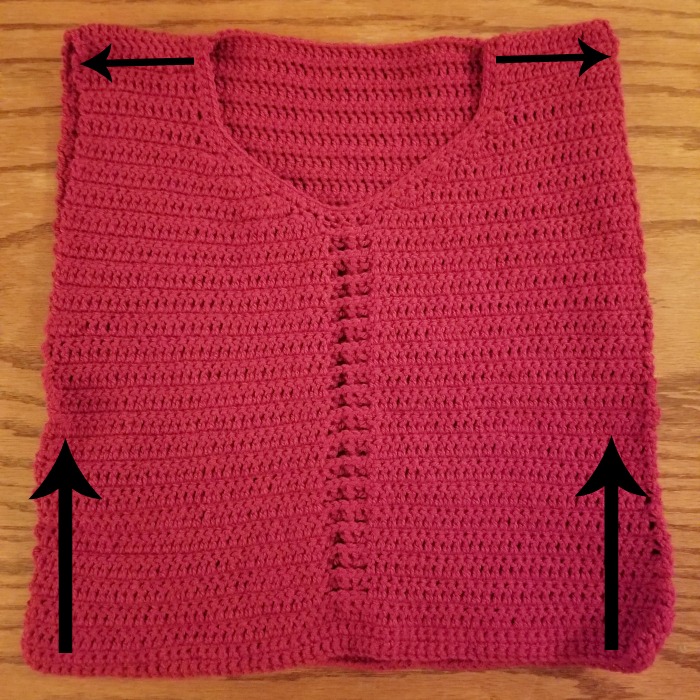
Fasten off, weave in the ends
Turn right side out
SLEEVES
Join yarn to the bottom of an arm hole
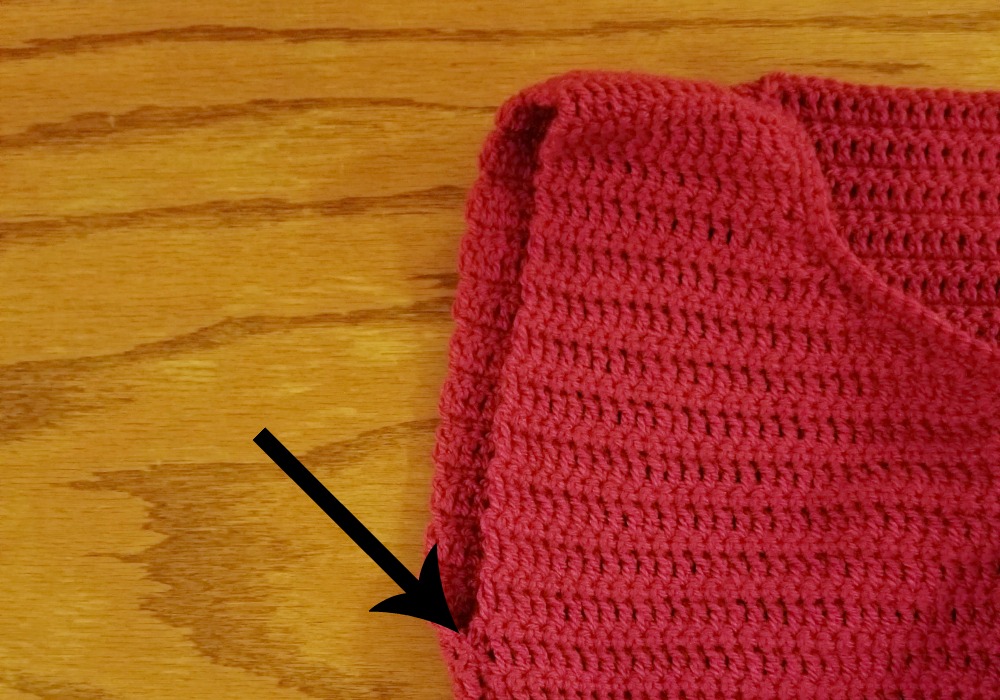
Round 1: ch 1, sc evenly around the armhole, join to first sc with sl st
Round 2: ch 2, dc in each stitch around, join to first dc with sl st
Round 3: ch 1, sc in each stitch around, join to first sc with sl st
Repeat rounds 2 & 3 to Round (37, 39, 41) (43, 45, 47)
Or until desired sleeve length.
CUFF
Round 1: ch 1, sc2tog around, join to first sc with sl st
Round 2: ch 1, *sc in 2 stitches, sc2tog* repeat from * to &* around, join to first sc with sl st
Round 3-5 ch 1, sc in each stitch around, join to first sc with sl st
Fasten off, weave in the ends.
Repeat for other sleeve.
BOTTOM EDGING
This is to make the bottom a little tighter around the waist to give that bell-like shape.
Using a 4.0 mm hook join yarn to bottom corner to crochet around the bottom of the sweater.
Round 1: ch 1, sc in each stitch around, join to first sc with sl st
Round 2: ch 1, *sc in 3 stitches, sc2tog* repeat from * to * around, join to first sc with sl st
Round 3: ch 1, sc in each stitch around, join to first sc with sl st
Fasten off, weave in the ends.
And you’re done!! I hope you love this sweater!
Looking for more patterns? Follow me on Facebook, Instagram, and Pinterest! Please share a pic of your finished product with me. I’d love to see it!


Breann, this is absolutely beautiful! Do you think it could be made longer? If so, what’s the best way to do that? I love everything about this sweater, but I just need a little more length for a more slimming effect. It’s been a few years since I wore something short and cute! Please let me know if you have any suggestions. Thank you. And thank you for sharing this beautiful pattern.
Hi! Thank you so much 🙂 In the pattern it’s noted when the neckline starts. The neckline should by just above the bust. I would continue doing the repeat (before the neckline) until it’s the length you want and then move on to the neckline part of the pattern. I hope this helps!
Wow love it , once my Christmas projects are done , this will be my next project ?
Thank you!
Yet another gorgeous masterpiece! Thank you for sharing. Do you have any advice in particular to folks just getting into crocheted clothing? I think for me at least there is a small mental block that it is above my league. Thank you for all you do!
P.s. have you ever tried any of that yarn bombing or street art kinda stuff? That seems cool too!
About how many yards of yarn did you use and what size? I want to make sure I order enough yarn from the same lot before I start.
Hi! I used around 1200 yds for a Small.
This is gorgeous, Breann! I adore the sleeves most of all but the whole thing is adorable. As a designer myself, this lovely sweater has definitely caused me to reconsider my horizons. (Now I’m trying to decide if I can fit making this sweater into my crammed holiday making, lol!)
Best wishes,
Amy Yarbrough
Ginger Peachy Store
Thank you!
I <3 <3 <3 this! Thank you so much for the beautiful pattern. It makes a wonderful holiday gift – to myself!
Thank you!
Hi thank you for this pattern.
There is a very small mistake in Row 42 for L and XL it should be [46] and {48}.
Sounds like you have made this sweater. I am having trouble matching gauge. I have the yarn that is called for and naturally have a fairly loose tension but I’ve gone up several hook sizes and still cannot get my swatch big enough. Did you use do weight or worsted in order to make gauge for this too?
Did you finish making the sweater? I used 4 ply acrylic yarn but one issue was it bulked up near underarms …use DK worsted which is soft than stiff
I am having trouble on the first row where you crochet three together
What do you do then to finish of the row
Is there a video I could
Hi! If you are on the neckline, the dc3tog is the end of the row 🙂
Hi, such beautiful project! I’m doing the L size. I understand that from row 2 to 9 of the neckline, the stitch number decreases by 2 (please correct me if im wrong). If that’s the case, not sure why I end up with 20 stitches instead of 22 on row 9?
Hi! So sorry!! Do the repeat to row 8 🙂
Thanks – that makes sense now!
This is such a lovely sweater! I will definitely be making this after I finish the Catalina cardigan 🙂
Thank you so much!!
Hi Breann!
For someone with a 38″ bust, I’m not sure whether I should make a M or L. How much positive ease should there be for this sweater? I haven’t crocheted a garment before.
Hi! There is a couple inches. I’m a 34″ and I made the small (36″) Hope this helps 🙂