Cowl Sweater Vest Crochet Pattern
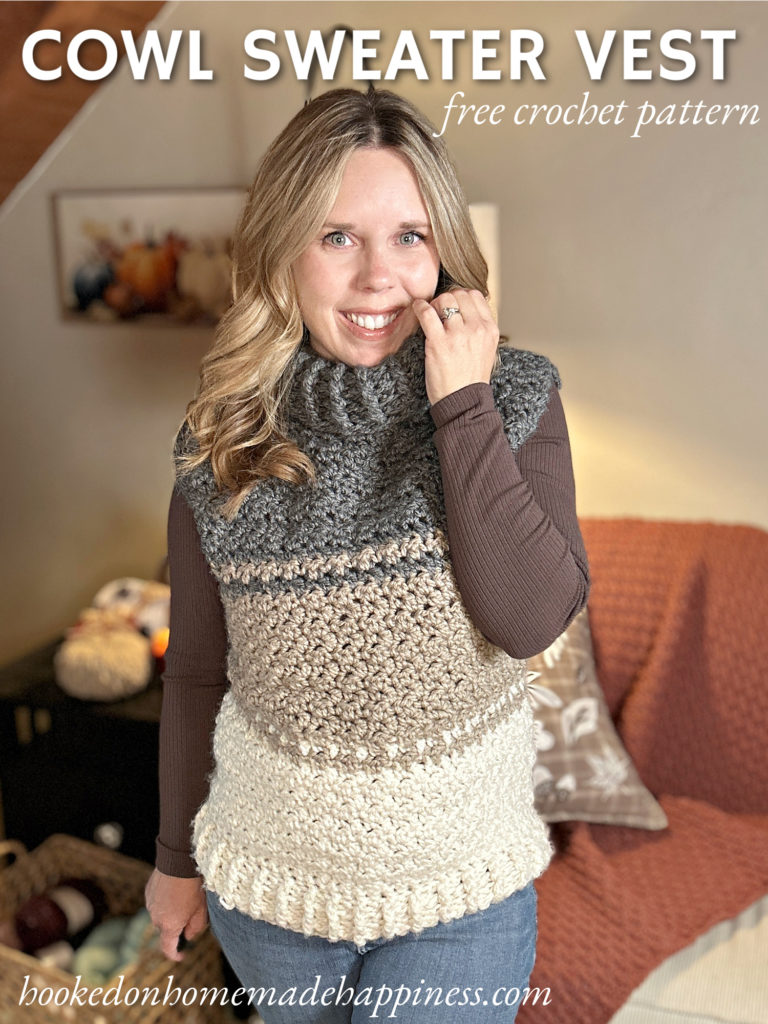
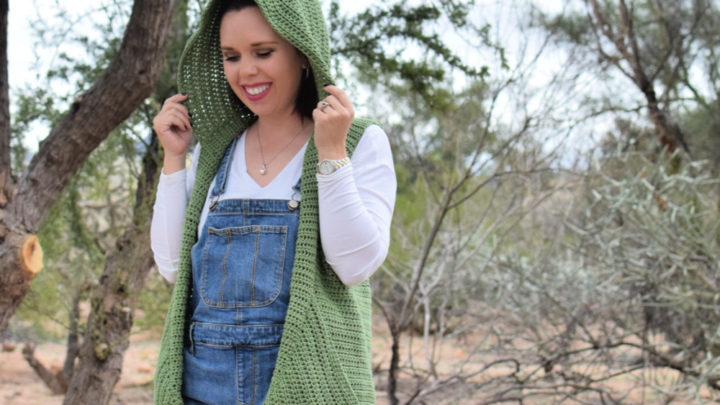
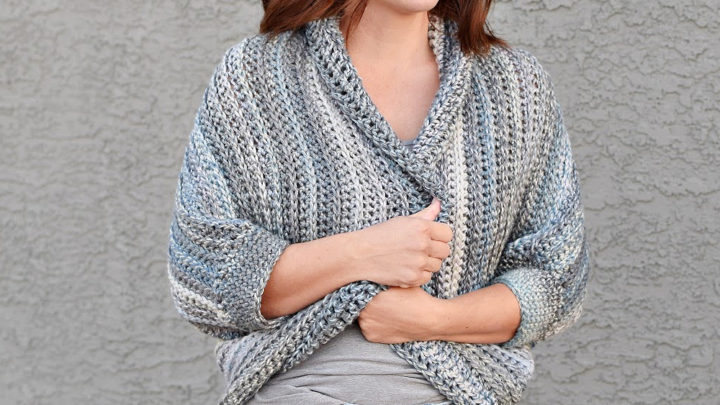
There’s nothing better than a cozy layering piece you can throw on when the weather starts to cool down! The Cowl Sweater Vest Crochet Pattern is stylish, warm, and super easy to make. Using the lemon peel stitch for lots of texture, and soft bulky weight yarn for extra squish, this vest works up quickly and looks great with any outfit.
Purchase the ad-free, printable PDF for easy printing.
About the Pattern
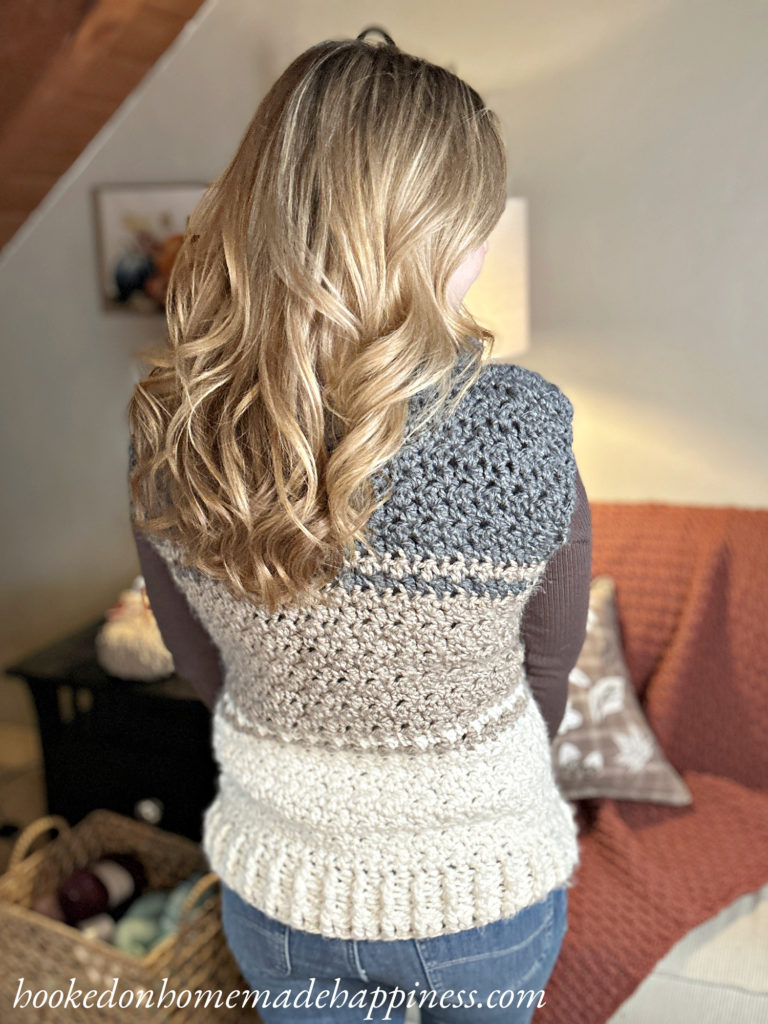
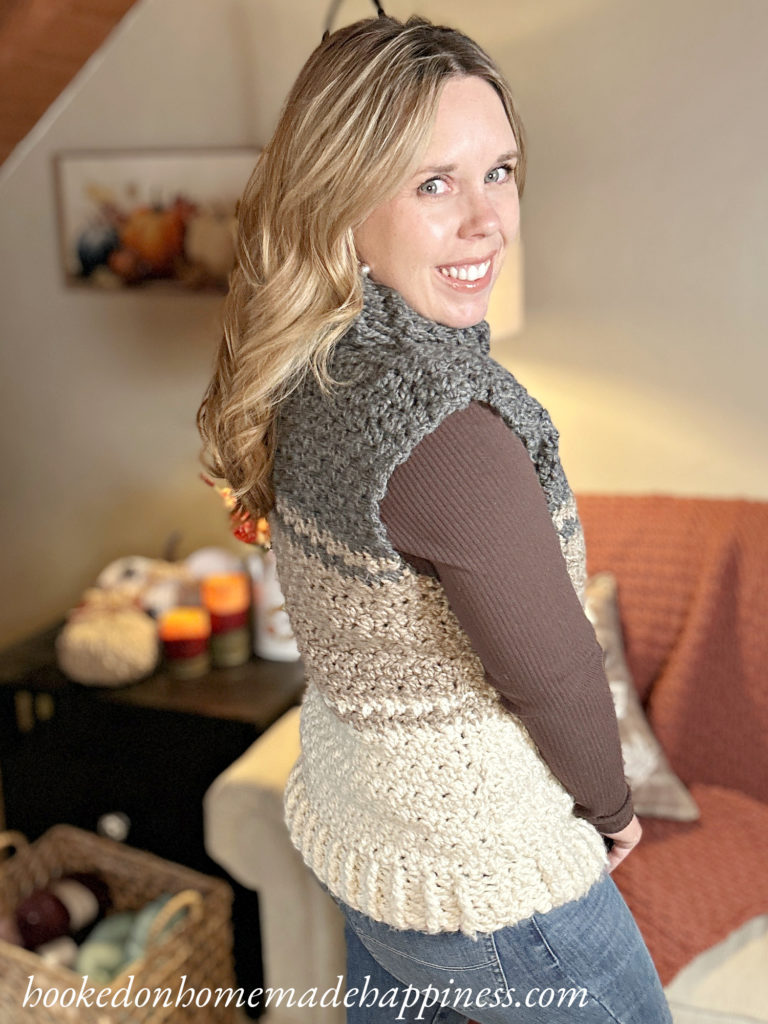
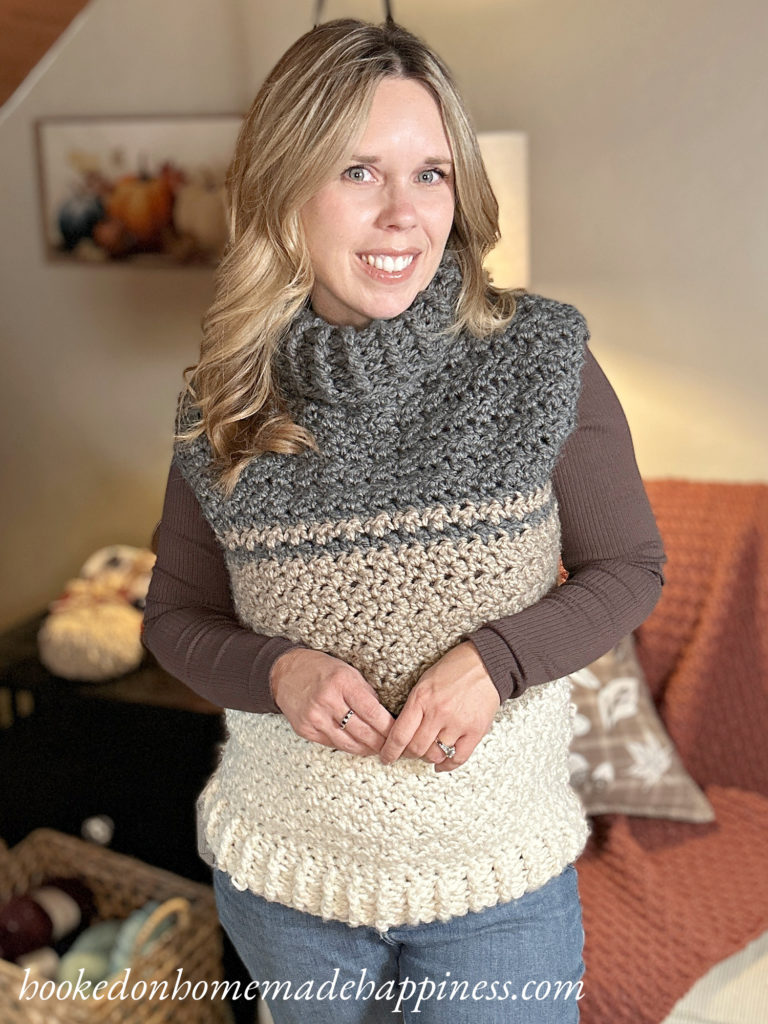
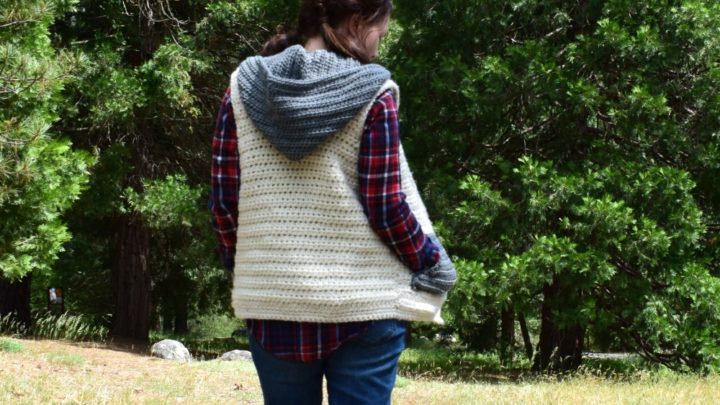
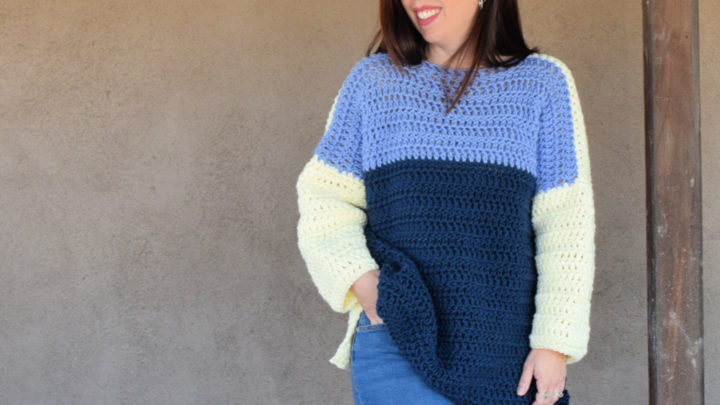
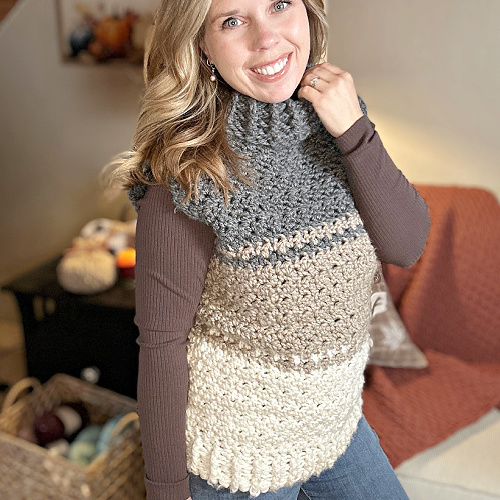
This sweater vest is worked in two main panels (front and back) and then seamed together. The oversized cowl neckline adds warmth and makes it extra cozy. The body is striped in three neutral colors, making it versatile and easy to wear with anything in your wardrobe.
The lemon peel stitch (alternating single and double crochet) gives it a subtle texture that looks great in stripes. Because it’s worked with bulky yarn (I used Loops & Threads Charisma), the vest not only comes together quickly, but it also has that soft, squishy feel we all love in handmade sweaters.
Materials
- Yarn: Loops & Threads Charisma (Bulky #5)
- Colors: 3 neutral shades (cream, gray, taupe – or any combo you love)
- Amount: Approx. 6-10 skeins total (varies by size)
- Hook: Size 8 mm & 10 mm
- Notions: Yarn needle, scissors, stitch markers
- Skill Level: Advanced beginner
What You’ll Love About This Pattern
- ✨ Quick & cozy – Bulky yarn works up fast and makes a warm layering piece.
- 🧶 Textured stitch – The lemon peel stitch adds visual interest without being complicated.
- 🎨 Customizable stripes – Use neutrals for a classic look or swap in bold colors for fun!
- 👕 Easy construction – Just two panels and a cowl, no complicated shaping.
- 🍂 Perfect for layering – Stylish over long sleeves, turtlenecks, or dresses
Making the Cowl Sweater Vest Crochet Pattern
Get the full free pattern below or purchase the ad-free, printable PDF
Materials
Bulky weight (5) yarn in 3 colors – 200g each color for S, 300g each color for M/L, 400g each color for XL/2X, 500g each color for 3X (I used Loops & Threads Charisma in Off White, Taupe, and Charcoal)
L/8.0 mm hook
N/10.0 mm hook
yarn needle
scissors
Level
intermediate
Pattern notes & stitches to know
sl st – slip stich
ch – chain
sc – single crochet
dc – double crochet
fpdc – front post double crochet
bpdc – back post double crochet
sts – stitches
· written in US terms
· ch 2 does not count as dc
· ch 1 does not count as sc
· This sweater is made with 2 rectangles sewn together. Then the cowl is added. Each rectangle starts at the bottom with the ribbing.
· Off White is Color A, Taupe is Color B, Charcoal is Color C
· Gauge: 8 stitches (alternating sc & dc) x 4 rows = 4” x 4”
Sizes:
(S, M, L) (XL, 2X, 3X) – The pattern is written in these sizes consecutively. Example, when the pattern gives the end of row count ((35, 39, 43) (47, 51, 55) dc) the 35 is for S, 39 is M, 43 is L, 47 is XL, 51 is 2X, 55 is 3X.
This sweater is a loose fit with 2” positive ease.
Approx Finished Size:
Bust: S (36”) M (40”) L (44”) XL (48”) 2X (52”) 3X (56”)
Length: S (22”) M (22”) L (25”) XL (25”) 2X (28”) 3X (28”)
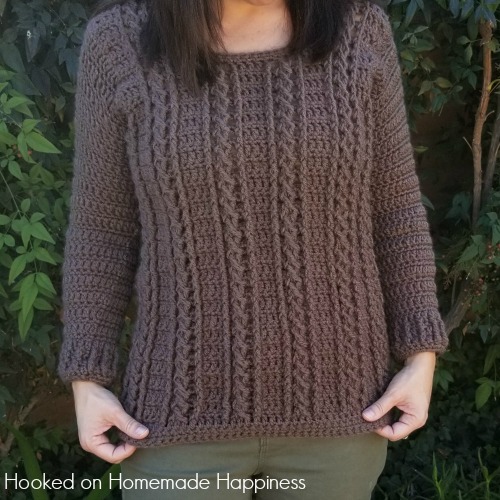
Size Small pictured. I am 5’0” with 34” bust
Color Stripe Pattern
| Row 1 – (17, 17, 18) (18, 19, 19) | Color A |
| Row (18. 18. 19) (19, 20, 20) | Color B |
| Row (19, 19, 20) (20, 21, 21) | Color A |
| Row (20, 20, 21) (21, 22, 22) – Row (30, 30, 32) (32, 34, 34) | Color B |
| Row (31, 31, 33) (33, 35, 35) | Color C |
| Row (32, 32, 34) (34, 36, 36) | Color B |
| Row (33, 33, 35) (35, 37, 37) – Row (43, 43, 46) (46, 49, 49) | Color C |
Pattern Support
Looking for pattern support or want to share your progress? Join our Crochet Community Facebook Group! It’s the perfect place to ask questions, get help, and connect with fellow makers.
CROCHET PATTERN WRITTEN INSTRUCTIONS
FRONT AND BACK (make 2)
With L/8.0 mm hook and Color A, ch (37. 41. 45) (49, 53, 57)
Leave a long end for sewing.
Row 1: dc in 3rd ch from the hook and across ((35, 39, 43) (47, 51, 55) dc)
Row 2: ch 2, turn, dc in first stitch, *fpdc in next stitch, bpdc in next* repeat from * to * across to last stitch, dc in last stitch ((35, 39, 43) (47, 51, 55) dc)
Row 3: ch 2, turn, dc in first stitch, *bpdc in next stitch, fpdc in next* repeat from * to * across to last stitch, dc in last stitch ((35, 39, 43) (47, 51, 55) dc)
Row 4: ch 2, turn, dc in first stitch, *fpdc in next stitch, bpdc in next* repeat from * to * across to last stitch, dc in last stitch ((35, 39, 43) (47, 51, 55) dc)
Row 5: ch 2, turn, dc in first stitch, *bpdc in next stitch, fpdc in next* repeat from * to * across to last stitch, dc in last stitch ((35, 39, 43) (47, 51, 55) dc)
Row 6: ch 1, turn, sc in each stitch across ((35, 39, 43) (47, 51, 55) sc)
Row 7: ch 1, turn, sc in first stitch, *dc in next stitch, sc in next* repeat from * to * across ((35, 39, 43) (47, 51, 55) sts)
Row 8: ch 2, turn, dc in first stitch, *sc in next stitch, dc in next* repeat from * to * across ((35, 39, 43) (47, 51, 55) sts)
Row 9 – Row (43, 43, 46) (46, 49, 49): repeat rows 7 & 8 ((35, 39, 43) (47, 51, 55) sts)
Fasten off. Leave a long end for sewing.
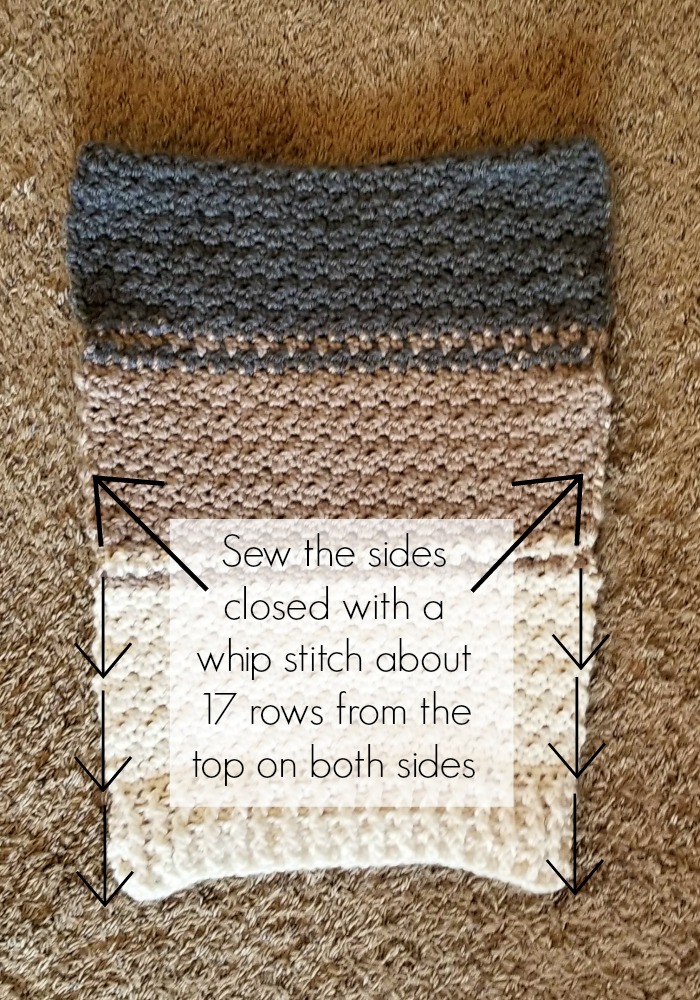
SEWING
Using the long end, sew the shoulders closed with a whip stitch. Leave approx (9”, 9.5”, 10”) (11”, 11.5” 12”) in the center for the neckline. (or the desired neckline width).

Using the long end, sew the sides together with a whip stitch. Sew up aprox 17 rows (or desired armhole width) leaving the space at the top for the armholes.
Weave in all your ends.
COWL
Join Charcoal at the corner of the neck hole
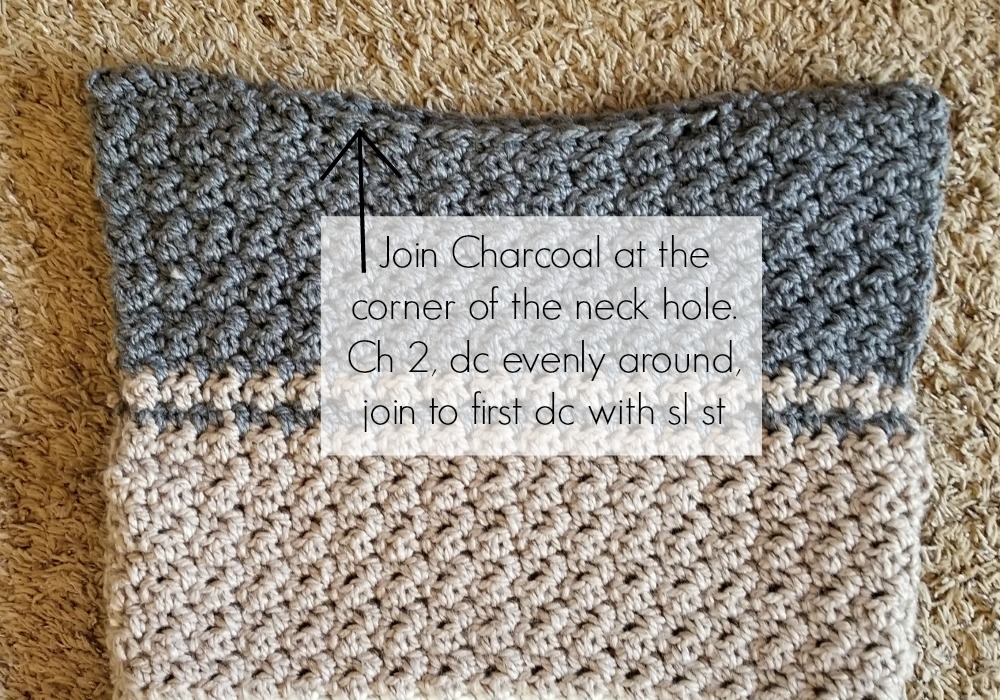
Row 1: ch 2, dc evenly around, join to first dc with sl st
Row 2: ch 2, fp dc in same stitch, *bpdc in next, fp dc in next* repeat from * to * around, join to first fpdc with sl st
Row 3 – 5: repeat row 2
Change to N/10.0 mm hook
Row 6 – 9: repeat row 2
Fasten off, weave in the ends

Looking for more patterns? Follow me on Facebook, Instagram, and Pinterest! Please share a pic of your finished product with me. I’d love to see it!


Zou graag het patroon willen kopen maar dan in Nederlands want het is zo mooi
I like toddlers patterns free looking for a vest that buttons on the sides and has the crowl neck
I didn’t have as much gray as I thought I did so I did rows 1-17 in the gray and then folded it in half, sewed the side up (leaving the bottom open) and made my daughter a super cute skirt!
Does the chain 2 count as a stitch??
No ?
I hate to keep bothering you. I am done with the two panels… Am I to sew right or wrong sides together. Also, I did the medium so should I use the same 7″ . 9″, & 17″ measurements for sewing up seams?
Thank you so much for the help!!!
You’re not bothering me 🙂 I would have wrong sides facing out, then sew. Turn it right side out. After sewing the shoulders, put the piece on and mark where you want your sleeves to be. I did 17 rows up from the bottom, you could probably do about the same.
Hello, this pattern looks amazing, thanks!!!
I am going to try it in shades of yellow for a friend.
Will post a picture as soon as I am done. 🙂
Hi, ☺️What’s the size of the vest on the picture?
Small 🙂
How many threads run out for size L
If you want three colors, you’ll need about 3 skeins of each color.
How much ch to start for size L (72ch or 76ch that is your start )
Thanks
The starting ch for L is 45
This was an amazing pattern. I made it for a friend of mine and she absolutely loved it! I will be making more….so much fun to make and easy. Thank you
Thank you so much!!
What is the finished size measurements for small and medium. Trying to figure what size i need for me.
Thanks
Bust: S (36”) M (40”)
Length: S (22”) M (25”)
Hi just a quick question what size is that yarn that you used?
Hi! Bulky, weight 5 🙂
I wa happy to find your pretty pattern for the crocheted vest to make for my grand daughter, but although the width is correct at 18” for small the length will be much too long. I’m using 8mm hook and the Loops and Threads Charisma yarn. The off white after 17 rows and the ribbing is 8 inches.The ribbing is 3” and the 17 rows are 5 “. Do you have an idea why I would need 30 rows of the next colour and even more rows of the darker colour? I would like the best to be 22 I inches long like you suggest. Help!
Hi! You won’t need 30 more rows of the next color, but use that color through row 30 🙂 Hope that helps!
Dear Breann;
Yes ,that really helps. Thank you! It is coming very nicely now and I appreciate your reply so quickly!
Awesome!
Hello,
Love the pattern so thank you for sharing. When you sewed the 2 pieces together, did you use the Charisma yarn or did you use an embroidery floss or something like that?
I used the Charisma yarn 🙂
Hey, pattern looks great!
In case i want to add sleeves.. could you give any advice to follow? Thank you
Nat
Hi! You could join to the bottom of an armhole and work around 🙂
I’m starting this sweater using bulky yarn. With even a 10 mm hook, my gage is really off. The width came out ok but the height is only 2”. I’ve never had this happen before and not sure what to do. Thanks
Hi! I would just add rows to the end to make it the correct length 🙂
Thanks so much for the lovely patterns . I truly appreciated it . Wishing you and your family a lovely Xmas 🎄🍾🎊🎉
Thank you very much for sharing this beautiful pattern. I use Chunky #5 with hook 8mm too. But I found the size is much smaller than expected. I originally planned to make a size M, but then I went for a size L instead after a few rows and noticed that I could not meet the gauge requirements.
However, my “almost” end piece size only bust 34″ and length 18″ only (without adding the cowl yet). :O
And the yarn usage is far less than your estimates too. Don’t know what’s wrong in my process.
But the piece/pattern is really beautiful. It’s amazing that simply alternative sc and dc can work out so beautiful texture. Thanks for your sharing again.
Hi! That’s great! Thank you so much! Wondering if you made a gauge swatch before starting?
yes. I did a guage, but it was smaller than your mentioned size. Since I didn’t find mine too tight, so I decided to go for one size up (from M to L), and hoped that worked. Apparantly, now I found it’s still too small.
But I will try to finish it. It’s too good to dismantle it now, and I hope it can still fit. Fingle crossed