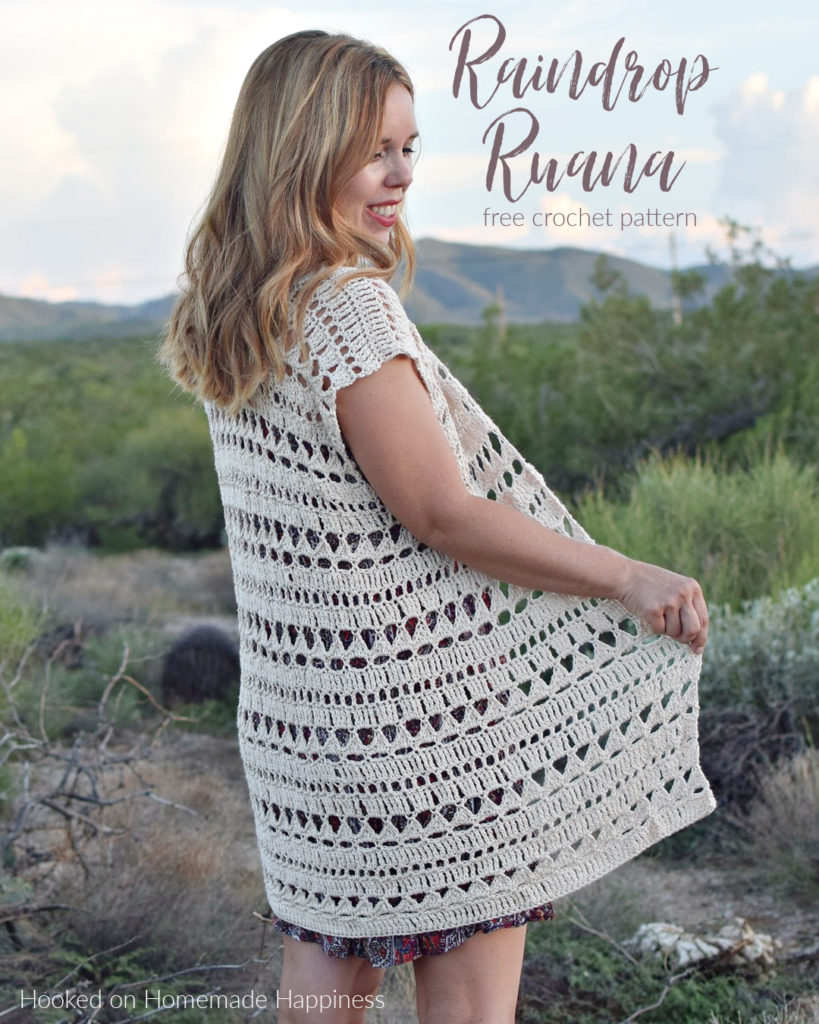
Raindrop Ruana Crochet Pattern
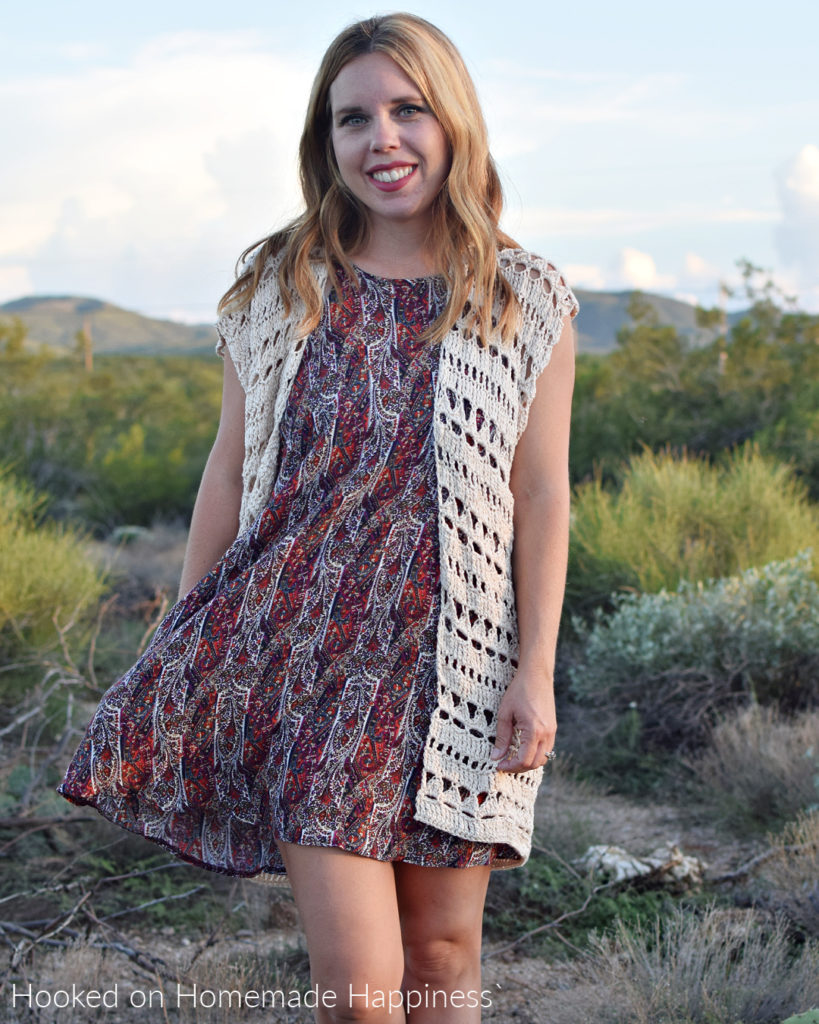
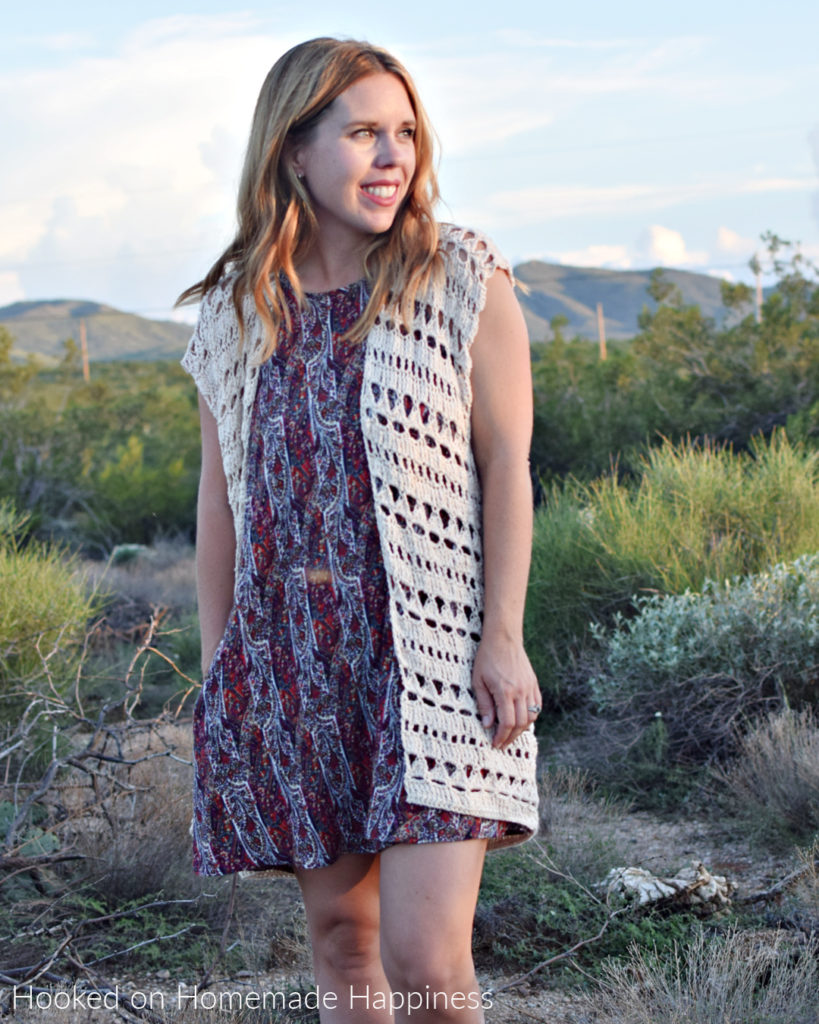
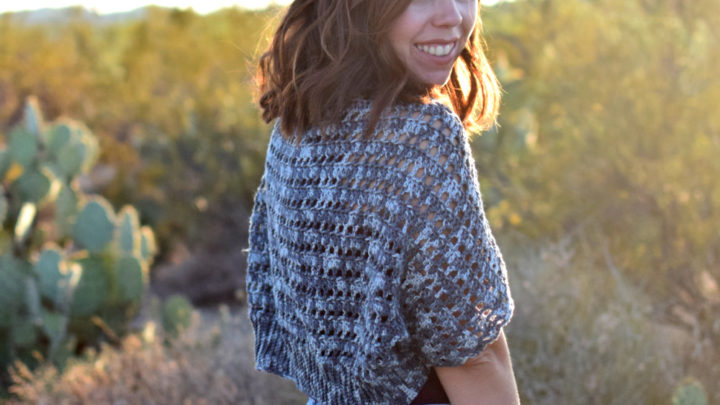
Light, airy, and effortlessly stylish—the Raindrop Ruana is the perfect layering piece for spring and summer! With its beautiful drape and delicate stitch details, this ruana adds just the right touch to any outfit without feeling heavy or bulky.
Designed using soft, lightweight sport weight yarn, this piece works up into a breathable fabric that flows beautifully as you move. Whether you’re heading to the beach, running errands, or just need a light layer on a breezy day, the Raindrop Ruana has you covered.
Purchase the ad-free, printable PDF for easy printing.
✨ Why You’ll Love This Pattern
- Lightweight and breathable for warm weather
- Elegant, flowy drape
- Made in one piece with minimal sewing
- A relaxing mix of stitches to keep things interesting
- Perfect for layering over tanks, tees, or dresses
🧶 Pattern Details
- Yarn: Sport weight yarn (WeCrochet Sport Shine)
- Hook: H/5.0 mm
- Construction: One piece with very little sewing
- Skill Level: Intermediate
- Stitches Used:
- Treble crochet
- Double crochet
- Chain spaces
- Triangle stitch
🌦️ About the Design
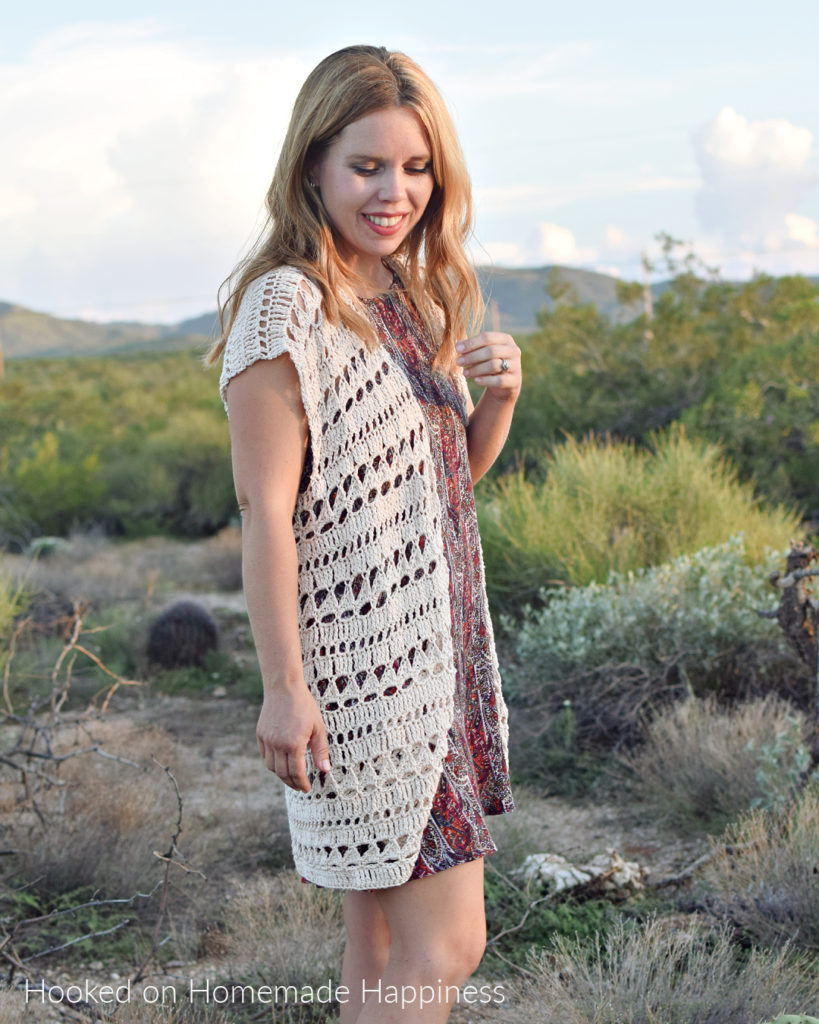
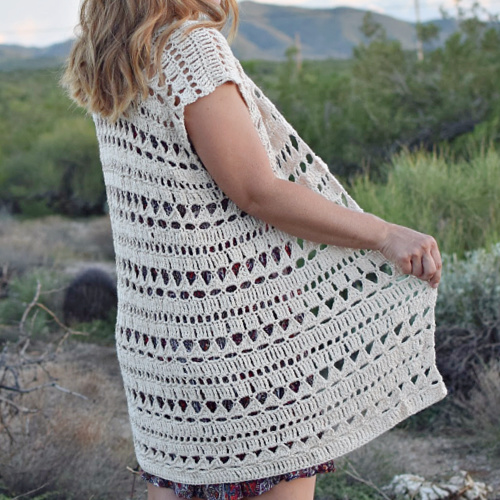
The Raindrop Ruana gets its name from the delicate, open stitch pattern that creates a soft, draping fabric—reminiscent of gentle raindrops. The combination of taller stitches like treble crochet with airy chain spaces gives the ruana its signature lightweight feel.
The triangle stitch adds a subtle texture and visual interest, making this piece feel intricate while still being approachable to work through.
Best of all, this ruana is made all in one piece, so you won’t be stuck assembling multiple panels at the end. Just a small amount of finishing, and you’re ready to wear!
🌿 Styling Your Ruana
This versatile piece can be styled so many ways:
- Throw it over a tank and jeans for a casual everyday look
- Layer it over a swimsuit as a chic beach cover-up
- Pair it with a sundress for an effortless boho vibe
- Add it to your travel wardrobe as a lightweight wrap
FAQ
🧵 Ready to Crochet?
Grab your yarn, hook, and get ready to create a beautiful, lightweight ruana that you’ll reach for again and again. The Raindrop Ruana is the perfect mix of comfort, style, and easy elegance.
Happy crocheting! 💕
Making the Raindrop Ruana Crochet Pattern
Get the full free pattern below or purchase the ad-free, printable PDF
Materials
WeCrochet Shine Sport in Cream (8 skeins (880yds) for S/M, 10 skeins (1,100yds) for L/XL, 12 skeins (1,320yds) for 3X/2X)
H/5.0mm hook
Yarn needle
Scissors
Level
intermediate
Pattern notes & stitches to know
ch – chain
fsc – foundation single crochet (VIDEO TUTORIAL: https://www.youtube.com/watch?v=Z2PsECMK58M&t=3s)
sc – single crochet
hdc – half double crochet
dc – double crochet
tr – treble crochet
rs – right side
ws – wrong side
· written in US terms
· ch 3 does not count as tr
· ch 4 counts as dc + ch 1
· This ruana is made as one rectangle, with openings for the sleeves (like the graphic below). There is a little sewing across the shoulders.
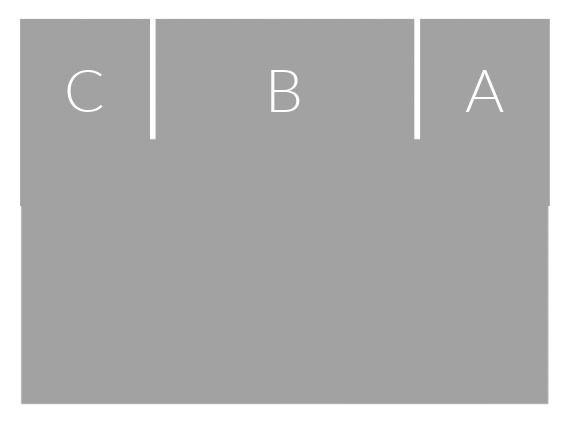
· Gauge: 3 tr x 1 row = 1” x 1”
Sizes:
S/M, L/XL, 2X/3X – The pattern is written in these sizes consecutively. Example, when the pattern gives the end of row count (153, 185, 217 sc) the 153 is for S/M, 185 is L/XL, 217 is 2X/3X.
This ruana is oversized with generous positive ease.
Approx Finished Size:
Bust: S/M (40”) L/XL (49”) 2X/3X (58”)
Length: S/M (27”) L/XL (32.5”) 2X/3X (38”)
Armhole Depth: S/M (9”) L/XL (10”) 2X/3X (11”)
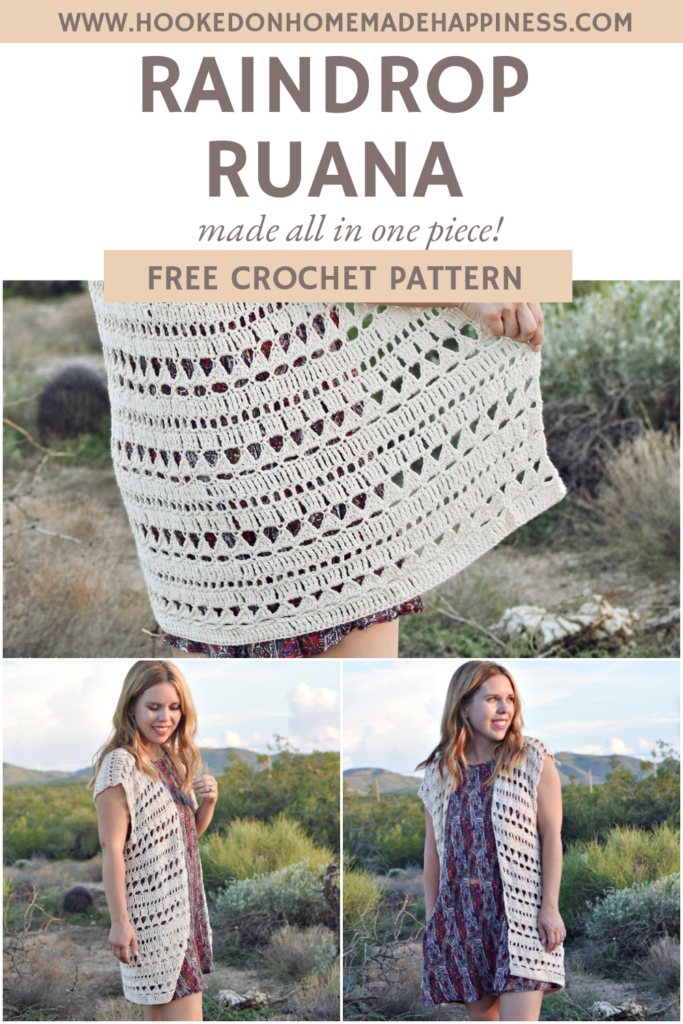
Size Small pictured. I am 5’0” with 34” bust
RAINDROP RUANA CROCHET PATTERN
ch 2
Row 1 (ws): starting in the 2nd ch from the hook fsc 153, 185, 217 (153, 185, 217 sc)
Row 2 (rs): ch 3, turn, tr in each stitch across (153, 185, 217 tr)
Row 3 (ws): ch 1, turn, sc in first stitch, *ch 3, skip 3 stitches, sc in next* repeat from * to * across (38, 46, 54 ch-3 spaces)
Row 4 (rs): ch 1, turn, *sc in next ch 3 space, ch 3, in the same space work (tr, dc, hdc, sc)* repeat from * to * across to last ch 3 space, sc in last ch 3 space, ch 3, in the same space work (tr, dc, hdc), sc in last sc (38, 46, 54 triangles)
Row 5 (ws): ch 6 (counts as dc + ch 3), turn, sc in the top of ch 3 of first triangle, *ch 3, sc in the top of ch 3 of next triangle* repeat from * to * across (38, 46, 54 ch-3 spaces)
Row 6 (rs): ch 3, turn, *tr in sc, 3 tr in ch 3 space* repeat from * to * across, tr in 3rd ch of turning ch (153, 185, 217 tr)
Row 7 (ws): ch 4, turn, skip 1 stitch, dc in next,*ch 1, skip 1 stitch, dc in next* repeat from * to * across (77, 93, 109 dc)
Row 8 (rs): ch 3, turn, tr in first dc, *tr in ch-1 space, tr in dc* repeat from to * to across (153, 185, 217 tr)
Row 9 – 30, 36, 42 (rs): repeat rows 3 – 8
This is the length before the armholes are made. To adjust the length, add or take out rows as needed.
Section A is made in the next rows. You will only work partly across the row, then turn.
Section A
Row 1 (ws): ch 4, turn, skip 1 stitch, dc in next,*ch 1, skip 1 stitch, dc in next* repeat from * to * across until there is a total of 19, 23, 27 dc (19, 23, 27 dc)
Row 2 (rs): ch 3, turn, tr in first dc, *tr in ch-1 space, tr in dc* repeat from to * to across (37, 45, 53 tr)
Row 3 (ws): ch 1, turn, sc in first stitch, *ch 3, skip 3 stitches, sc in next* repeat from * to * across (9, 11, 13 ch-3 spaces)
Row 4 (rs): ch 1, turn, *sc in next ch 3 space, ch 3, in the same space work (tr, dc, hdc, sc)* repeat from * to * across to last ch 3 space, sc in last ch 3 space, ch 3, in the same space work (tr, dc, hdc), sc in last sc (9, 11, 13 triangles)
Row 5 (ws): ch 6 (counts as dc + ch 3), turn, sc in the top of ch 3 of first triangle, *ch 3, sc in the top of ch 3 of next triangle* repeat from * to * across (9, 11, 13 ch-3 spaces)
Row 6 (rs): ch 3, turn, *tr in sc, 3 tr in ch 3 space* repeat from * to * across, tr in 3rd ch of turning ch (37, 45, 53 tr)
Row 7 (ws): ch 4, turn, skip 1 stitch, dc in next,*ch 1, skip 1 stitch, dc in next* repeat from * to * across (19, 23, 27 dc)
Row 8 – 14 (rs): repeat rows 2 – 7
The height of section A is the size of your armhole. Add or take out rows as needed.
For size S/M: Fasten off. Leave a long end for sewing
For size L/XL: add one more row of tr
For size 2X/3X: add two more rows of tr
Fasten off. Leave a long end for sewing.
Section B
Lay the piece so Section A is on the right.
Where to join: find the last stitch from Section A, Row 1, skip 3 stitches, join yarn here
Row 1 (ws): ch 4, skip 1 stitch, dc in next,*ch 1, skip 1 stitch, dc in next* repeat from * to * across until there is a total of 37, 45, 53 dc (37, 45, 53 dc)
Row 2 (rs): ch 3, turn, tr in first dc, *tr in ch-1 space, tr in dc* repeat from to * to across (73, 89, 105 tr)
Row 3 (ws): ch 1, turn, sc in first stitch, *ch 3, skip 3 stitches, sc in next* repeat from * to * across (18, 22, 26 ch-3 spaces)
Row 4 (rs): ch 1, turn, *sc in next ch 3 space, ch 3, in the same space work (tr, dc, hdc, sc)* repeat from * to * across to last ch 3 space, sc in last ch 3 space, ch 3, in the same space work (tr, dc, hdc), sc in last sc (18, 22, 26 triangles)
Row 5 (ws): ch 6 (counts as dc + ch 3), turn, sc in the top of ch 3 of first triangle, *ch 3, sc in the top of ch 3 of next triangle* repeat from * to * across (18, 22, 26 ch-3 spaces)
Row 6 (rs): ch 3, turn, *tr in sc, 3 tr in ch 3 space* repeat from * to * across, tr in 3rd ch of turning ch (73, 89, 105 tr)
Row 7 (ws): ch 4, turn, skip 1 stitch, dc in next,*ch 1, skip 1 stitch, dc in next* repeat from * to * across (37, 45, 53 dc)
Row 8 – 14 (rs): repeat rows 2 – 7
Or until it’s the same length as Section A
For size S/M: Fasten off. Leave a long end for sewing
For size L/XL: add one more row of tr
For size 2X/3X: add two more rows of tr
Fasten off. Leave a long end for sewing
Section C
Lay the piece so Section B is on the right.
Where to join: find the last stitch from Section B, Row 1, skip 3 stitches, join yarn here
Row 1 (ws): ch 4, skip 1 stitch, dc in next,*ch 1, skip 1 stitch, dc in next* repeat from * to * across until there is a total of 19, 23 dc (19, 23, 27 dc)
Row 2 (rs): ch 3, turn, tr in first dc, *tr in ch-1 space, tr in dc* repeat from to * to across (37, 45, 53 tr)
Row 3 (ws): ch 1, turn, sc in first stitch, *ch 3, skip 3 stitches, sc in next* repeat from * to * across (9, 11, 13 ch-3 spaces)
Row 4 (rs): ch 1, turn, *sc in next ch 3 space, ch 3, in the same space work (tr, dc, hdc, sc)* repeat from * to * across to last ch 3 space, sc in last ch 3 space, ch 3, in the same space work (tr, dc, hdc), sc in last sc (9, 11, 13 triangles)
Row 5 (ws): ch 6 (counts as dc + ch 3), turn, sc in the top of ch 3 of first triangle, *ch 3, sc in the top of ch 3 of next triangle* repeat from * to * across (9, 11, 13 ch-3 spaces)
Row 6 (rs): ch 3, turn, *tr in sc, 3 tr in ch 3 space* repeat from * to * across, tr in 3rd ch of turning ch (37, 45, 53 tr)
Row 7 (ws): ch 4, turn, skip 1 stitch, dc in next,*ch 1, skip 1 stitch, dc in next* repeat from * to * across (19, 23, 27 dc)
Row 8 – 14 (rs): repeat rows 2 – 7
Or until it’s the same length as Section B
For size S/M: Fasten off. Leave a long end for sewing
For size L/XL: add one more row of tr
For size 2X/3X: add two more rows of tr
Fasten off. Leave a long end for sewing
SEWING
Lay right side up
Fold sections A & C towards the middle (section B). Line up the edges across the top with stitch markers. Use the long ends and a yarn needle to whip stitch the shoulders closed.
Weave in the ends.
Turn right side out.
Looking for more patterns? Follow me on Facebook, Instagram, and Pinterest! Please share a pic of your finished product with me. I’d love to see it!



I love that little dress under your Ruana Brean! And your hair looks fantastic (=
The Ruana is very fresh and flattering but I like my sleeves a little longer.
Keep designing these fantastic patterns for us! You know we love you in Canada Brean!
Thank you so much!! The dress is a goodwill find & my hubby did my hair 🙂 You could definitely add some sleeves to this pattern!
You’re welcome (: It’s past my bedtime but tomorrow I’ll go over the pattern more thoroughly to see how adventurous I feel about modifying your design. I’ve been crocheting for a verrry long time so…we’ll see. I will let you know if I decide to play with your pattern! =D
Reading through the pattern and crocheting in my head, it all makes sense until I get to Section B. The pattern says for rows 8 – 14 to repeat rows 2 – 7. But, here’s my question: If row 8 is to be a row 2, R 9 would be 3, R10 = 4, R 11 = 5, R 12 = 6, R 13 = 7, and R14 is ????????
Am I missing something?
Thanks!
Back to row 2 🙂
Thanks so much!
I am working on the raindrop rauna with red heart tweed with 5 mm hook and mine is working up with sides angling a bit. Any advice to fix this?
Hi! I’m not sure without seeing it. Can you email me a pic hookedonhomemadehappiness@gmail.com
Thank you for all the patterns I could only do little granny squares before I found you
You are a wonderful teacher and generous with your patterns
Thank you so much!
I think this pattern would make a great top, tunic, or dress.