
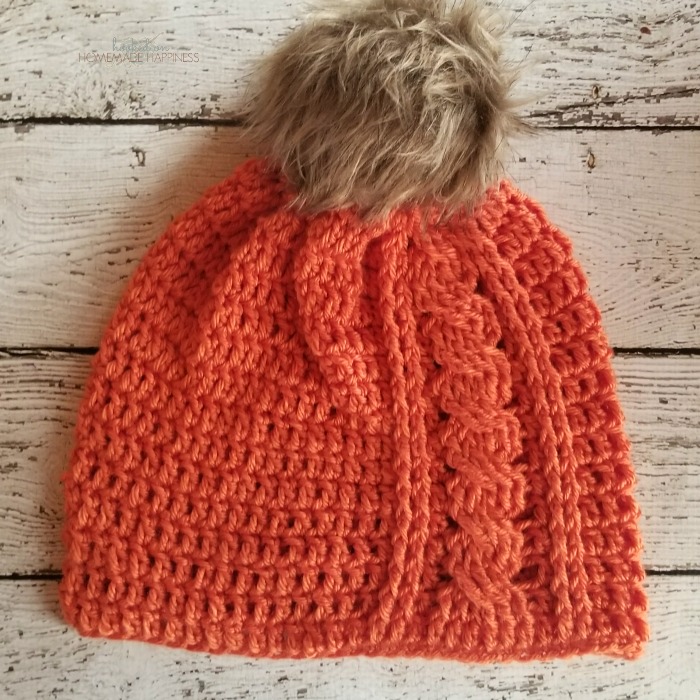
I’ve recently become obsessed with crochet cables! I love the depth and design it creates on a piece. I’ve been working on a cable sweater… but I keep running out of yarn. I always underestimate the amount of yarn I need *sigh*. Anyway, because I loved making the sweater so much, I wanted to make a Cabled Crochet Beanie! Instead of having cables all around, I just did one cable running along the side.
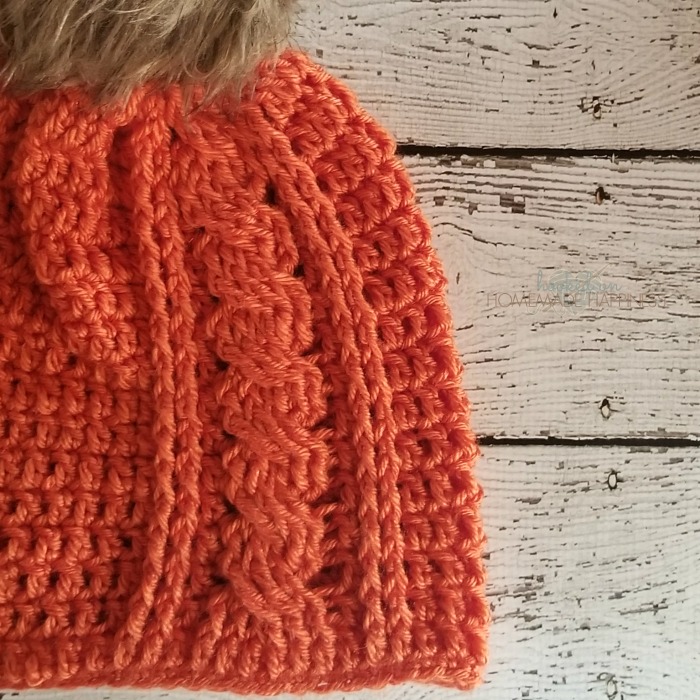
I had this beautiful orange skein of yarn that I bought for another project, but it ended up being the wrong type of yarn. DOH! So it was just laying around waiting to be used. I think it was destined to become this fall beanie! The pom pom is my favorite part. I bought it from The Turtle Trunk on Etsy. You can find her shop >>>HERE<<<
This pattern is available as an inexpensive, clearly formatted, PDF instant download HERE in my Etsy shop.
PATTERN
Materials
Worsted weight (4) yarn – I used Red Heart Soft in Tangerine
5.00 mm hook
Yarn needle
Scissors
Pom pom (optional)
Level
Intermediate
Pattern notes & stitches to know
Sl st – slip stitch
Ch – chain
Sc – single crochet
Dc – double crochet
Fpdc – front post double crochet
Fptr – front post treble crochet
Measurements:
Width: 10 inches across the bottom
Length: 9 inches not including pom pom
Gauge:
11 dc = 4”
7 rows = 4”
BEANIE
This beanie is worked from the bottom up
Ch at the beginning of rounds do not count as stitch
Ch 61
Row 1: sc in 2nd chain from the hook and across, join to first sc with sl st to make a loop (60 sc)
Round 2: ch 3, dc in each stitch around, join to first dc with sl st (60 dc)
Round 3: ch 3, dc in next 20 stitches, fpdc in next 2, dc in next, fpdc in next 6, dc in next, fpdc in next 2, dc in remaining stitches around, join to first dc with sl st (10 fpdc, 50 dc)
Round 4: ch 3, dc in next 20 stitches, fpdc in next 2, dc in next, skip next 3 stitches (we’ll get back to these), fptr in next 3
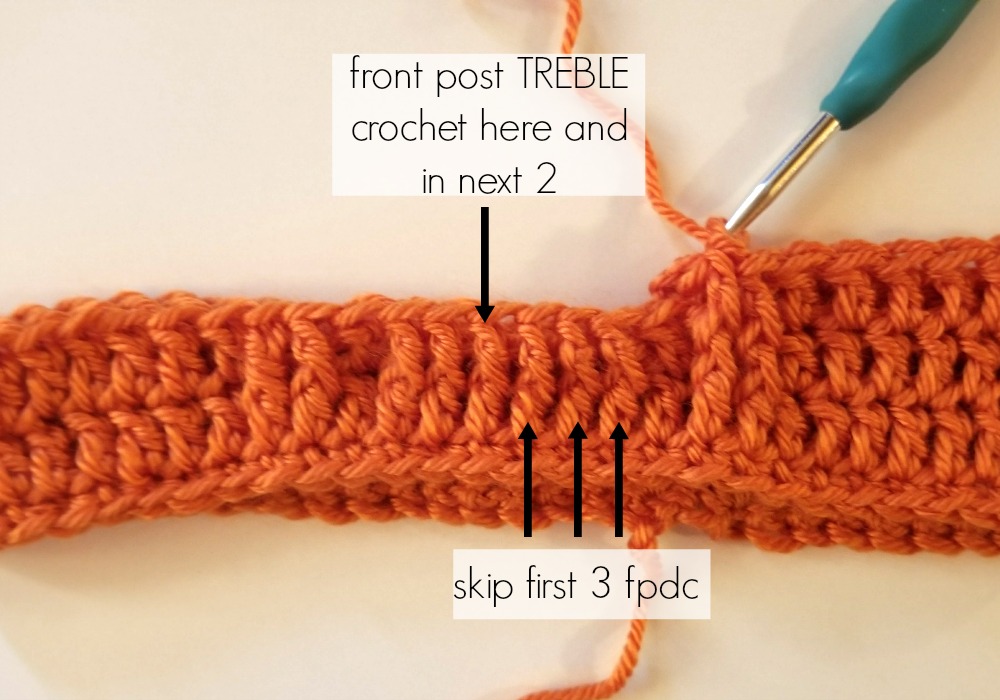
Fptr around the first of the skipped stitches and in the next 2
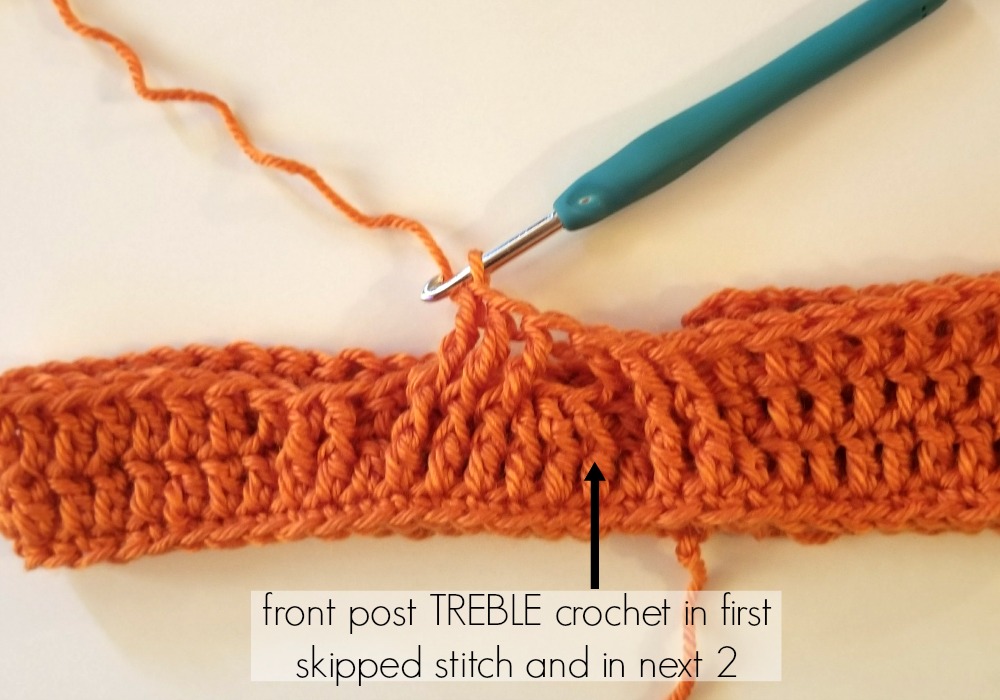
You can see how the stitches are crossing over each other
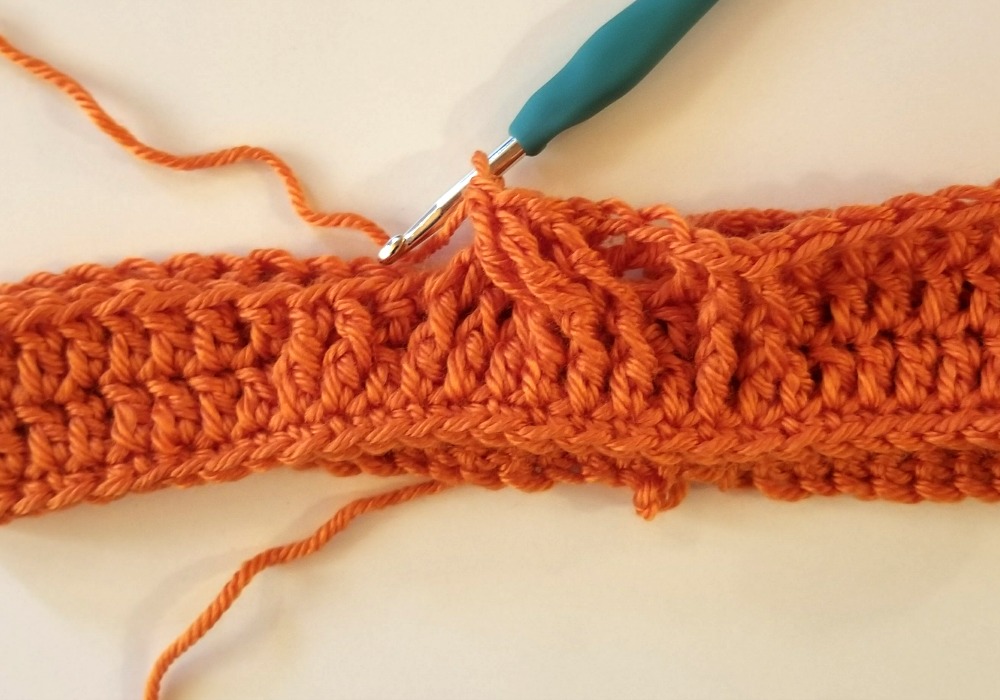
Dc in next, fpdc in next 2, dc in remaining stitches around, join to first dc with sl st (50 dc, 4 fpdc, 6 fptr)
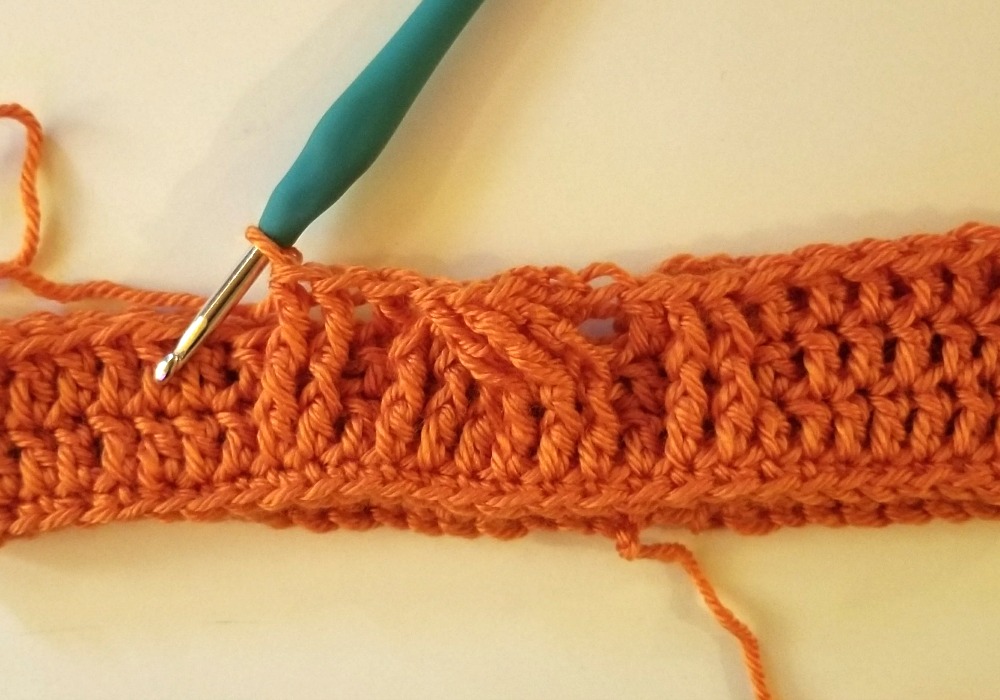
Round 5: ch 3, dc in 20 stitches, fpdc in next 2, dc in next, fpdc in next 6 stitches
You’re going to fpdc around the cable stitches in order as they come. You can see you’ll work the stitches in the back first, then the stitches in the front of the cable.
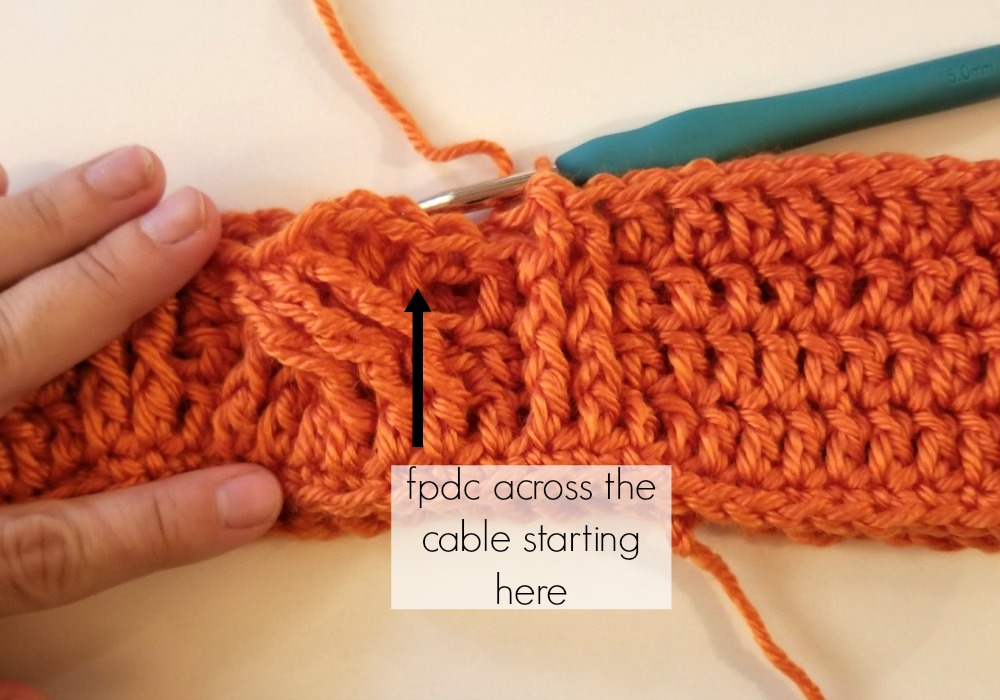
Dc in next, fpdc in next 2, dc in remaining stitches around, join to first dc with sl st (50 dc, 10 fpdc)
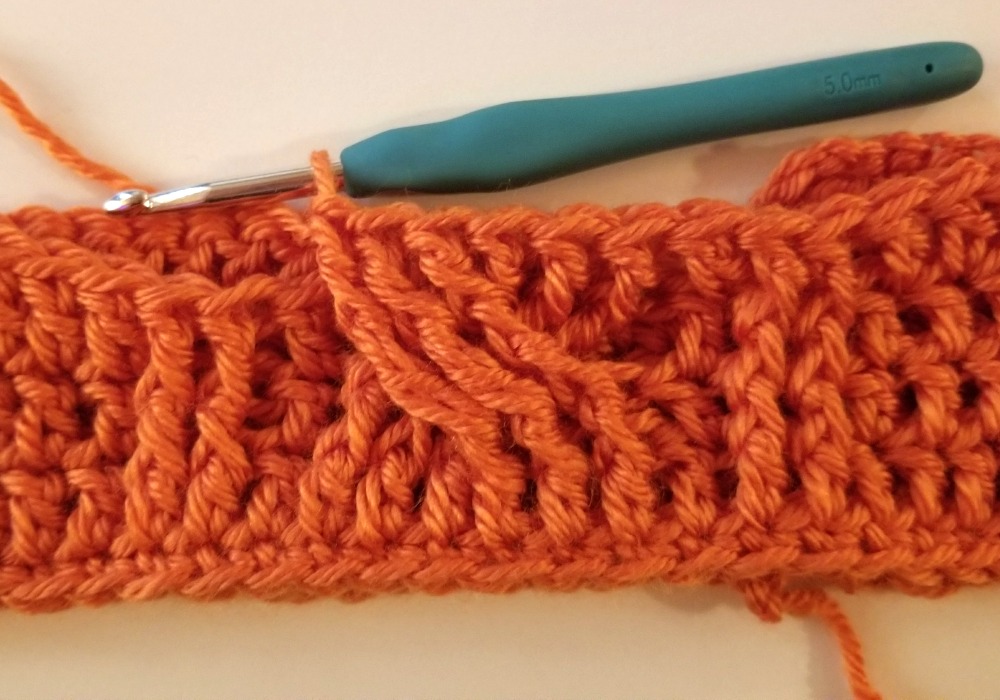
Repeat rounds 4 & 5 to row 17
Leave a long tail for sewing.
Use the long tail and your yarn needle, weave the end in and out of the top loops of the last row all the way around, pull string to close, sew the top closed.
(how to sew the top closed photo tutorial HERE)
Sew the first end in, sew the small gap closed.
Add a pom pom!

Looking for more patterns? Follow me on Facebook, Instagram, and Pinterest! Please share a pic of your finished product with me. I’d love to see it!

NEVER MISS A PATTERN!
Sign up for my newsletter and receive a FREE ebook with 3 of my favorite patterns PLUS patterns straight to your inbox. You’ll also get a heads up about upcoming giveaways, events, and crochet alongs.


What age group is this cabled beanie for?
How would one adjust it for an adult size ?
Thank you.
Hi the pattern is written in a (small) adult size. You really could start with any starting ch length and the pattern will work.