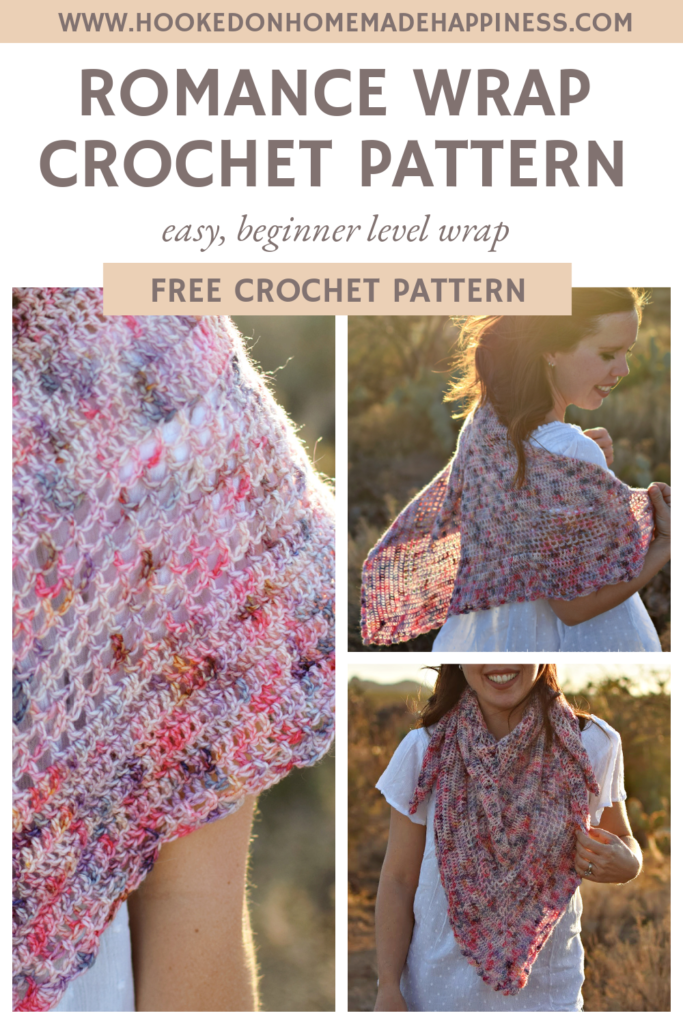
Romance Wrap Crochet Pattern
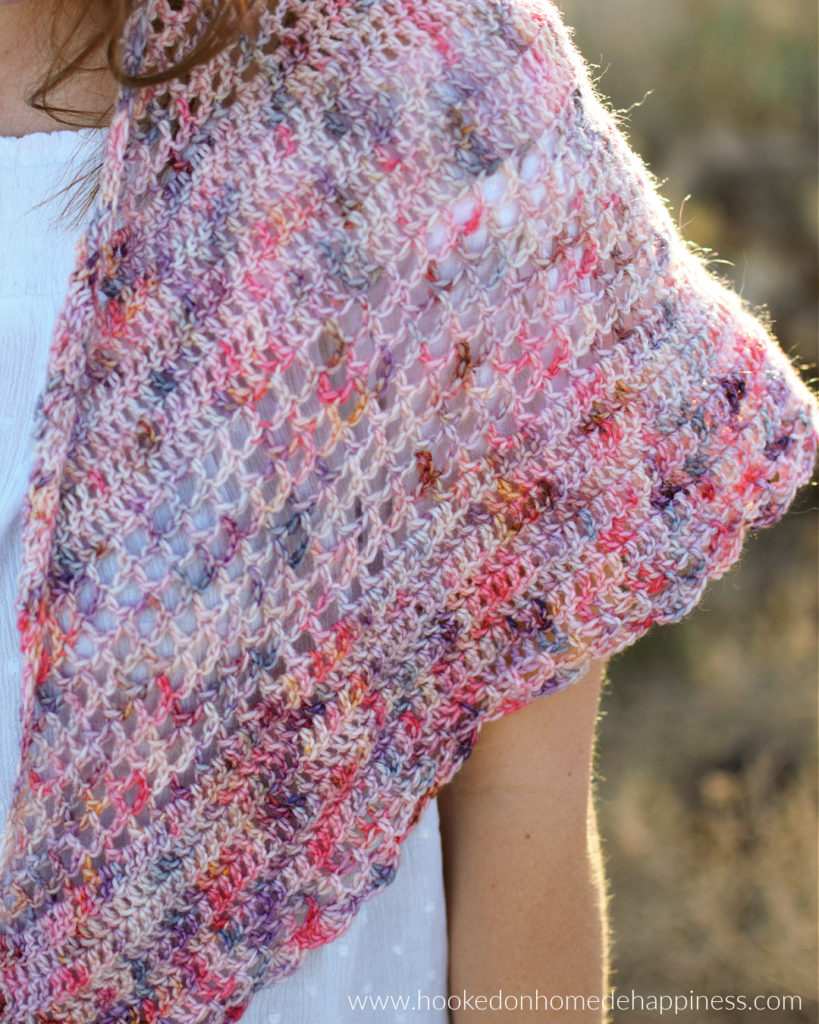
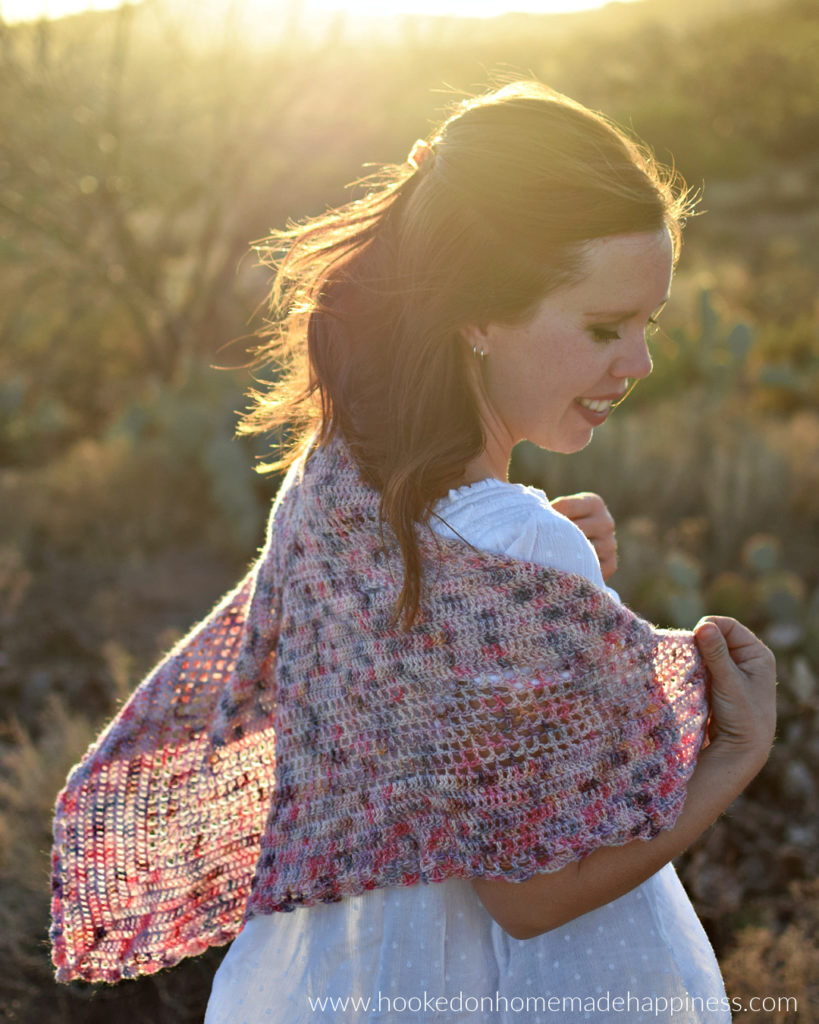
The Romance Wrap Crochet Pattern is the perfect lightweight wrap for spring and summer. This pretty wrap is a simple combination of double crochet and chain stitches, with a feminine scalloped border.

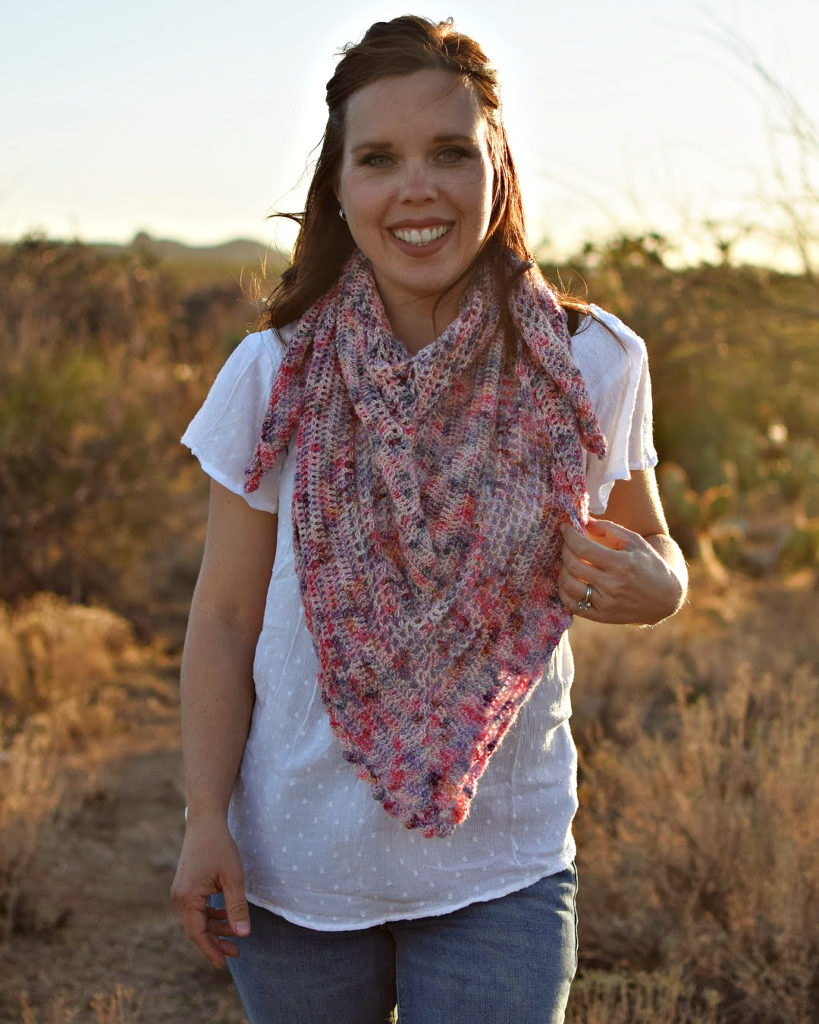
For this wrap I used sock weight yarn that I dyed myself. It’s a wool/mohair blend. Any sock weight yarn would work! Cotton, wool, acrylic, or any fiber. Some great sock weight options are Palette (100% Peruvian wool), Comfy Fingering (cotton/acrylic blend), or Muse Hand Painted Fingering (Superwash Merino wool/Nylon blend).
More Homemade Happiness:


Daydreamer Wrap // Al Fresco Shawl // Beautiful You Shawl
click here to pin this pattern for later >>>
Romance Wrap Crochet Pattern
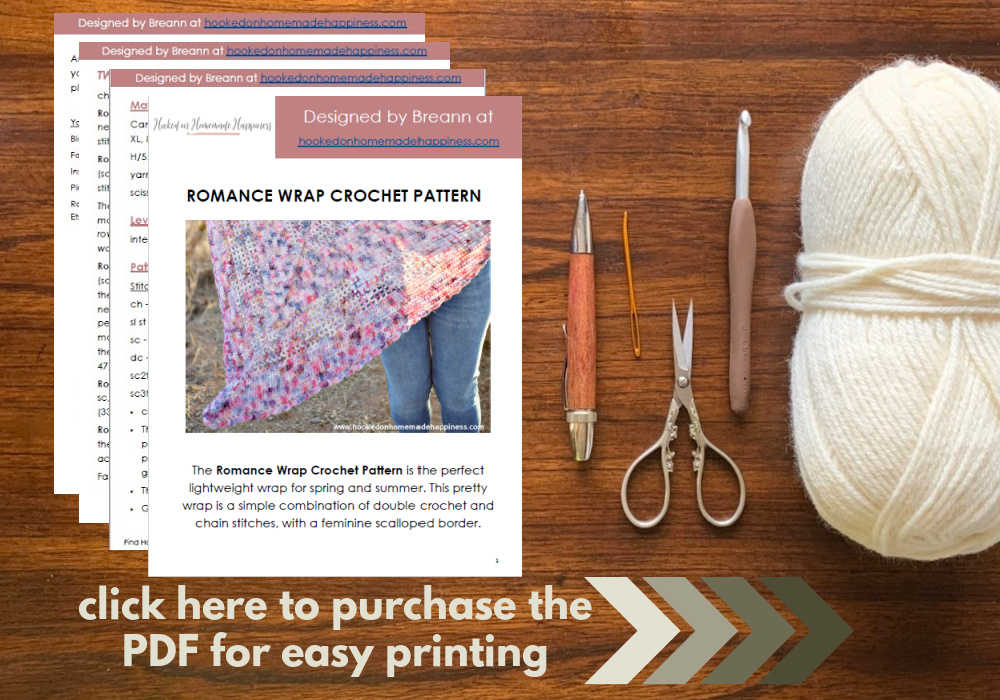
Get the free pattern below or purchase the ad-free, printable PDF in my Etsy Shop or Ravelry Shop
PIN for later HERE
Add to your Ravelry Queue HERE
Materials
200g sock weight yarn
G/4.0 mm hook
yarn needle
scissors
Level
easy
Pattern notes & stitches to know
ch – chain
dc – double crochet
sc – single crochet
· written in US terms
· ch 3 counts as dc
· ch 4 counts as dc + ch 1
· This triangle wrap is working in turned rows, starting in the center.
· Approx finished size: 45” x 39” x 39”
ROMANCE WRAP CROCHET PATTERN
Ch 4, join to first ch with sl st to make a ring
Row 1: ch 3, working in the ring, 3 dc, ch 2, 4 dc (8 dc)
Row 2: ch 3, turn, dc in same stitch, dc in each stitch across to ch-2 space, (2 dc, ch 2, 2 dc) all in ch-2 space dc in each stitch across to last stitch, 2 dc in last (14 dc)
Row 3: ch 3, turn, 2 dc in same stitch, dc in each stitch across to ch-2 space, (2 dc, ch 2, 2 dc) all in ch-2 space, dc in each stitch across to last stitch, 3 dc in last stitch (22 dc)
Row 4 – 8: alternate repeating rows 2 & 3, ending with a row 2 repeat
Row 9: ch 4, turn, dc in same stitch, ch 1, skip 1 stitch, *dc in next stitch, ch 1, skip 1 stitch* repeat from * to * across to ch-2 space, (dc, ch 1, dc, ch 2, dc, ch 1, dc) all in ch-2 space, ch 1, skip 1 stitch, repeat from * to * across to last stitch, (dc, ch 1, dc) all in last stitch (34 dc)
Row 10: ch 4, turn, dc in same stitch, ch 1, *dc in next dc, ch 1* repeat from * to * across to ch-2 space, (dc, ch 1, dc, ch 2, dc, ch 1, dc) all in ch-2 space, ch 1, repeat from * to * across to last stitch, (dc, ch 1, dc) all in last stitch (40 dc)
Row 11 – 16: repeat row 10
Row 17: ch 3, turn, 2 dc in same stitch, dc in each stitch and ch space across to ch-2 space, (2 dc, ch 2, 2 dc) all in ch-2 space, dc in each stitch and ch space across to last stitch, 3 dc in last stitch (158 dc)
Row 18 – 24: alternate repeating rows 2 & 3, ending with a row 2 repeat
Note: this section of filet stitches has a different corner than the previous section
Row 25: ch 4, turn, dc in same stitch, ch 1, skip 1 stitch, *dc in next stitch, ch 1, skip 1 stitch* repeat from * to * across to ch-2 space, (dc, ch 2, dc) all in ch-2 space, ch 1, skip 1 stitch, repeat from * to * across to last stitch, (dc, ch 1, dc) all in last stitch (108 dc)
Row 26: ch 4, turn, dc in same stitch, ch 1, *dc in next dc, ch 1* repeat from * to * across to ch-2 space, (dc, ch 2, dc) all in ch-2 space, ch 1, repeat from * to * across to last stitch, (dc, ch 1, dc) all in last stitch (112 dc)
Row 27 – 32: repeat row 26
Row 33: repeat row 17
Row 34 – 40: alternate repeating rows 2 & 3, ending with a row 2 repeat
Row 41: repeat row 25
Row 42: ch 1, turn, sc in first dc, sc in ch space, *5 dc in next dc, skip ch space, sc in next dc, skip ch space* repeat from * to * across to ch-2 space, sc in ch-2 space, repeat from * to * across to last 2 stitches, sc in last 2 stitches
Fasten off.
Weave in the ends.
Looking for more patterns? Follow me on Facebook, Instagram, and Pinterest! Please share a pic of your finished product with me. I’d love to see it!


Love this shawl, I am going to try fingering weight yarn. Thank you for all your patterns.
This is so pretty. Having had double mastectomies for breast cancer this is the perfect accessory for my now flat chest. Thank you so much.
This is a very pretty shawl and the yarn color is also very pretty. The name “Romance Wrap” is very fitting.
I have started this but it is not laying flat and the top of the wrap is curling upward at the ends …… I am doing it correctly, I have finished row 17 and have the correct amount of stitches each time…..advice pls
Hi! Is it laying flat but not flat across the top? The is intentional. The curve will make the shawl lay nicely over the shoulders 🙂
Sorry have been in hospital and am only just getting back to this. I understand about the top curving at the edge. However the body of the wrap is wonky……. It is flat up to row 9, and goes wrong from there. Is there an adjustment I could do that would fix it? Perhaps a change in the middle part? Please advise
Hi! I would have to see a picture to know what the problem is. You can email me at hookedonhomemadehappiness@gmail.com