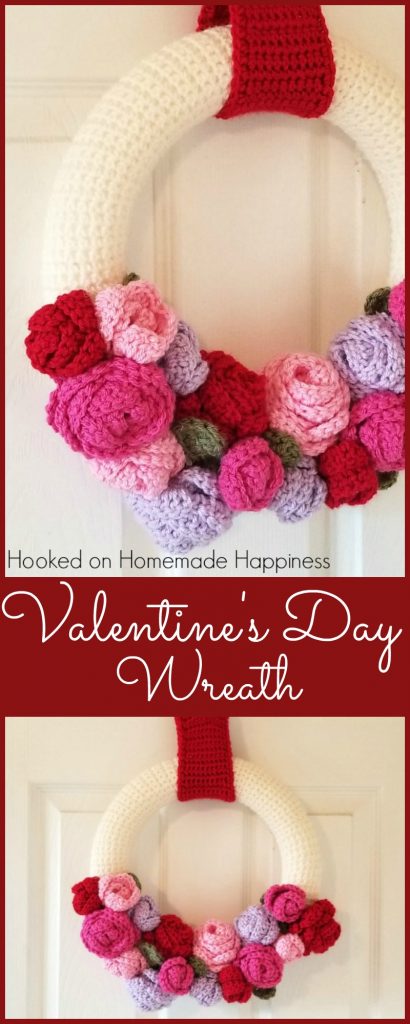
Valentine’s Day Wreath Crochet Along Part 1
Thanks for joining this fun Valentine’s Day Wreath crochet along!
A crochet along is a project that’s broken into parts with a specified starting date so we can all work on a project at the same time together! This crochet along will have three parts. The first part (this post) will be crocheting the wreath base, part 2 will be the roses and leaves, and part 3 will be putting all the pieces together and adding the hanger. Last Monday I posted the complete Supplies List >>HERE<< and this week we’ll crochet the wreath base.
You can join my Facebook group here: https://www.facebook.com/groups/1974671912859520/ where you can share your progress, ask questions, and be inspired by fellow crocheters!

If you prefer to have the entire pattern at once, this pattern is available as an inexpensive, clearly formatted, PDF instant download in my Etsy shop or Ravelry Shop!
PATTERN
Materials for Part 1
1 Styrofoam 12 inch wreath
Worsted weight yarn in ivory – or whatever color your choose (I used I Love This Yarn in Ivory)
H/5.0 mm hook
Yarn needle
Scissors
Level
Intermediate
Pattern Notes & Stitches to Know
sl st – slip stitch
ch – chain
sc – single crochet
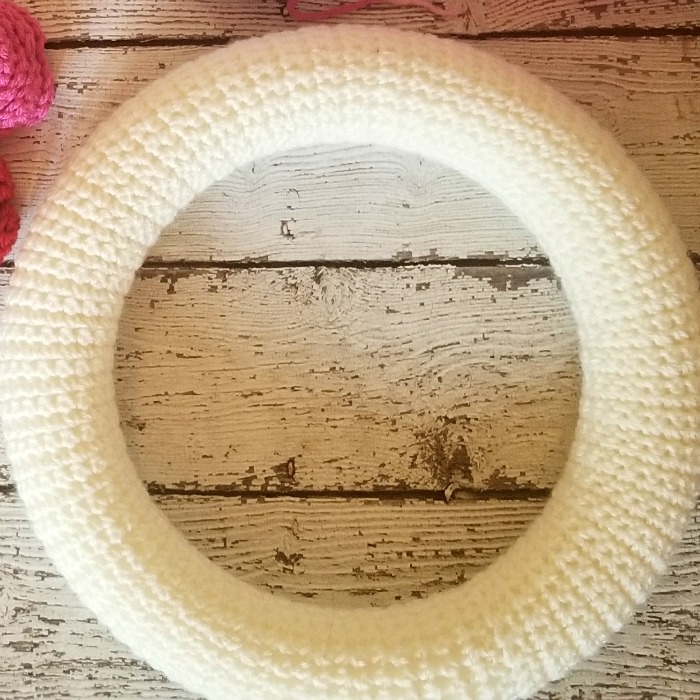
WREATH BASE
In Ivory (or whichever color you choose for your base) ch 19
NOTE: test this width around the wreath, it should wrap around snug. Add or take out chs as needed, the number of chs doesn’t matter, just that it wraps around the wreath nicely
Row 1: sc in 2nd ch from the hook and across (18 sc)
Row 2 – 112: ch 1, turn, sc in each stitch across (18 sc)
NOTE: This length should be able to wrap around the entire wreath. Add or take out rows as needed, the number of rows doesn’t matter, just that it fits snug
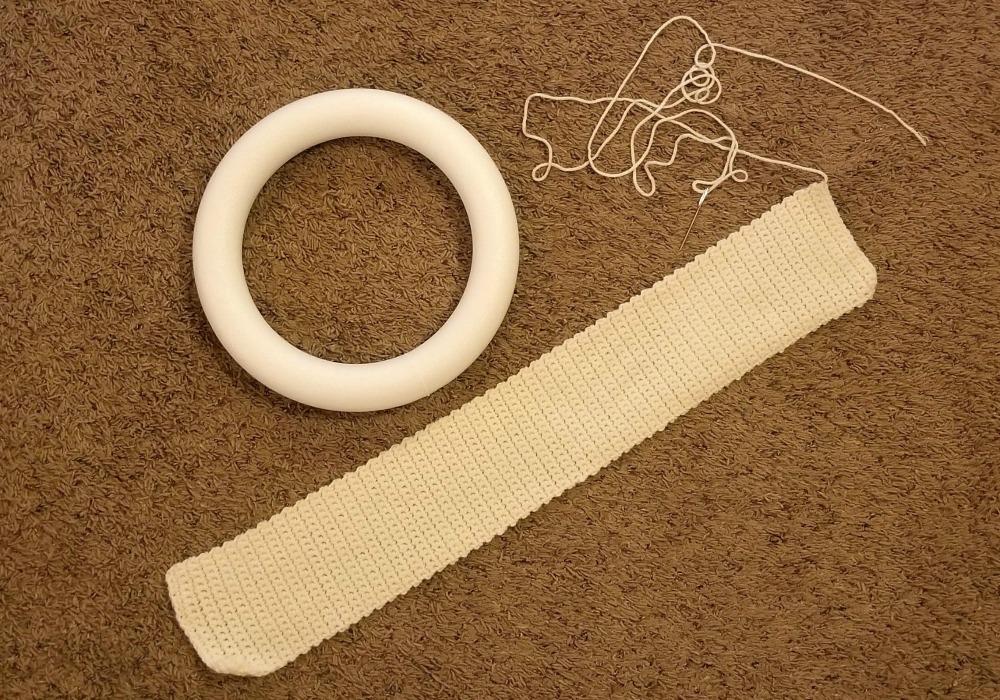
Fasten off, leave a long tail for sewing (I left about 60 inches). Bring both short ends together, sew them together with a whip stitch. Wrap the base around the wreath and sew it closed using a whip stitch, making sure to line up each row. It looks like it won’t work out, but as long as you line up each row it will come out nice and smooth. 🙂
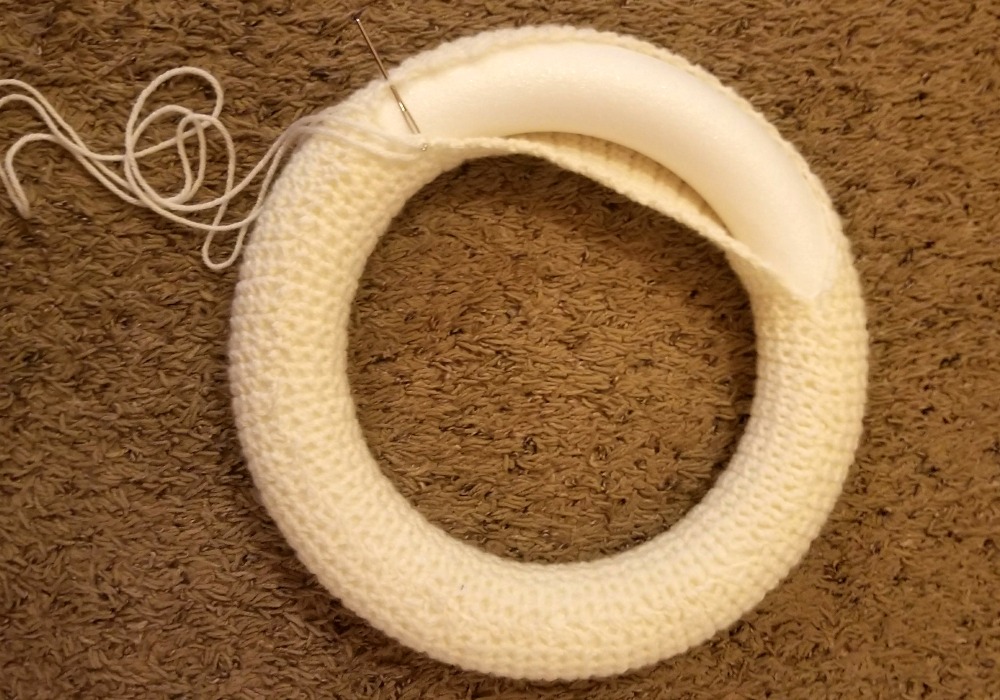
Fasten off, weave in your ends
Next Monday, January 15th will be Part 2! The pattern for the flowers and leaves will be posted. See you then!
PART 2 >>HERE<<
Looking for more patterns? Follow me on Facebook, Instagram, and Pinterest! Please share a pic of your finished product with me. I’d love to see it!

NEVER MISS A PATTERN!
Sign up for my newsletter and receive a FREE ebook with 3 of my favorite patterns PLUS patterns straight to your inbox. You’ll also get a heads up about upcoming giveaways, events, and crochet alongs.


4 Comments