Tunisian Knit Stitch (Tunisian Stitch Scrapghan – Part 2)
Do you love crochet, but find yourself stuck in a rut with the same stitches over and over again? Are you looking to add some texture and dimension to your projects? Then look no further, because today we’re diving into the world of Tunisian crochet and the versatile Tunisian Knit Stitch. With its knit-like appearance and endless possibilities, the Tunisian crochet knit stitch is perfect for pillows, bags, and sweaters. If you are new to Tunisian crochet, check out the Tunisian Simple Stitch Pattern for a overview of Tunisian crochet for beginners. This pattern is a part of the Tunisian Stitch Sampler Scrapghan where you will learn a variety of Tunisian crochet stitches, all while making a colorful blanket.
>GET THE BLANKET DETAILS HERE<
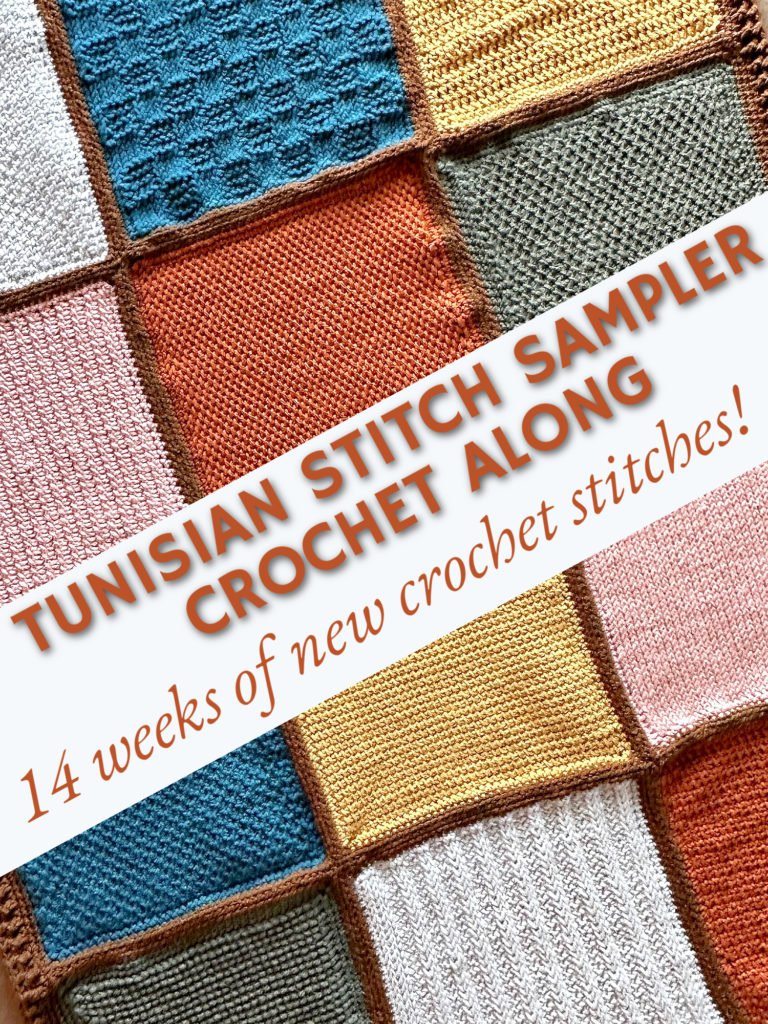
It’s not too late to join the Tunisian Stitch Scrapghan CAL! You can find all the Scrapghan Crochet Along info HERE. Join my FACEBOOK GROUP to share your progress with your fellow crocheters!
Tunisian Knit Stitch Crochet Pattern
Get the free pattern below or purchase the entire ad-free, printable PDF in my Etsy Shop or Ravelry Shop
PIN for later HERE
Add to your Ravelry Queue HERE
Materials
approx. 88g worsted weight yarn + small amount for the border (the same color that will be used for sewing – optional)
J/6.0 mm Tunisian crochet hook
H/5.0 mm hook
yarn needle
scissors
Level
easy
Curling Level
high
Pattern notes & stitches to know
ch – chain
TKS – Tunisian knit stitch (insert hook between the front and back vertical bars, yarn over, pull up a loop)
sc – single crochet
sl st – slip stitch
· written in US terms
· There is no multiple requirement for this stitch.
· The side facing you is the right side of the stitch. Do not turn.
· Each row is made up of a forward pass and a return pass
· Return Pass: ch 1, *yarn over, pull through 2 loops on hook* repeat from * to * across until 1 loop remains on hook
· Bind Off: insert hook into 2nd vertical bar from hook, yarn over and pull up a loop. Pull loop through the loop on the hook. *Insert hook into next vertical bar, yarn over and pull up a loop. Pull loop through the loop on the hook* repeat from * to * across
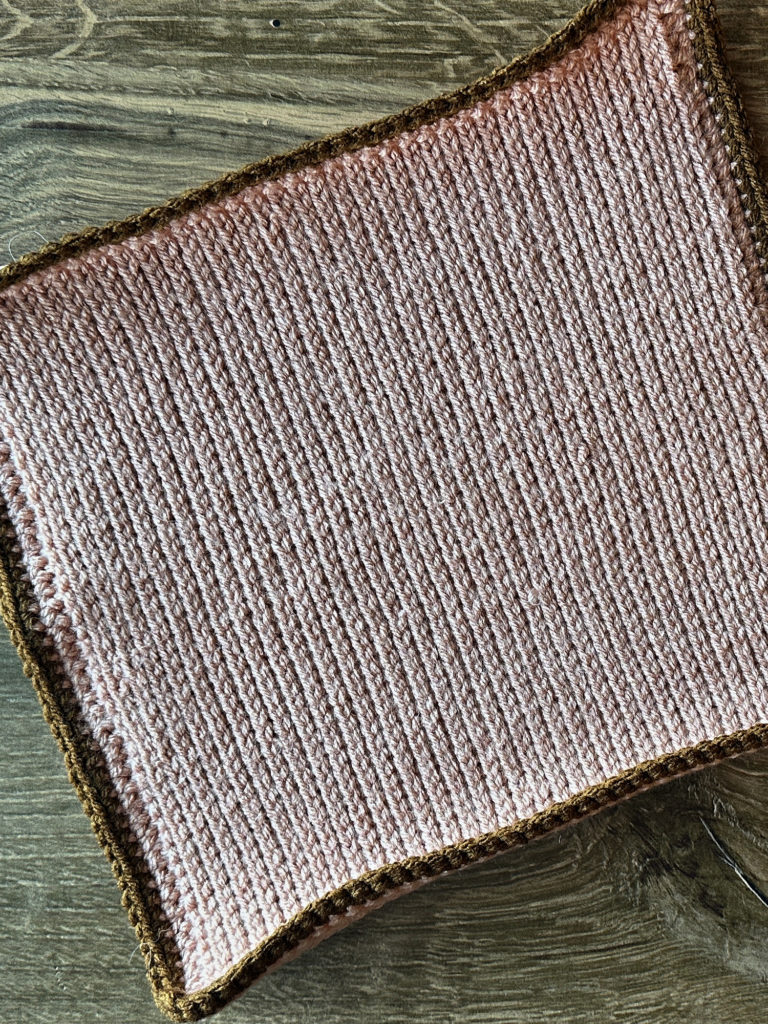
Approximate Finished Size (after border & blocking): 11” x 11”
Scrapghan Tips
· If you’re having trouble getting the sizing right, remember that it’s easier to adjust a square that’s too small than one that’s too big.
· If a square comes out too small you can add an additional round for the border, go up a hook size, and/or steam block and stretch the square to the size you want.
· The edges might curl. This can be fixed with some steam blocking. It won’t be noticeable after sewing.
· Each square has at least 2 rounds of border. For the last round of the border I used the same color for each square (the dark brown). This is the same color used for the sewing.
· Each square does not need the same number of stitches for the border.
PART 2 – TUNISIAN KNIT STITCH
Ch 40
Row 1: insert hook into 2nd ch from hook, yarn over and pull up a loop, *insert hook into next ch, yarn over and pull up a loop* repeat from * to * across. (40 stitches on hook) Return Pass.
Row 2: starting in 2nd stitch from the hook, TKS in each stitch across (40 stitches on hook) Return Pass.
Row 3 – 47: repeat row 2
Bind off.
Do not fasten off.
BORDER
Change to H/5.0 mm regular crochet hook
With the same color used for the square, work around the entire square
Round 1 (rs): ch 1, sc along the side of the square, working 1 sc in the side of each row to the corner, (sc, ch 2, sc) in corner, sc in each stitch across to next corner, (sc, ch 2, sc) in corner, sc along the side of the square, working 1 sc in the side of each row to the corner, (sc, ch 2, sc) in corner, sc in each stitch to last, (sc, ch 2, sc) in last stitch, join to first sc
Fasten off.
Join border color to ch-2 space
Round 2 (rs): ch 1, *(sc, ch 2, sc) in ch-2 space, sc in each stitch across to ch-2 space* repeat from * to * around, join to first sc with sl st
Fasten off. Weave in the ends.
And that’s it for Part 2! See you next week for Part 3 🙂
Looking for more patterns? Follow me on Facebook, Instagram, and Pinterest! Please share a pic of your finished product with me. I’d love to see it!