
Bobble Crochet Stocking Pattern
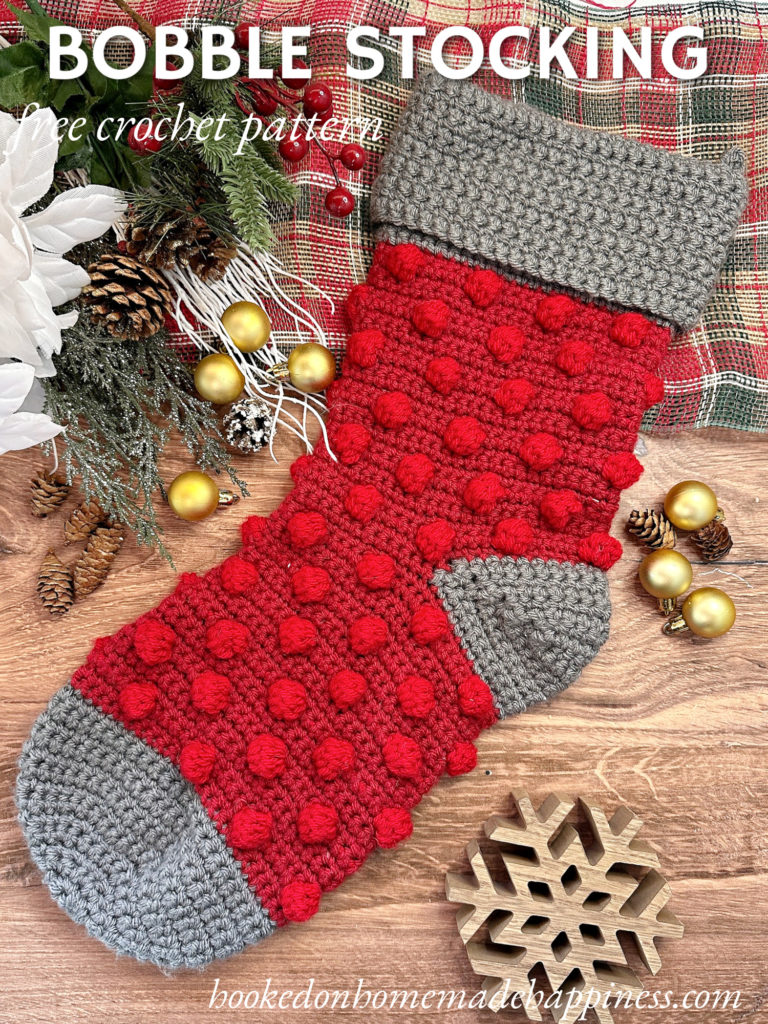
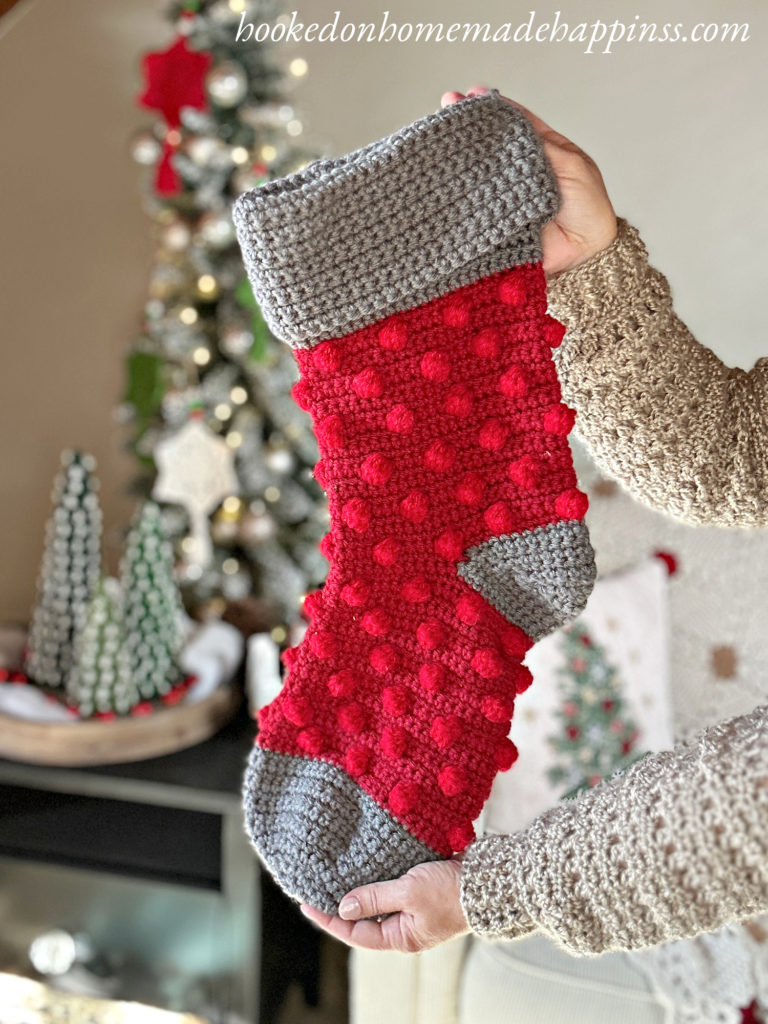
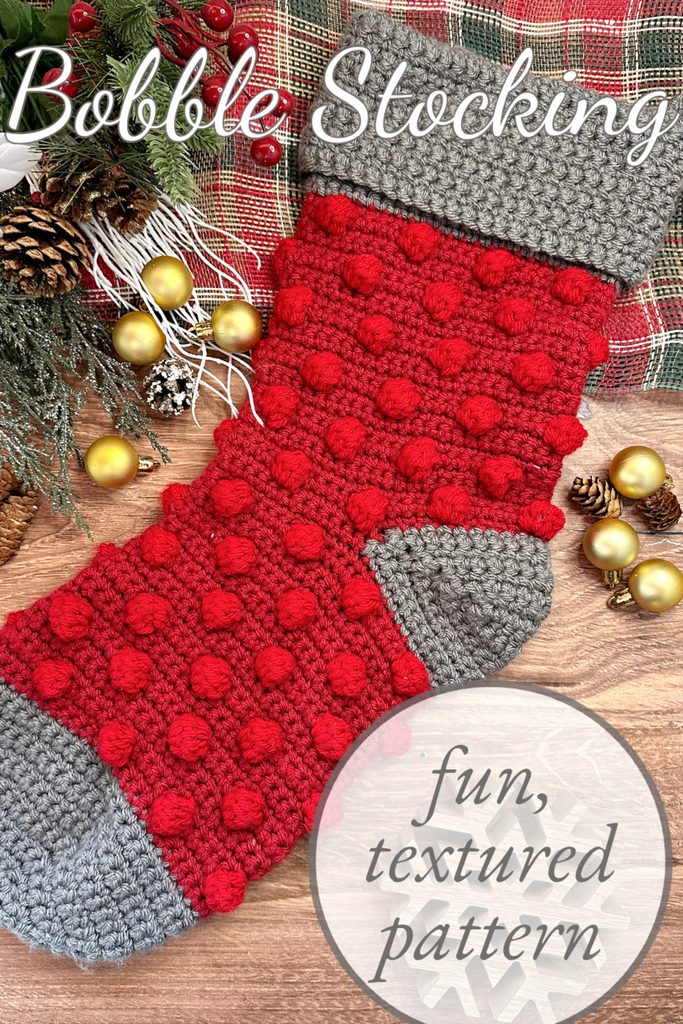
Add a little handmade charm to your holiday decor with the Bobble Stocking Crochet Pattern! This cozy Christmas stocking features fun, textured bobbles that really stand out against the simple stitches of the body. Made with bulky weight yarn, it works up quickly and has a soft, chunky look that’s perfect for the holidays. Plus, it’s a nice, large size with plenty of room for stocking stuffers, sweet treats, and Christmas morning surprises!
Purchase the ad-free, printable PDF for easy printing.
Why You’ll Love This Pattern
- Fun Bobble Texture: The bobble stitches add a festive, dimensional look to this Christmas stocking.
- Bulky Weight Yarn: The thicker yarn creates a cozy stocking that works up quickly.
- Roomy Size: This large stocking has plenty of space for gifts, candy, and other Christmas goodies.
- Easy to Customize: Choose coordinating shades for a subtle look or contrasting colors to make the bobbles pop.
- Handmade Holiday Decor: A beautiful addition to your mantel that can be enjoyed year after year.
About the Pattern
The Bobble Stocking Crochet Pattern is made from the bottom up in turned rounds. This construction creates the stocking shape while allowing the textured bobble stitches to stand out throughout the body.
The pattern uses bulky weight yarn and a 6.0 mm crochet hook, making it a great project for creating a chunky, cozy Christmas stocking.
The finished stocking is generously sized, making it both a pretty decoration and a practical stocking for Christmas morning!
Yarn and Supplies
For this pattern, you’ll need:
- Yarn: Bulky weight (category 5) yarn in three colors
- Crochet Hook: J/6.0 mm
- Yarn Needle: For weaving in ends
- Scissors: For trimming yarn

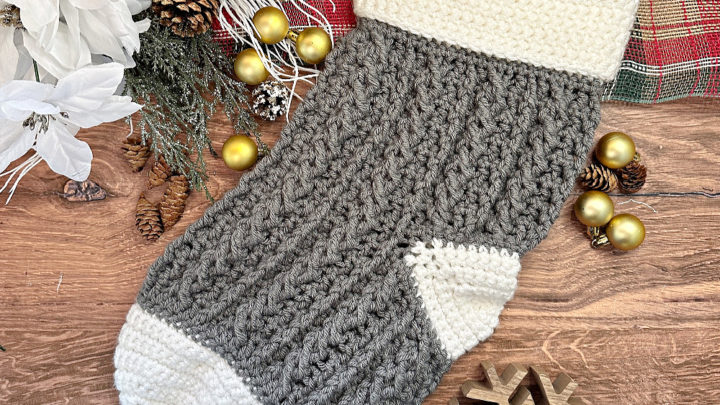
Bobble Crochet Stocking Pattern
Get the free pattern below or purchase the ad-free, printable PDF in my Pattern Shop
PIN for later HERE
Add to your Ravelry Queue HERE
Materials
Bulky weight yarn in 3 colors, 100g burgundy and red, 200g gray (I used Paintbox Simply Chunky)
J/6.0 mm hook
yarn needle
scissors
Level
intermediate
Pattern notes & stitches to know
magic ring
sl st – slip stitch
ch – chain
sc – single crochet
sc2tog – single crochet 2 together (single crochet decrease)
bobble – in the last step of the stitch before the bobble, pull through the secondary color, *yarn over, insert into stitch, pull up a loop, yarn over, pull through 2 loops* repeat 4 more times. You have 6 loops on hook. Pull your main color through all 6 loops on hook.

· written in US terms
· ch 1 does not count as sc
· ch 2 does not count as dc
· Pattern is made from the bottom up with turned rounds
· Gauge: 12 sc x 14 rows = 4” x 4”
· Approx Finished Size (with cuff folded): 20” x 7”
BOBBLE CROCHET STOCKING PATTERN
With gray, make a magic ring
TOE
Round 1: ch 1, 6 sc in ring, pull ring closed tight, join to first sc with sl st (6 sc)
Round 2: ch 1, turn, 2 sc in each stitch around, join to first sc with sl st (12 sc)
Round 3: ch 1, turn, *sc in 1 stitch, 2 sc in next* repeat from * to * around, join to first sc with sl st (18 sc)
Round 4: ch 1, turn, *sc in 2 stitches, 2 sc in next* repeat from * to * around (24 sc)
Round 5: ch 1, turn, *sc in 3 stitches, 2 sc in next* repeat from * to * around, join to first sc with sl st (30 sc)
Round 6: ch 1, turn, *sc in 4 stitches, 2 sc in next* repeat from * to * around, join to first sc with sl st (36 sc)
Round 7: ch 1, turn, *sc in 5 stitches, 2 sc in next* repeat from * to * around, join to first sc with sl st (42 sc)
Round 8: ch 1, turn, *sc in 6 stitches, 2 sc in next* repeat from * to around, join to first sc with sl st (48 sc)
Round 9 – 14: ch 1, turn, sc in each stitch around, join to first sc with sl st (48 sc)
Change to Burgundy
Fasten off gray.
Round 15 – 16: ch 1, turn, sc in each stitch around, join to first sc with sl st (48 sc)
The bobbles begin in the next round. Join the red for the first bobble stitch. All bobbles are done in red. All single crochets are in burgundy. Do not fasten off either color, but carry them both throughout.
Round 17: ch 1, turn, sc in 2 stitches, bobble in next, *sc in 5 stitches, bobble in next* repeat from * to * across, sc in last 3, join to first sc with sl st (8 bobbles, 40 sc)
Round 18 – 20: ch 1, turn, sc in each stitch around, join to first sc with sl st (48 sc)
Round 21: ch 1, turn, *sc in 5 stitches, bobble in next* repeat from * to * around, join to first sc with sl st (8 bobbles, 40 sc)
Round 22 – 24: ch 1, turn, sc in each stitch around, join to first sc with sl st (48 sc)
Repeat rounds 17 – 24 to Round 38 (48 sc)
The space for the heel is made in the next round
Round 39: ch 1, turn, sc in 21 stitches, ch 21, skip 21 stitches, sc in remaining stitches around, join to first sc with sl st (27 sc)
There will be a hole where the heel is. Leave it for now. The heel will be finished at the end.
In the next round, work in each stitch and ch around
Round 40: ch 1, turn, sc in each stitch and ch around, join to first sc with sl st (48 sc)
Repeat rounds 17 – 24 to Round 62 (48 sc)
CUFF
Change to gray
Fasten off burgundy and red
Round 63 – 75: ch 1, turn, sc in each stitch around, join to first sc with sl st (48 sc)
The hanger is made in the next round. Make sure it’s lined up with the back of the heel.
Round 76: ch 1, turn, sc in each stitch to the back of the heel (approx., 14 stitches) ch 6, sc in next stitch (do not skip any stitches), sc in remaining stitches around, join to first sc with sl st (48 sc)
Round 77 – 90: ch 1, turn, sc in each stitch around, join to first sc with sl st (48 sc)
Fasten off. Weave in the ends.
HEEL
Join Gray to the corner of the heel space
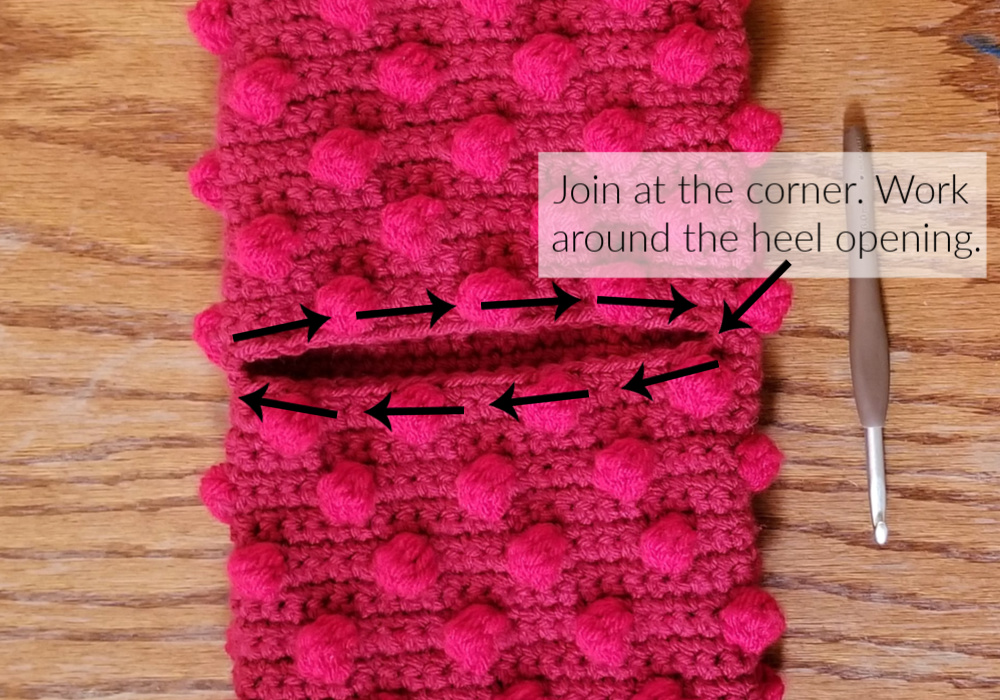
Round 1: ch 1, sc2tog, sc across to opposite corner (approx. 19 stitches), sc2tog, turn so your working across the top of the heel, sc2tog, sc across (approx. 19 stitches) to last 2 stitches, sc2tog, join to first sc2tog with sl st
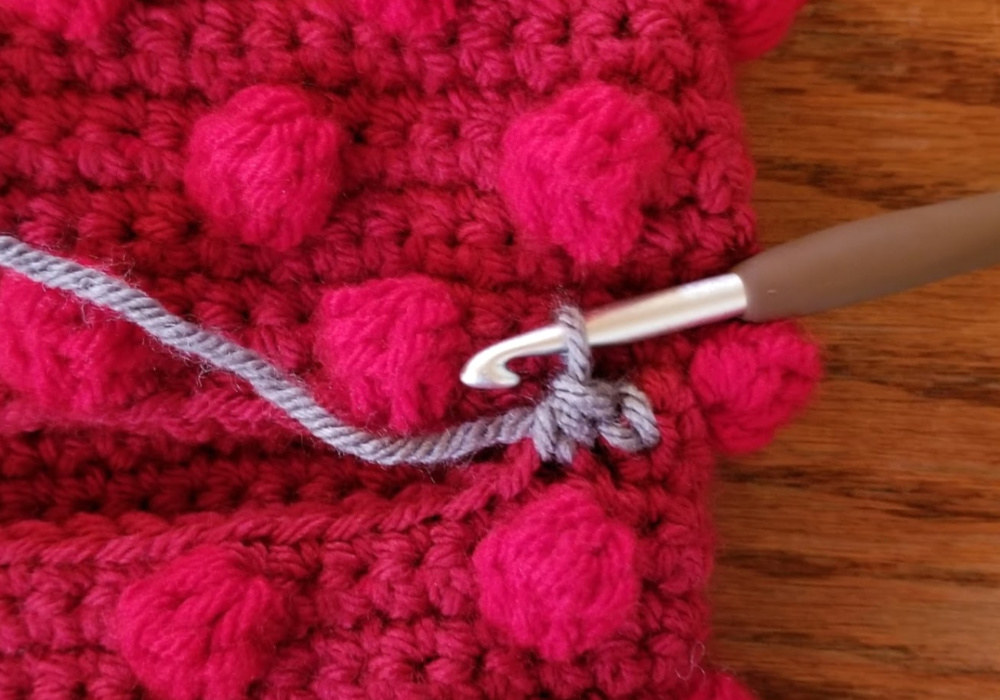
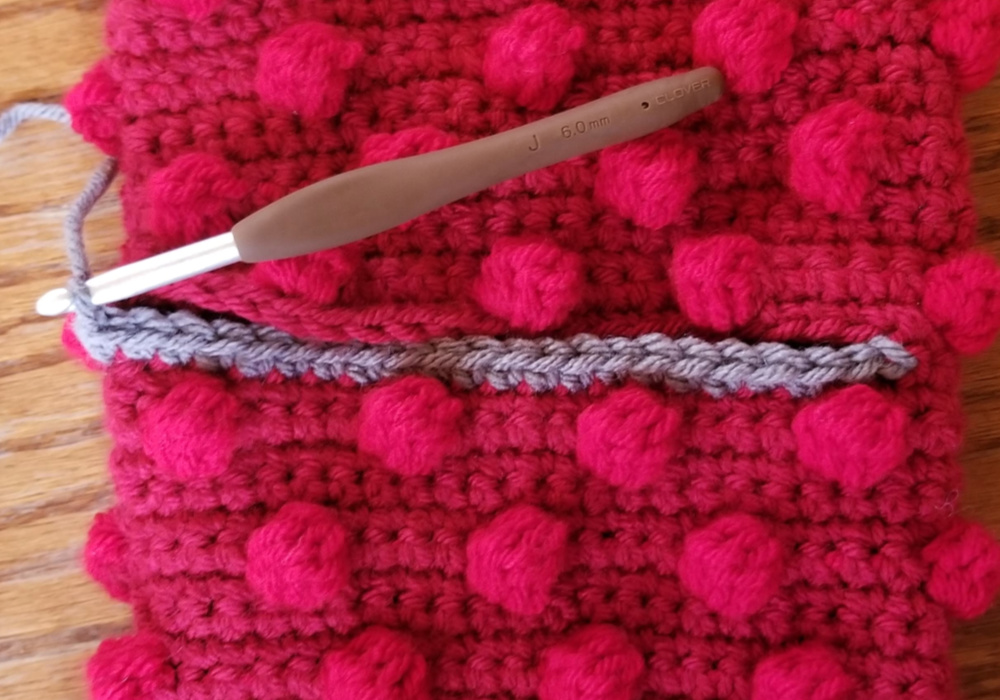
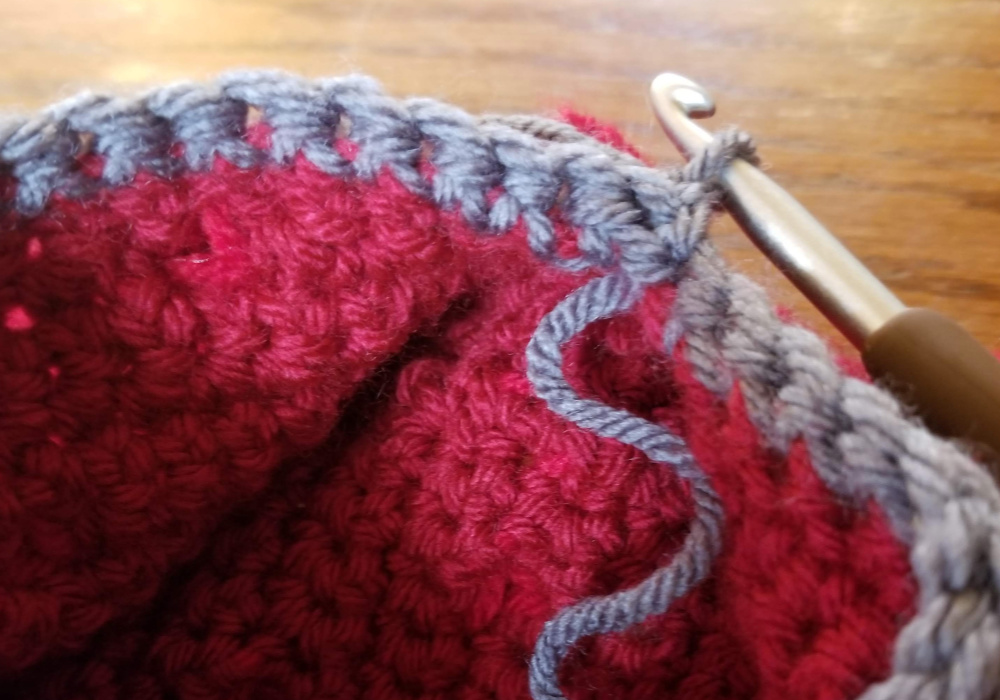
Round 2: ch 1, turn, sc2tog, sc across to opposite corner (approx. 17 stitches), sc2tog, turn so your working across the top of the heel, sc2tog, sc in across (approx. 17 stitches) to last 2 stitches, sc2tog, join to first sc2tog with sl st
Repeat round 2, decreasing the stitch count by 4 each round, to Round 8
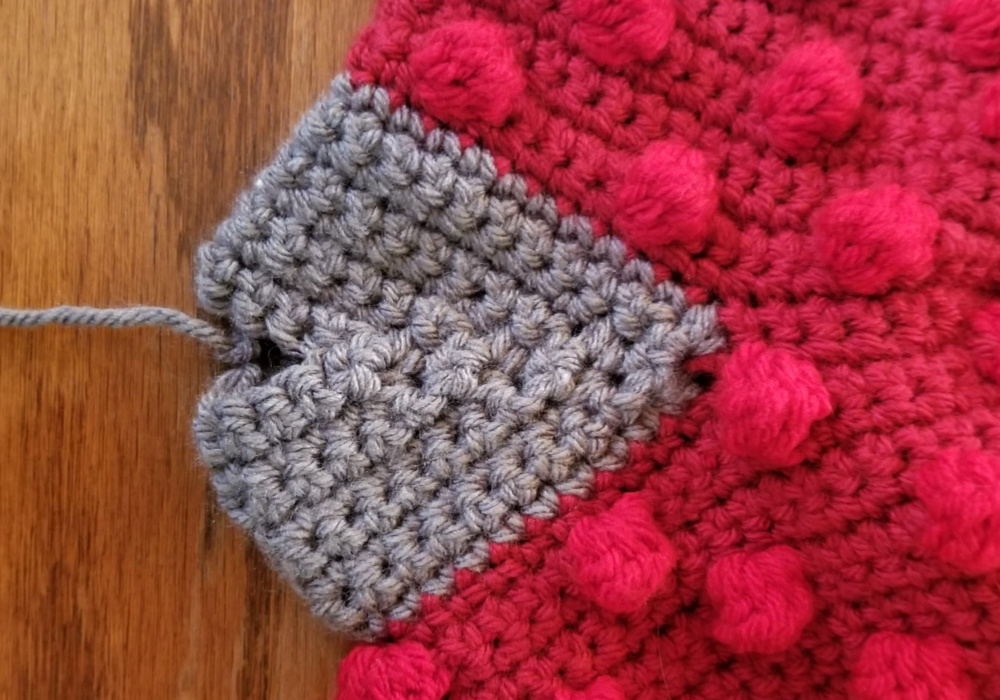
Fasten off. Leave a long end for sewing.
Use the long end to sew the opening closed.
Weave in the ends.
And you’re done with this bobble stocking!! I hope you love it!
Looking for more patterns? Follow me on Facebook, Instagram, and Pinterest! Please share a pic of your finished product with me. I’d love to see it!



My bobbles were a little off. And it took a bit working on my first stocking. But now I’m on my second stocking and I can’t get over how easy these are to put together. Thank you for the step by steps!!
Oh good! I’m glad you figured it out 🙂
What is the weight of the chunky yarn needed to use for this bobble stocking?
5
Hi
Do you have the Bobble Crochet Stocking Pattern in video instructions?
If not, do you know where I could find one?
Thank you,
Aileen
Hi! No, I don’t yet 🙂
Hi, doing well with bobble stocking but at row 33 im instructed to do a bobble row. It is lining straight up from the prior bubble ,in bubble row #21, instead of being a little off centered. What should i do?? Thanks for your reply.
Aileen
Hi! When doing the bobble repeats, make sure you are alternating between rounds 17 & 21. So if it’s lining up, then do the opposite round repeat. Hope that helps!
Hi! Thank you for this beautiful pattern! I’m at the heel and I can’t seem to understand, is there a video tutorial? Thank you
Sorry, no video. What’s your question?