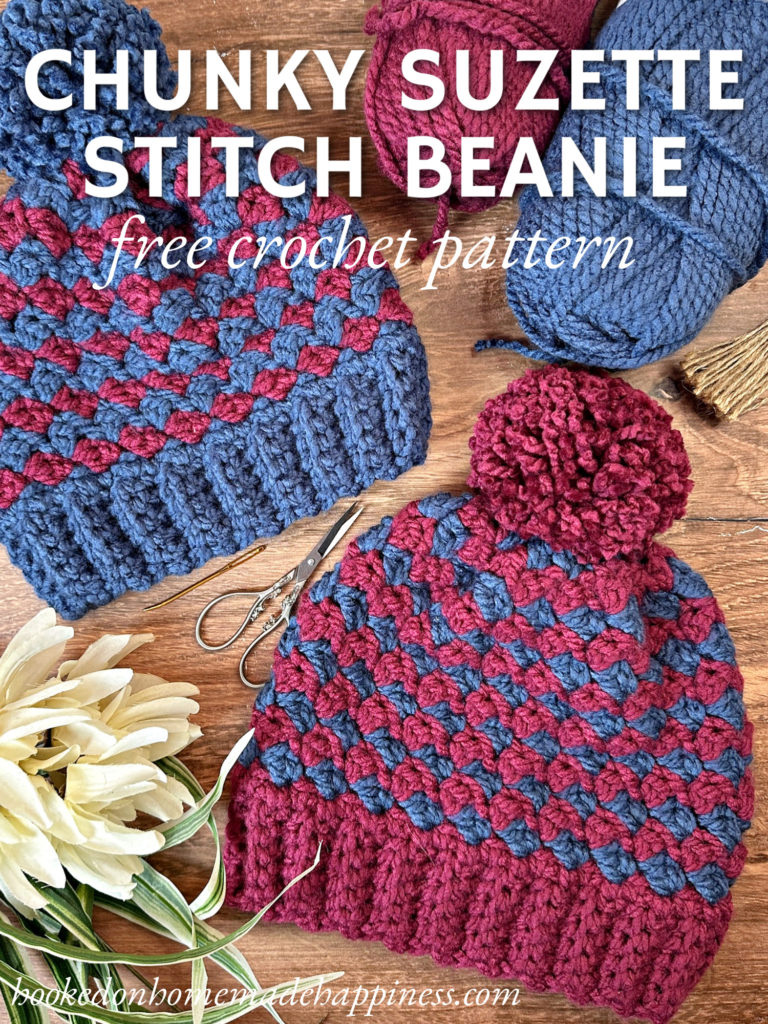
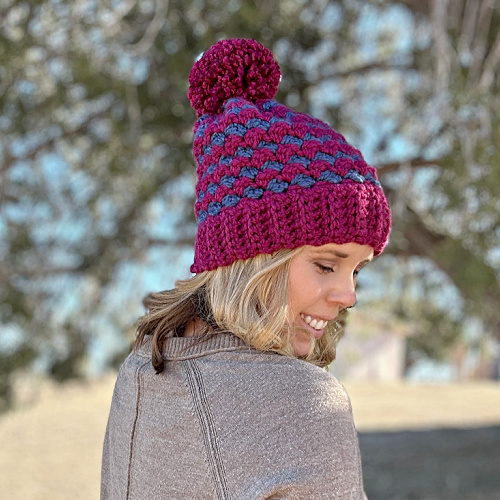
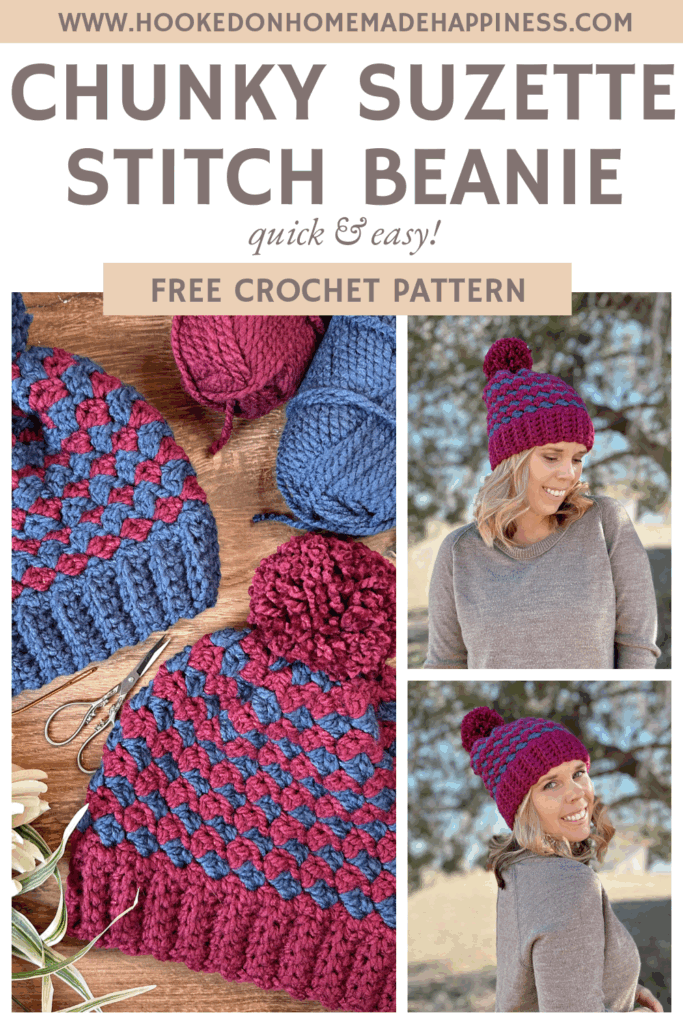
Chunky Suzette Stitch Beanie Crochet Pattern
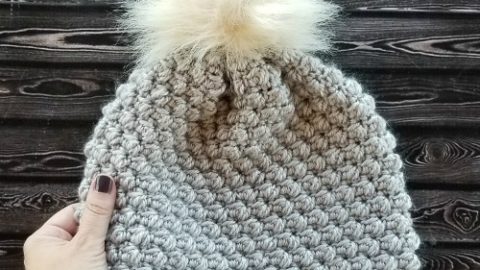
If you’re looking for a quick and cozy crochet beanie that’s full of texture, this Chunky Suzette Stitch Beanie Crochet Pattern is a must-make. Using bulky weight yarn and a large hook, this hat works up fast and is perfect for last-minute gifts, chilly weather, or adding a handmade touch to your winter wardrobe.
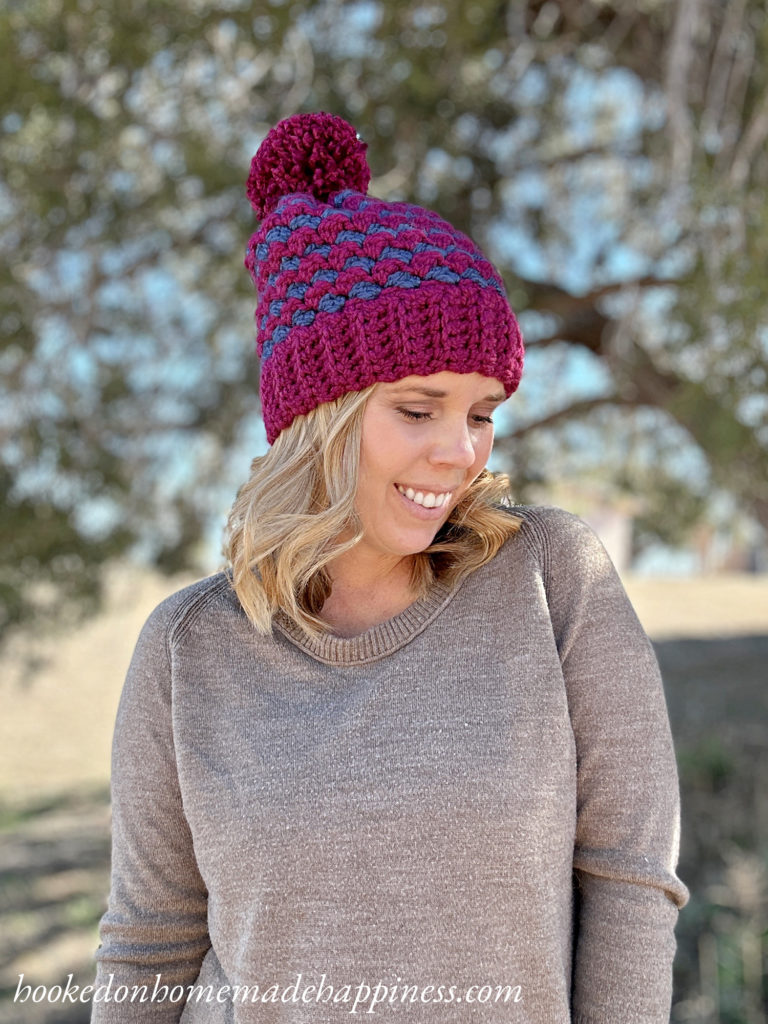
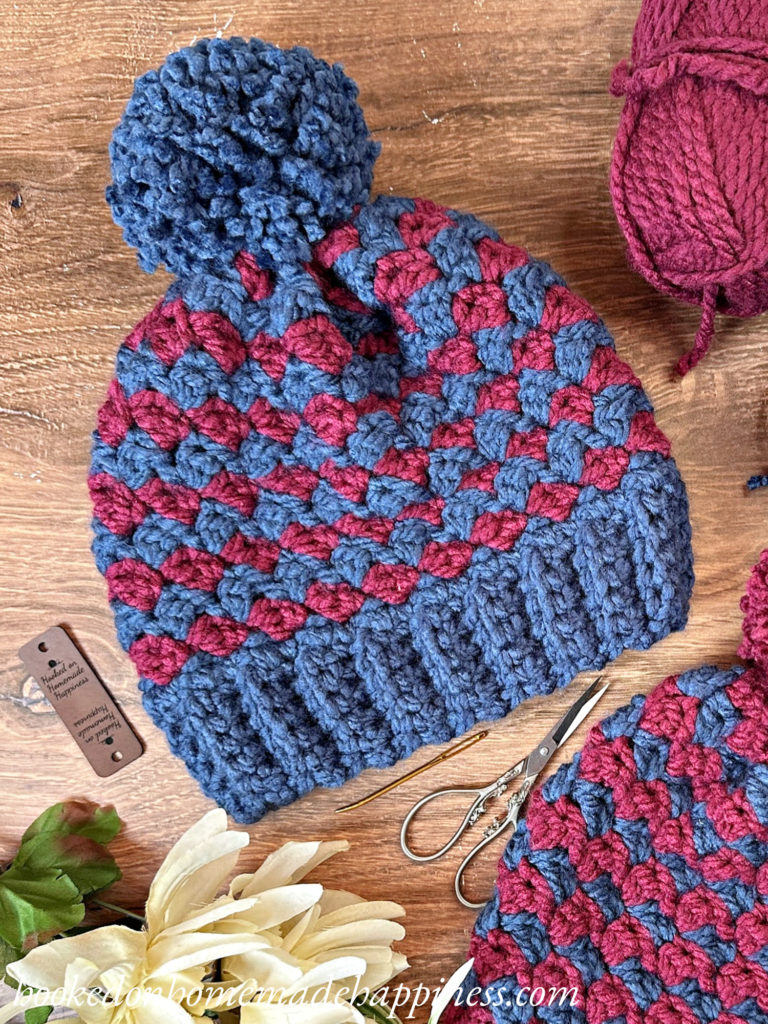
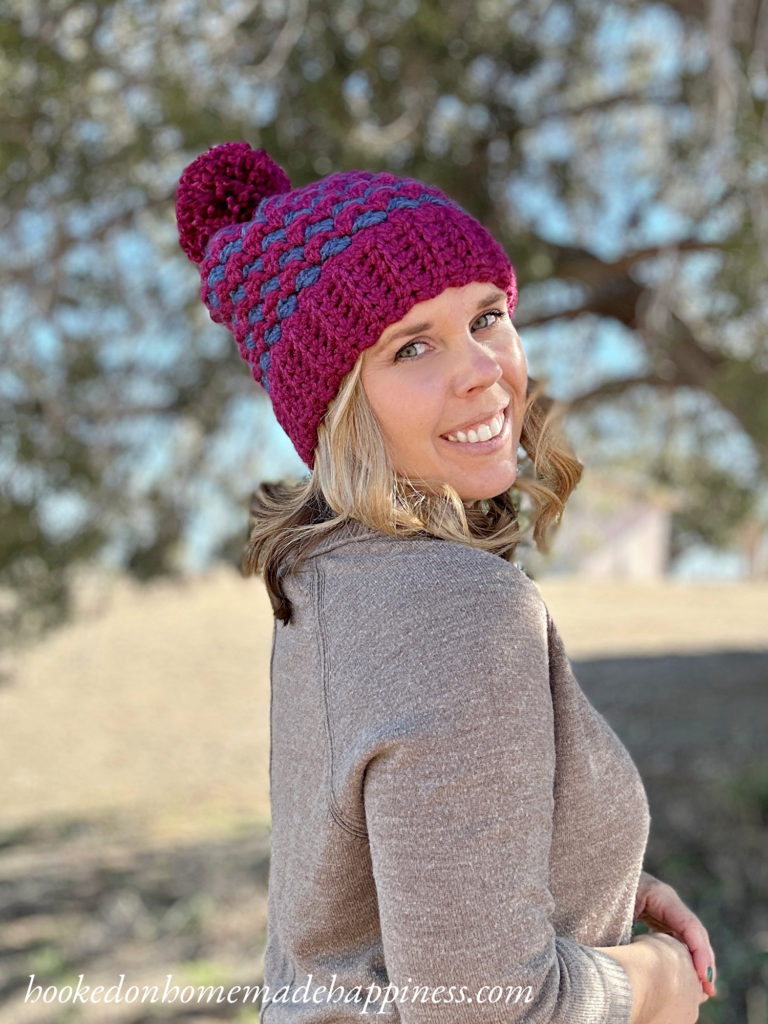
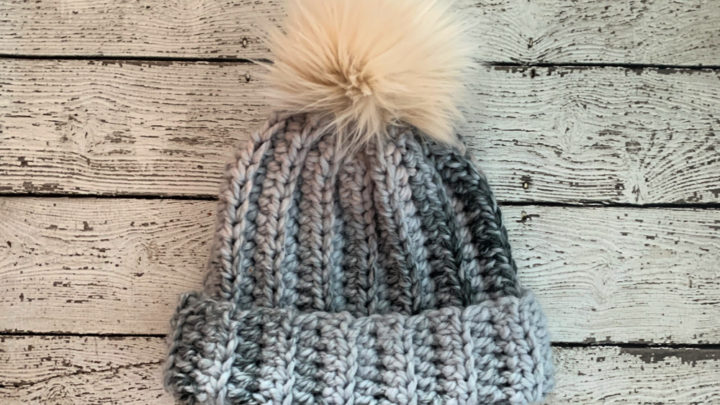
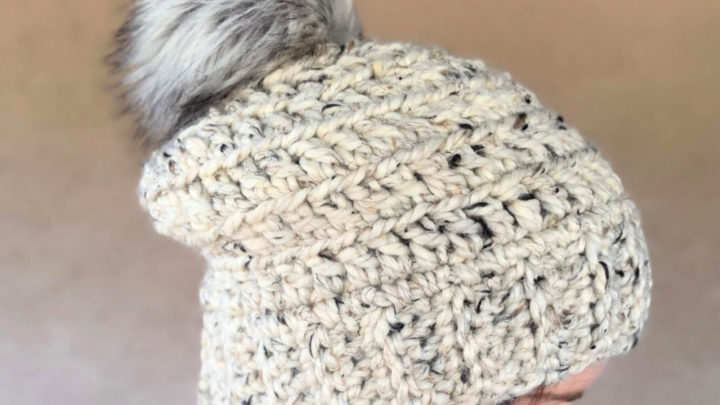
This beanie combines a classic single crochet back loop only (SC BLO) brim with the beautifully textured Suzette stitch, worked in stripes and turned rounds for a polished look.
Purchase the ad-free, printable PDF for easy printing.
Why You’ll Love This Chunky Beanie Pattern
- Works up quickly with bulky (5) weight yarn
- Beginner-friendly construction with simple stitches
- Cozy, textured look using the Suzette stitch
- Stylish striped design for added interest
- Great for gifts, craft fairs, or personal wear
Pattern Details
- Pattern Name: Chunky Suzette Stitch Beanie
- Skill Level: Beginner
- Yarn Weight: Bulky (5)
- Hook Size: L / 8.0 mm
- Construction: Brim worked flat, hat body worked in turned rounds
- Stitches Used: Single crochet (SC), double crochet (DC), Suzette stitch
About the Construction
This beanie starts with a ribbed brim made from single crochet stitches worked in the back loop only. Once the brim is complete, it’s seamed to form a circle.
From there, the main body of the hat is worked using the Suzette stitch, which creates a thick, nubby texture that’s both warm and eye-catching. The stitch pattern is worked in stripes and turned rounds, helping the stitches stay neat and consistent all the way around.
The bulky yarn and large hook make this project fast, satisfying, and perfect for colder months.
Yarn & Color Ideas
This pattern looks great in:
- Classic neutrals for everyday wear
- High-contrast stripes for a bold, modern look
- Soft tonal colors for a subtle textured effect
Bulky yarn adds warmth and structure, making this beanie extra cozy without feeling heavy.
FAQ
Ready to Crochet?
The Chunky Suzette Stitch Beanie Crochet Pattern is a fun, fast project that delivers big texture with minimal effort. Whether you’re making one for yourself or stitching up a few as gifts, this beanie is sure to become a favorite.
Making the Chunky Suzette Stitch Beanie Crochet Pattern
Get the full free pattern below or purchase the ad-free, printable PDF
Materials
125g bulky (5) weight yarn in 2 colors (I used Loops & Threads Charisma)
L/8.0 mm hook
yarn needle
scissors
Level
easy+
Pattern notes & stitches to know
sl st – slip stich
ch – chain
sc – single crochet
blo – back loop only
dc – double crochet
· written in US terms
· ch 1 does not count as sc
· This beanie is worked from the bottom up, starting with the sc ribbing. The ribbing is worked flat, in rows. The main body of the beanie is made in turned rounds.
· Sizes: Pattern is written in 3 sizes, Child, Small Adult and Large Adult consecutively. Example, when the pattern gives the end of the row count as (39, 43, 47), the 39 is the child the 43 is the small and the 47 is the large.
Approximate Finished Size:
Circumference: Child (17”) Sm (19”) Lg (21”)
Length: Child (8”) Sm (9”) Lg (10”)
Pattern Support
Looking for pattern support or want to share your progress? Join our Crochet Community Facebook Group! It’s the perfect place to ask questions, get help, and connect with fellow makers.
CROCHET PATTERN WRITTEN INSTRUCTIONS
CHUNKY SUZETTE STITCH BEANIE CROCHET PATTERN
Starting with Color A, ch 7
Row 1: sc in 2nd ch from the hook and scross (6)
Row 2: ch 1, turn, sc in first stitch, sc blo in next 4 stitches, sc in last (6)
Repeat row 2 to Row 39, 43, 47 (8)
Bring both short ends of the ribbing together, slip stitch the ends together. Now you will work around the top of the ribbing in joined rounds.
Round 1: ch 1, sc evenly around working 1 sc in the end of each row, join to first sc with sl st ((39, 43, 47) sc)
Change to Color B. Do not fasten off Color A
Round 2: ch 1, (sc, dc) in first stitch, skip 1 stitch, *(sc, dc) in next, skip 1 stitch*, repeat from * to * around to last stitch, sc in last stitch, join to first sc with sl st ((39, 43, 47))
Change to Color A. Continue changing colors every round.
Round 3 – Round (12, 15, 18): ch 1, turn, (sc, dc) in first stitch, skip 1 stitch, *(sc, dc) in next, skip 1 stitch*, repeat from * to * around to last stitch, sc in last stitch, join to first sc with sl st ((39, 43, 47))
Fasten off. Leave a long end for sewing.
Use the long end to weave in and out of the top loops of the last round. Cinch to close. Sew the top closed.
Weave in all the ends.
Add a pom pom.
Looking for more patterns? Follow me on Facebook, Instagram, and Pinterest! Please share a pic of your finished product with me. I’d love to see it!


Gorgeous, what yarn is that??
I was wondering the same thing. Did you receive an answer?
Loops and Threads Charisma in colour Mulberry Bush but according to pattern instructions any type of Category 5 bulk yarn will work. I reread Breann’s instructions–funny how that works! heeheee
I just finished this. I wasn’t sure if I could do it I’m really happy how it turned out.
Thank you for the pattern.