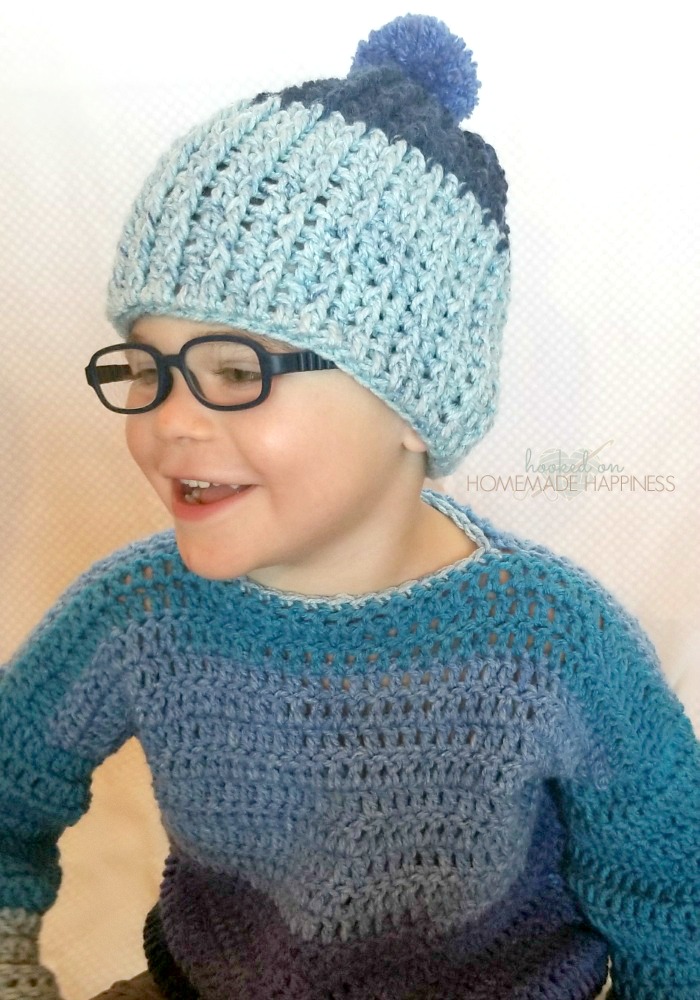
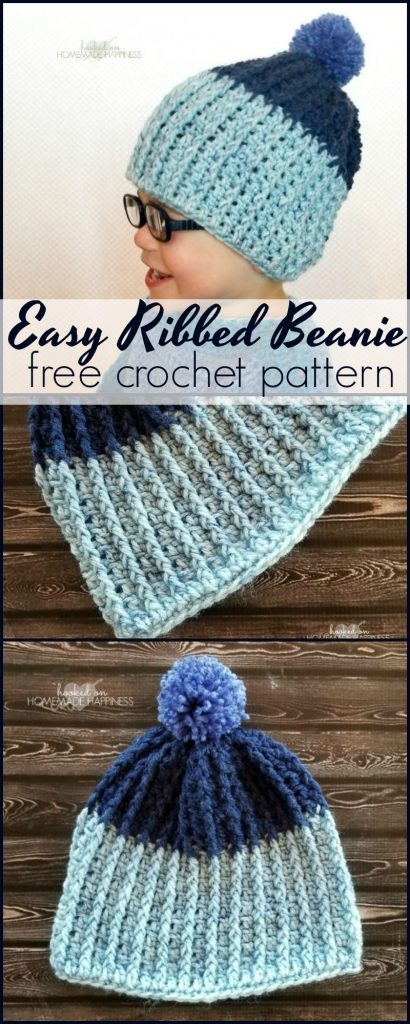
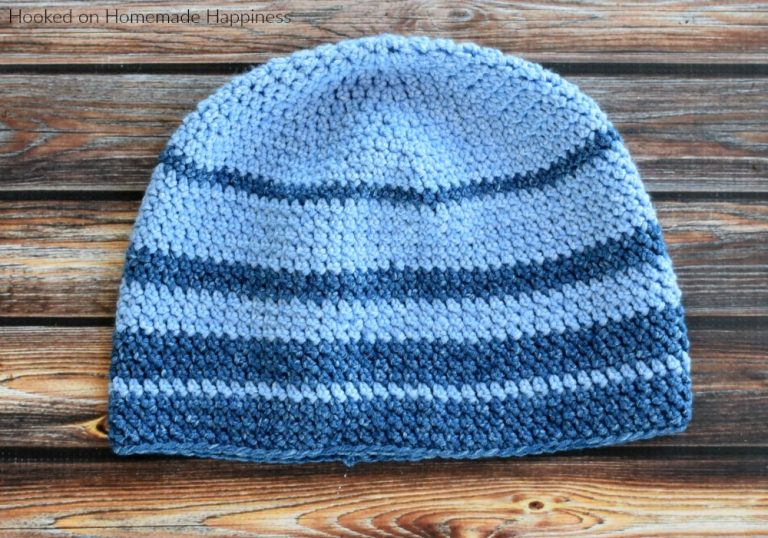
Easy Ribbed Crochet Beanie
This Ribbed Crochet Beanie is easy to make and is sure to keep those little ears warm in the cooler months.
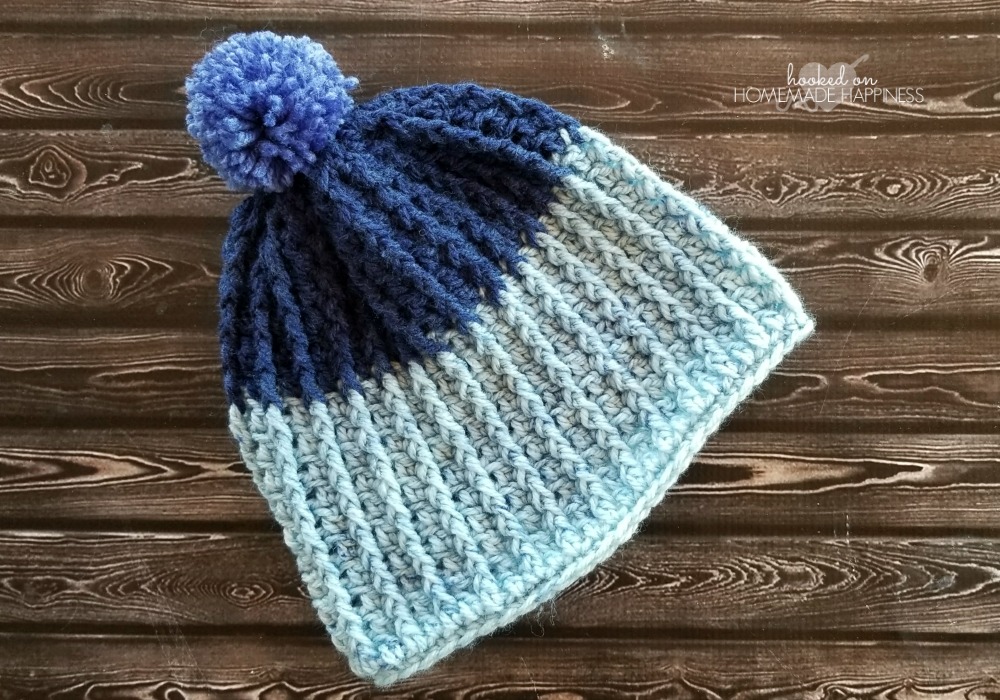
I used some leftover Caron Cake I had after making an EVERYKID CROCHET SWEATER for my little guy. Of course, he needed a matching beanie. This beanie uses front post double crochet to create the ribbing.
This pattern is available as an inexpensive, clearly formatted, PDF instant download HERE in my Etsy shop.
PATTERN
Materials
Worsted weight (4) yarn – I used Caron Cake in Blueberry Cheesecake
5.00 mm hook
Yarn needle
Scissors
(optional) pom pom maker
Level
Easy to intermediate —you must be familiar with basic crochet stitches
Pattern notes & stitches to know
Sl st – slip stitch
Ch – chain
Sc – single crochet
Dc – double crochet
Fpdc – front post double crochet (Photo tutorial >>>HERE<<<)
Finished size:
Width: 9 inches across the bottom
Length: 8.5 inches long (not including pom pom)
BEANIE
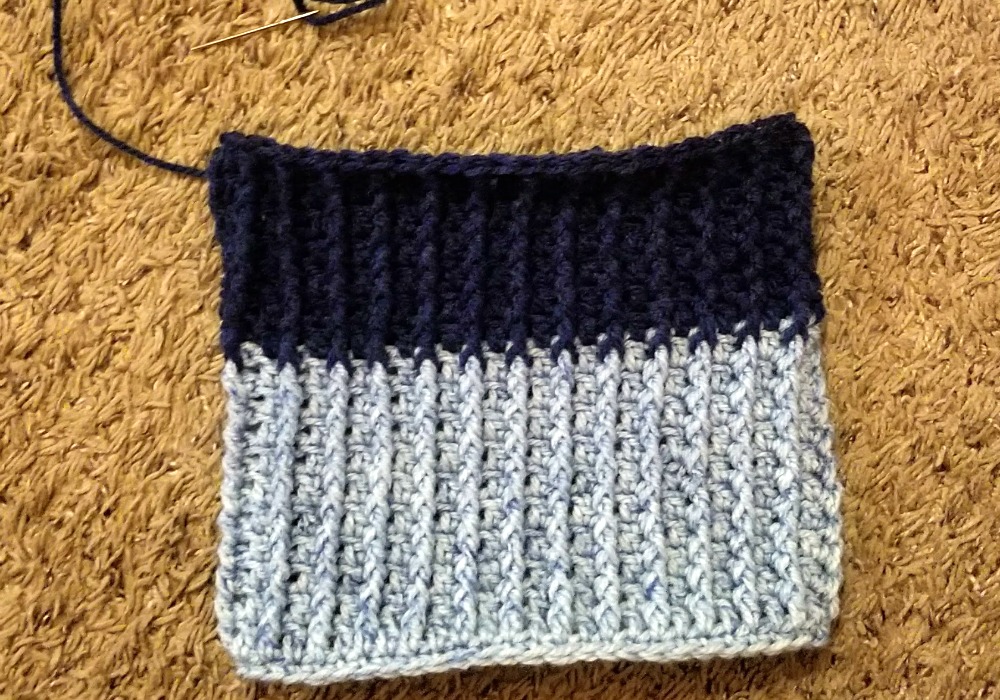
This beanie is worked from the bottom up.
Ch 3 at beginning of round does not count as dc
Ch 53 (any amount can be chained)
This chain is the base of the beanie. You can test this chain around the head. Add or take out chains as needed.
Row 1: sc in 2nd chain from the hook and across, join to the first sc with sl st to make a circle (52 sc)
You will now be working in the round
Round 2: ch 3, dc in each stitch around, join to first dc with sl st (52 dc)
Round 3: ch 3, *dc, fpdc in next* repeat from * to * around, join to first dc with sl st (26 dc, 26 fpdc)
Round 4 – 17: ch 3, *dc in dc from previous row, fpdc around fpdc from previous row* repeat from * to * around, join to first dc with sl st (26 dc, 26 fpdc)
Or until your desired length.
Leave a long tail for sewing.
Sew in your first end (use it to close the hole from row 1)
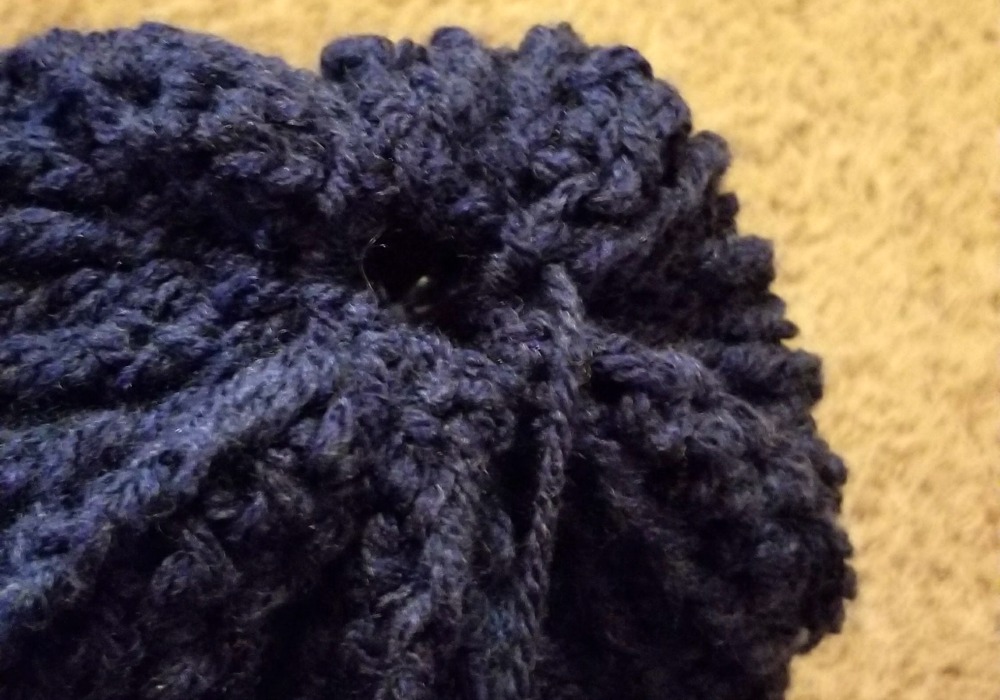
Weave the long end in and out of the top loops of the last row, all the way around
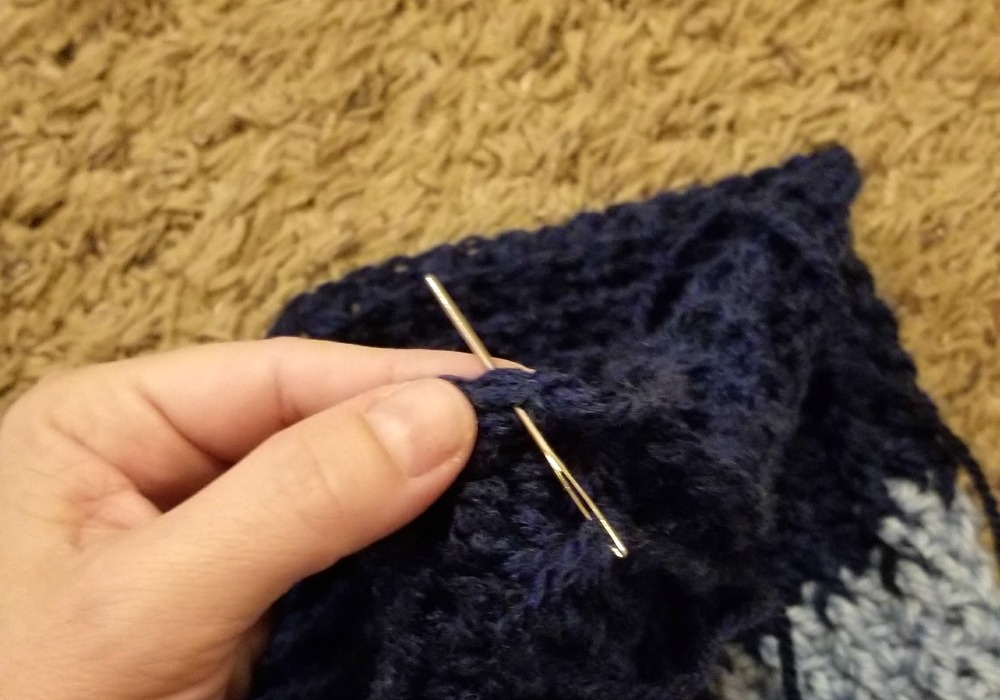
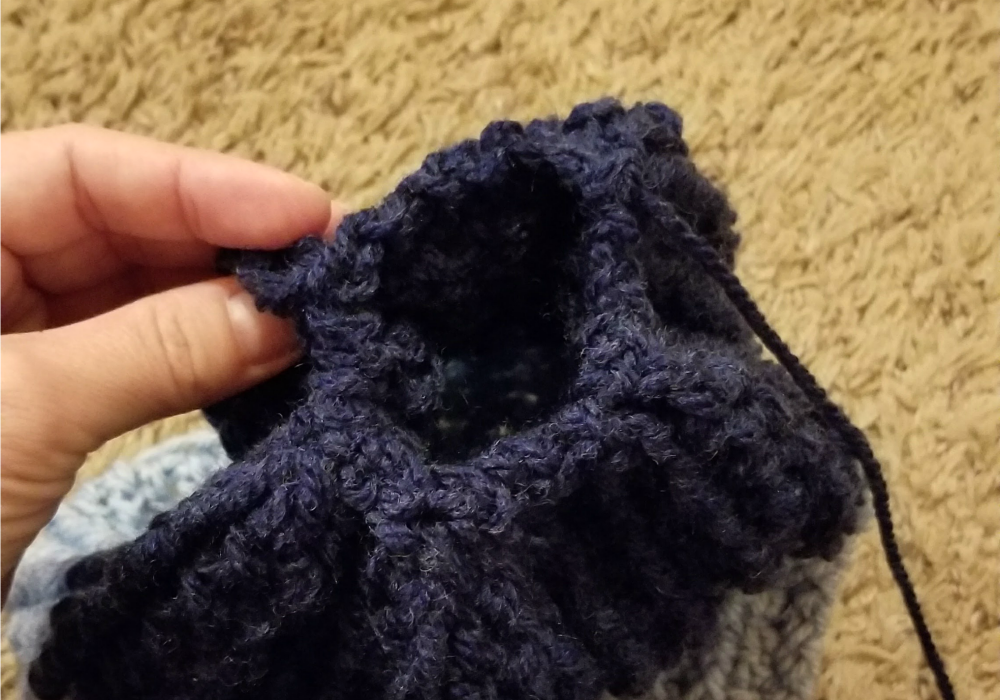
Pull the end to cinch up the top. Sew the top closed by sewing back a forth a couple times through the hole at the top.
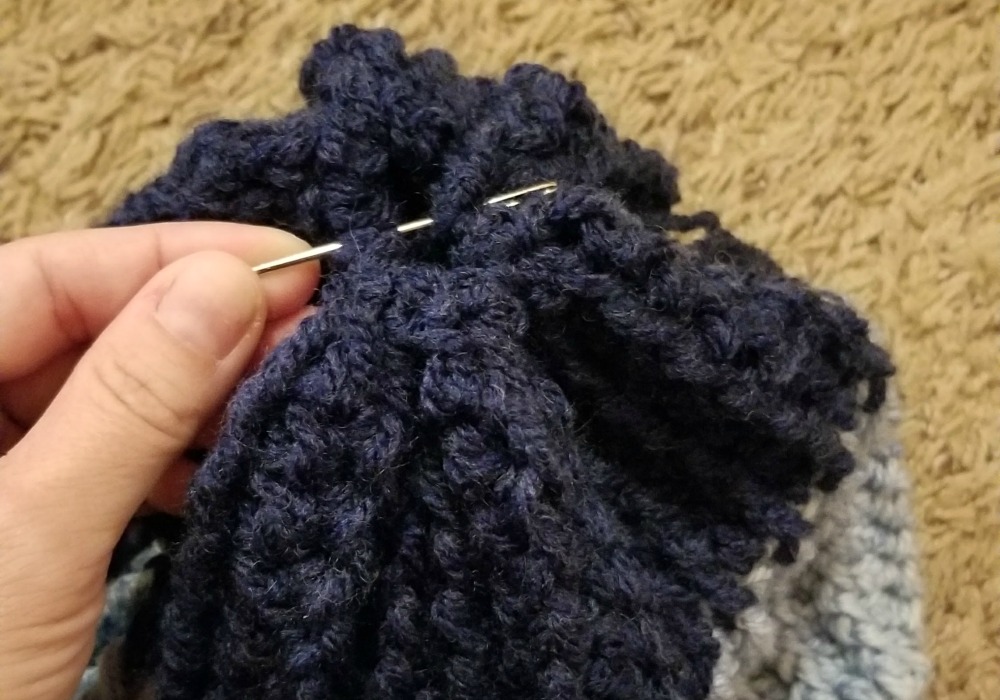
Fasten off, weave in all your ends. Add a pom pom!
Looking for more patterns? Follow me on Facebook, Instagram, and Pinterest! Please share a pic of your finished product with me. I’d love to see it!

NEVER MISS A PATTERN!
Sign up for my newsletter and receive a FREE ebook with 3 of my favorite patterns PLUS patterns straight to your inbox. You’ll also get a heads up about upcoming giveaways, events, and crochet alongs.
>>>HOOKED ON HOMEMADE NEWSLETTER<<<


I like the look of the popcorn beanie .
Love the little hat, but I have ripped it out twice! I am confused on row 4 ! Do I D.C. , then fpdc , all the way around! My ribs Ist time were going right direction! 2 nd try they are going around , I think it is because I am doing a dc , fpdc, dc, fpdc all way around! Hope this makes sense! Bette
Hi ? you should dc in each dc and fp in each fp around. So yes, (dc, fpdc in next) all the way around. When the beanie is done the posts should be a straight line all the way up. Does that help?
So I double crochet in the first dc and then fp in that same one
Or do I dc in first post and fp dc in next?
Yes! One stitch in each. There isn’t any increasing
Thank you, I will give it a try!!