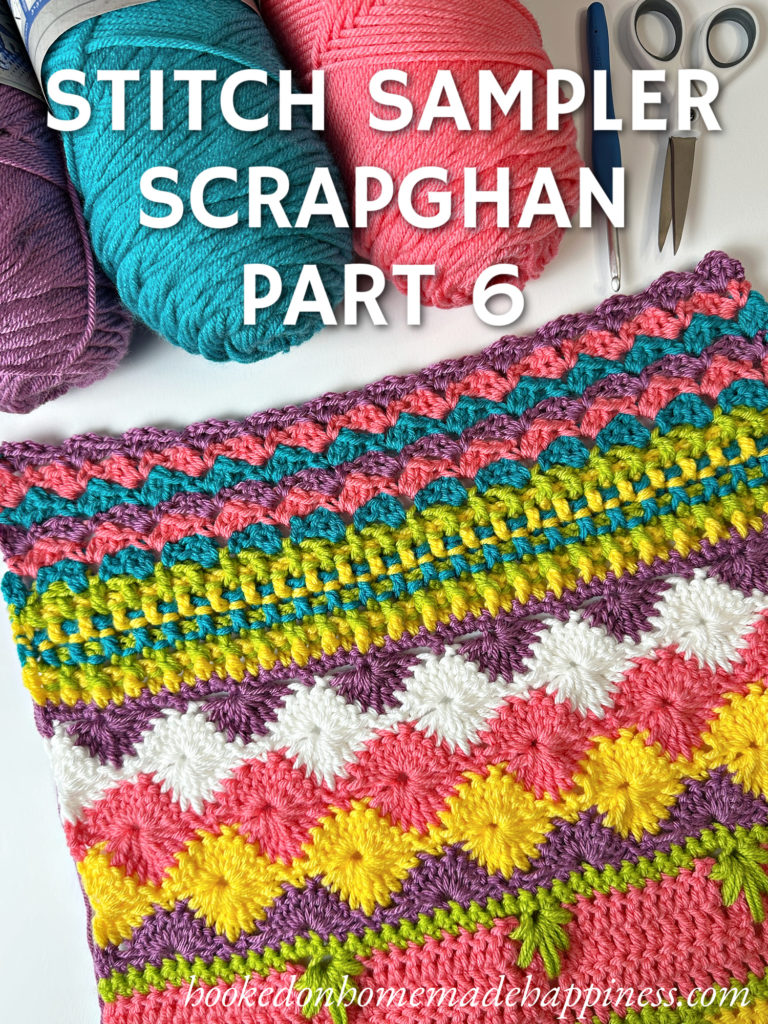
2026 Stitch Sampler Scrapghan CAL – Part 6: Tulip Stitch
Welcome back to the 2026 Stitch Sampler Scrapghan Crochet Along! 🌸 We’re heading into Week 6, and this week’s stitch might be one of the prettiest yet—the Tulip Stitch.
With its soft, angled shells and gentle movement, this stitch fits our flower and garden theme perfectly. If you’ve ever worked the slanted shell stitch, this one will feel familiar—it’s very similar, with a slightly different placement that gives it that lovely tulip-inspired look.
Crochet Along Schedule Reminder
This is a FREE crochet along with no official sign-up required. Each week, a new stitch section is released so you can add to your blanket little by little.
- 🗓 Starts: January 9, 2026
- 📅 New sections: Every Friday
- 🧵 Final week: Border to finish the blanket
Feel free to crochet at your own pace—catch up anytime!
GET ALL THE CROCHET ALONG DETAILS HERE
About the Tulip Stitch
The Tulip Stitch creates a repeating pattern of slanted shells that resemble little blooming flowers lined up across your blanket. It has a beautiful flow to it and adds a softer, decorative texture compared to some of the more structured stitches we’ve used so far.
Why you’ll love this stitch:
- 🌷 Floral-inspired texture that feels light and elegant
- 🧶 Similar to the slanted shell stitch, so it’s easy to learn
- ✨ Adds movement and visual interest
- 💕 Works beautifully in both solids and color changes
This stitch brings a gentle, decorative break in the sampler—perfect for balancing out the denser textures from previous weeks.
Ready to Crochet Part 6?
Grab your yarn and let’s add the Tulip Stitch to our stitch sampler blanket! 🌸🧶
This section adds such a soft, floral touch and really brings the garden theme to life.
I can’t wait to see your Week 6 progress—happy crocheting! 💕
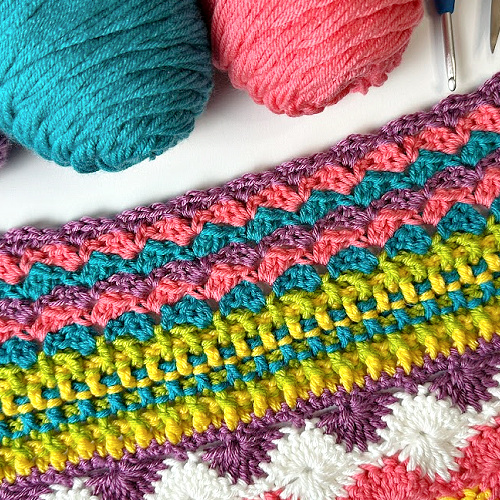
Part 6 – the Tulip Stitch
Get the full pattern for Part 6 below or download the ad-free, printable PDF for free HERE
PIN for later HERE
Add to your Ravelry Queue HERE
Materials
worsted weight acrylic (I used Hobby Lobby I Love This Yarn)
H/5.0mm hook
yarn needle
scissors
Level
easy
Pattern notes & stitches to know
ch – chain
sc – single crochet
dc – double crochet
rs – right side
ws – wrong side
· written in US terms
· ch 2 does not count as dc
· This stitch requires a starting chain that is a mult of 4
· chains do not count in end row stitch count
· to find the end row stitch count for a different size blanket: take your original stitch count and subtract 2, divide by 4, mult by 3, then add 3 (I think… lol)
· Row 1 is 1 less than the stitch count for the remainder
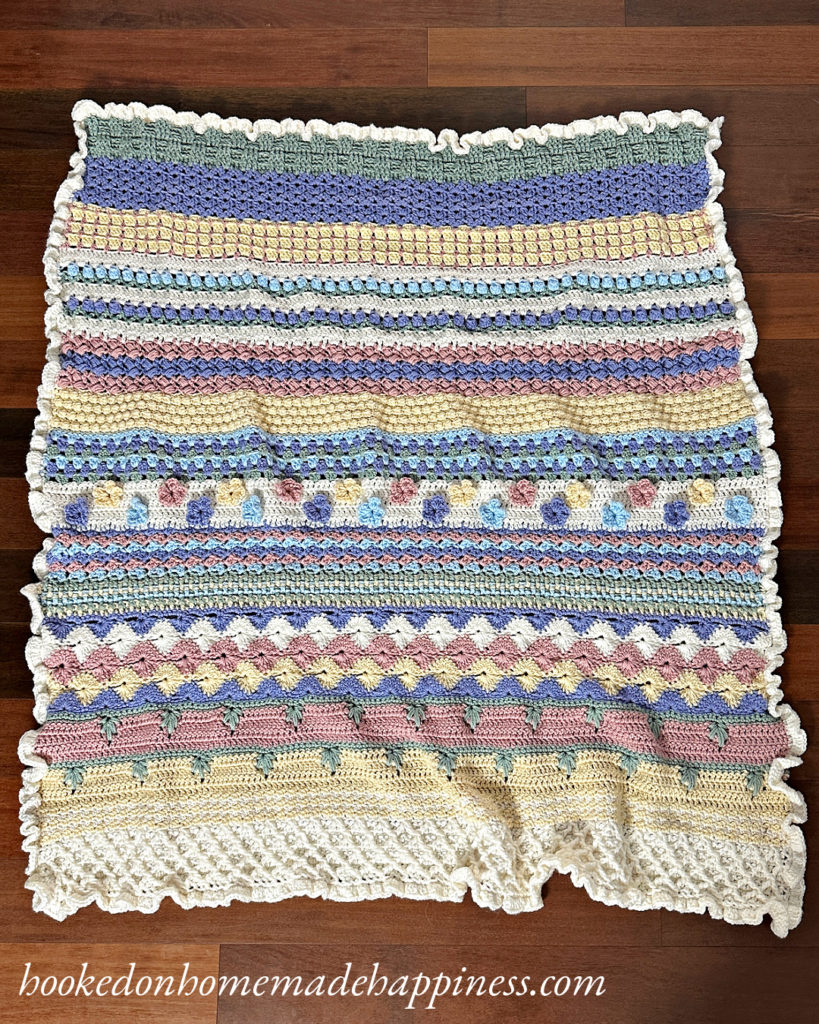
· This stitch looks great with any color combinations. I used 3 colors and changed color every row.
· If you use 3 colors and change color every row, do not fasten off. Carry the yarn.
Scrapghan Tips
· This blanket will use different hook sizes depending on the stitch. Some stitches work up tighter than others. Even with changing hook sizes, the blanket will not have completely straight edges.
· Feel free to adjust your hook size according to how you crochet.
· This blanket requires a foundation row that is a multiple of 24 + 2.
· The starting chain requirement for this particular stitch is given in the pattern notes (this may or may not match what was used for the entire blanket). This is just a note given for use of this stitch in other projects, not for this blanket.
· Each part starts over at row 1 of that stitch. Be sure to place a stitch marker and the last stitch of each part to mark where the next part begins.
Watch the Tutorial
See how it’s done! This easy-to-follow video tutorial will walk you through each step of the pattern.
PART 6 – TULIP STITCH
Row 1 (ws): ch 2, turn, dc in first stitch, ch 2, sc in next, *skip 2, 2 dc in next, ch 2, sc in next* repeat from * to * across (110)
Row 2 (rs) – Row 6 (rs): ch 2, turn, skip first stitch, (2 dc, ch 2, sc) in ch-2 space, *skip 3 stitches, (2 dc, ch 2, sc) in ch-2 space* repeat from * to * across (111)
Fasten off.
Place a stitch marker in the last row of this section
See you next week for Part 7!
Looking for more patterns? Follow me on Facebook, Instagram, and Pinterest! Please share a pic of your finished product with me. I’d love to see it!