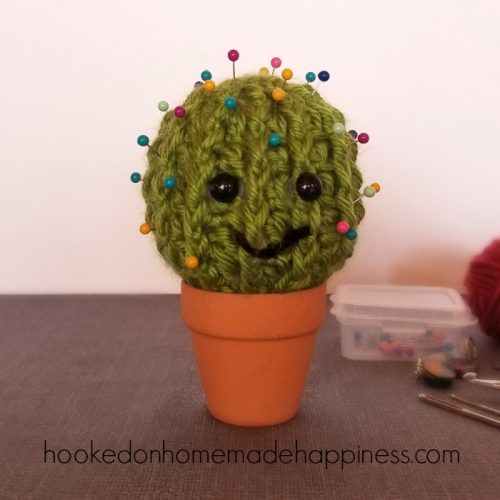
I needed a pincushion and, really, why buy something when you can make it? It’s more fun and the result is usually better than anything you could find in a store! Living in the desert, I knew I wanted to make a cactus.
Isn’t he just the cutest?
PATTERN
Materials
Green worsted weight acrylic yarn (I used Red Heart Soft in Leaf)
A little bit of black yarn
5.0 mm hook
Safety Eyes
2 inch tera cotta pot (I found mine at Wal Mart)
Fiberfill
Yarn Needle
Scissors
Level
Intermediate
Pattern Notes & Stitches to Know
sl st – slip stitch
ch – chain
dc – double crochet
fpdc – front post double crochet
dc2tog – double crochet 2 together or decrease
magic ring
NOTE: ch 3 at the beginning of each round does not count as a dc
CACTUS
Start with a magic ring
Round 1: ch 3, 12 dc into ring, join to the top of first dc with sl st, pull ring closed tight (12 dc)
Round 2: ch 3, *dc, fpdc* in each stitch around, join to the top of first dc with a sl st (12 dc, 12 fpdc)
Round 3 – 7: ch 3, *dc in dc from previous round, fpdc around fpdc in previous round* repeat from * to * around, join to the top of first dc with a sl st (12 dc, 12 fpdc)
NOTE: At this point, I added my safety eyes (on round 5) and sewed on the mouth (over rounds 6 & 7)
Round 8: ch 3, *dc2tog over the next dc and fpdc (making sure to do a fpdc in the second stitch), dc in next, fpdc in next* repeat from * to * around, join to the top of the first dc with a sl st (12 dc, 12 fpdc)
NOTE: You will not be doing fpdc in the next rounds. Start stuffing the cactus with fiber fill, continue stuffing after each remaining round
Round 9: ch 3, *dc in next 4 stitches, dc2tog* repeat from * to * around, join to the top of first dc with a sl st (18 dc)
Round 10: ch 3, *dc in next 3 stitches, dc2tog* repeat from * to * around, join to the top of first dc with a sl st (15 dc)
Fasten off, leave a long tail for sewing. Finish stuffing with fiberfill. Use the long tail to sew the bottom closed.
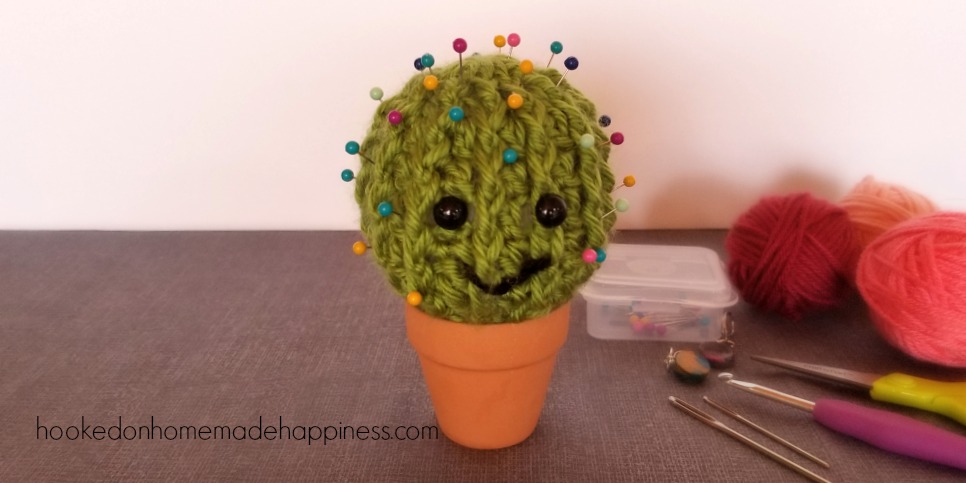
Place it in your 2 inch pot and add your pins. All done!
![]()
Looking for more patterns? Follow me on Facebook, Instagram, and Pinterest! Please share a pic of your finished product with me. I’d love to see it!

NEVER MISS A PATTERN!
Sign up for my newsletter and receive a FREE ebook with 3 of my favorite patterns PLUS patterns straight to your inbox. You’ll also get a heads up about upcoming giveaways, events, and crochet alongs.


Such a cute and happy cactus! 🙂 I could definitely use a cactus pin cushion.
Thank you!! 🙂
Your cactus pincushion is adorable! Thanks for sharing at Snickerdoodle. We’ll be featuring this at today’s party!
Wonderful! Thanks so much 🙂